Now that you know the hardware, it’s time to learn how to give it instructions. We use a program called Mixly.

Mixly app
1. What is Mixly?
Mixly is a Block-Based programming language. Instead of typing complicated code where one missed semicolon breaks everything, you simply drag and drop blocks that snap together like LEGO bricks.
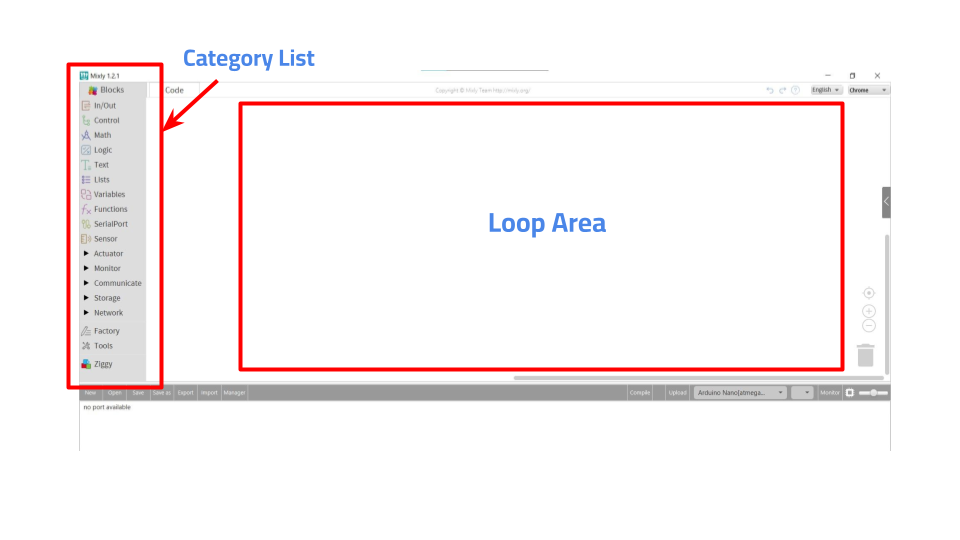
Mixly Workspace
2. The Main Parts of a Mixly Program
Every program you create in Mixly has a specific structure:
Category List (Left Panel)
This panel contains all the programming blocks organized into categories such as Control, Logic, Sensors, and Communication.
Each category has a different color, and each color represents a different type of function in the program.
You drag blocks from this panel into the workspace to build your program.
Setup Area
The Setup section runs only once when the board is powered on or reset.
You can imagine this as the moment when the board wakes up and prepares itself.
After the setup is finished, the program moves to the Loop section.
Loop Area
When you write a program in Mixly, the code is placed inside a Loop area.
The Loop is the part of the program that runs again and again continuously while the board is powered.
This means the RGX board is constantly repeating the same steps.
You can think of the loop as a cycle that never stops.
You can think of the loop as a cycle that never stops.
Because the loop runs very fast (many times every second), the system reacts almost instantly when the button is pressed.
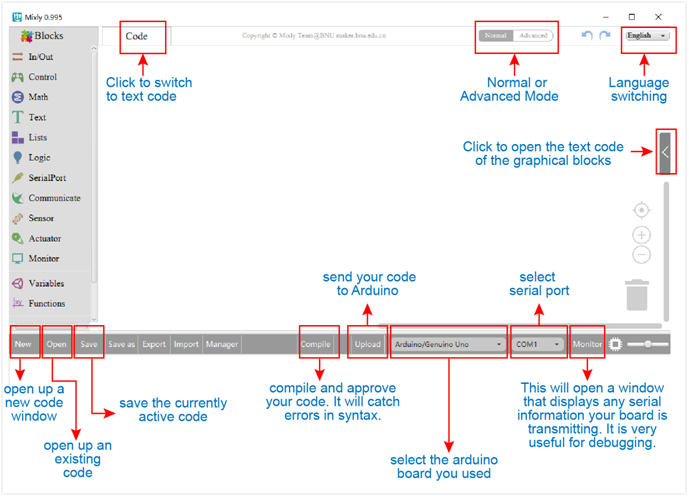
Overview of the Mixly Software workspace
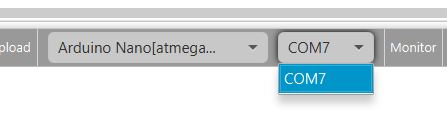
Select the Board (ArduinoNano[atmega328]) to Port.
3. Talking to the Board
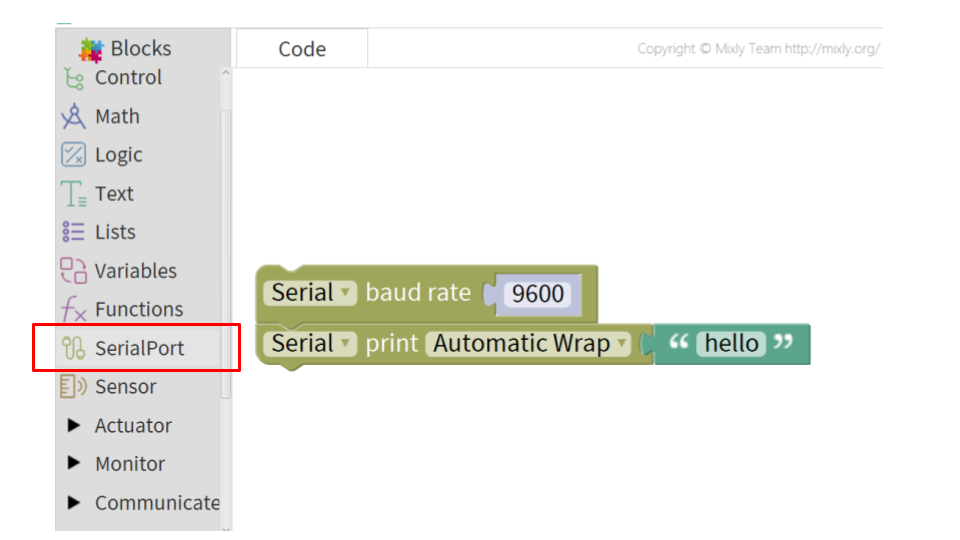
Serial Print
How do we know what the "Brain" is thinking? We use Serial Communication.
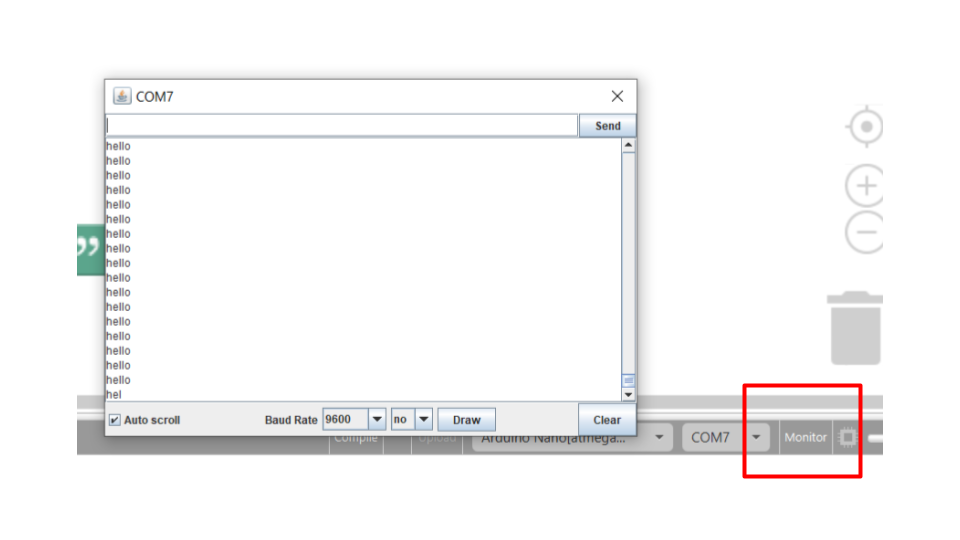
The RGX board can send text messages back to your computer screen through the USB cable. We call this Serial Printing.
•
The Serial Print Block: You can tell the board to "Print" a message like "Hello" or "Button Pressed!" or "Lamp is ON".
•
The Serial Monitor: This is a special window in Mixly where these messages appear.
Why use it?
1.
Checking: To see if a sensor is actually working.
2.
Debugging: If your project isn't working, you can print messages to find out where the "bug" (the mistake) is.
4. How to Create Your First Code
1.
Find your block: Look in the menus on the left (Input/Output or Control).
2.
Drag and Snap: Pull the block into the workspace.
3.
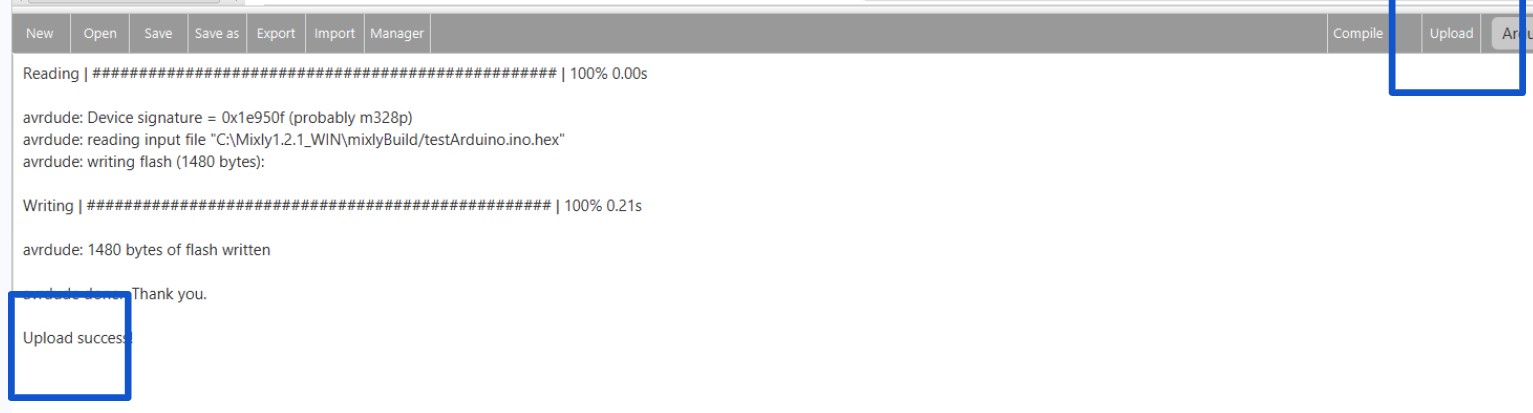
Connect the Brain: Plug your RGX board into the computer via USB. Upload: Click the Upload button. This "teaches" the board your instructions.
Important Connection Note:
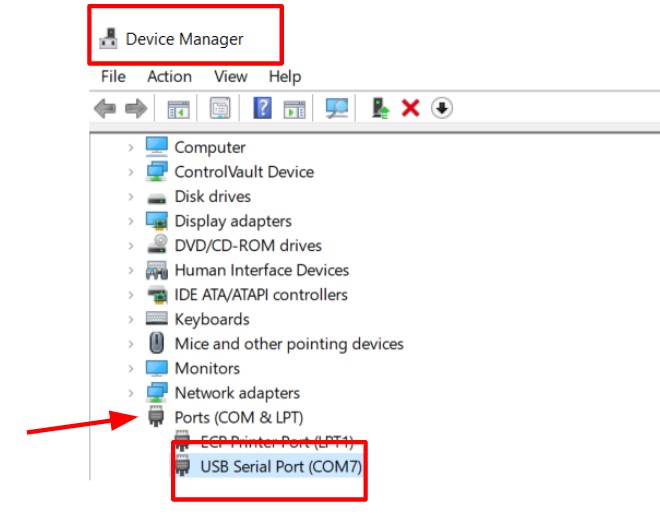
When you connect the board to your computer, the system will recognize it as a COM Port. You can find your specific board's number by opening the "Device Manager" on your computer and looking under the "Ports (COM & LPT)" section. You will see a label like "COM3" or "COM5"—this is the number you must select in your coding software.
4.
Once the progress bar finishes, the board will start running your code immediately!
Final Result