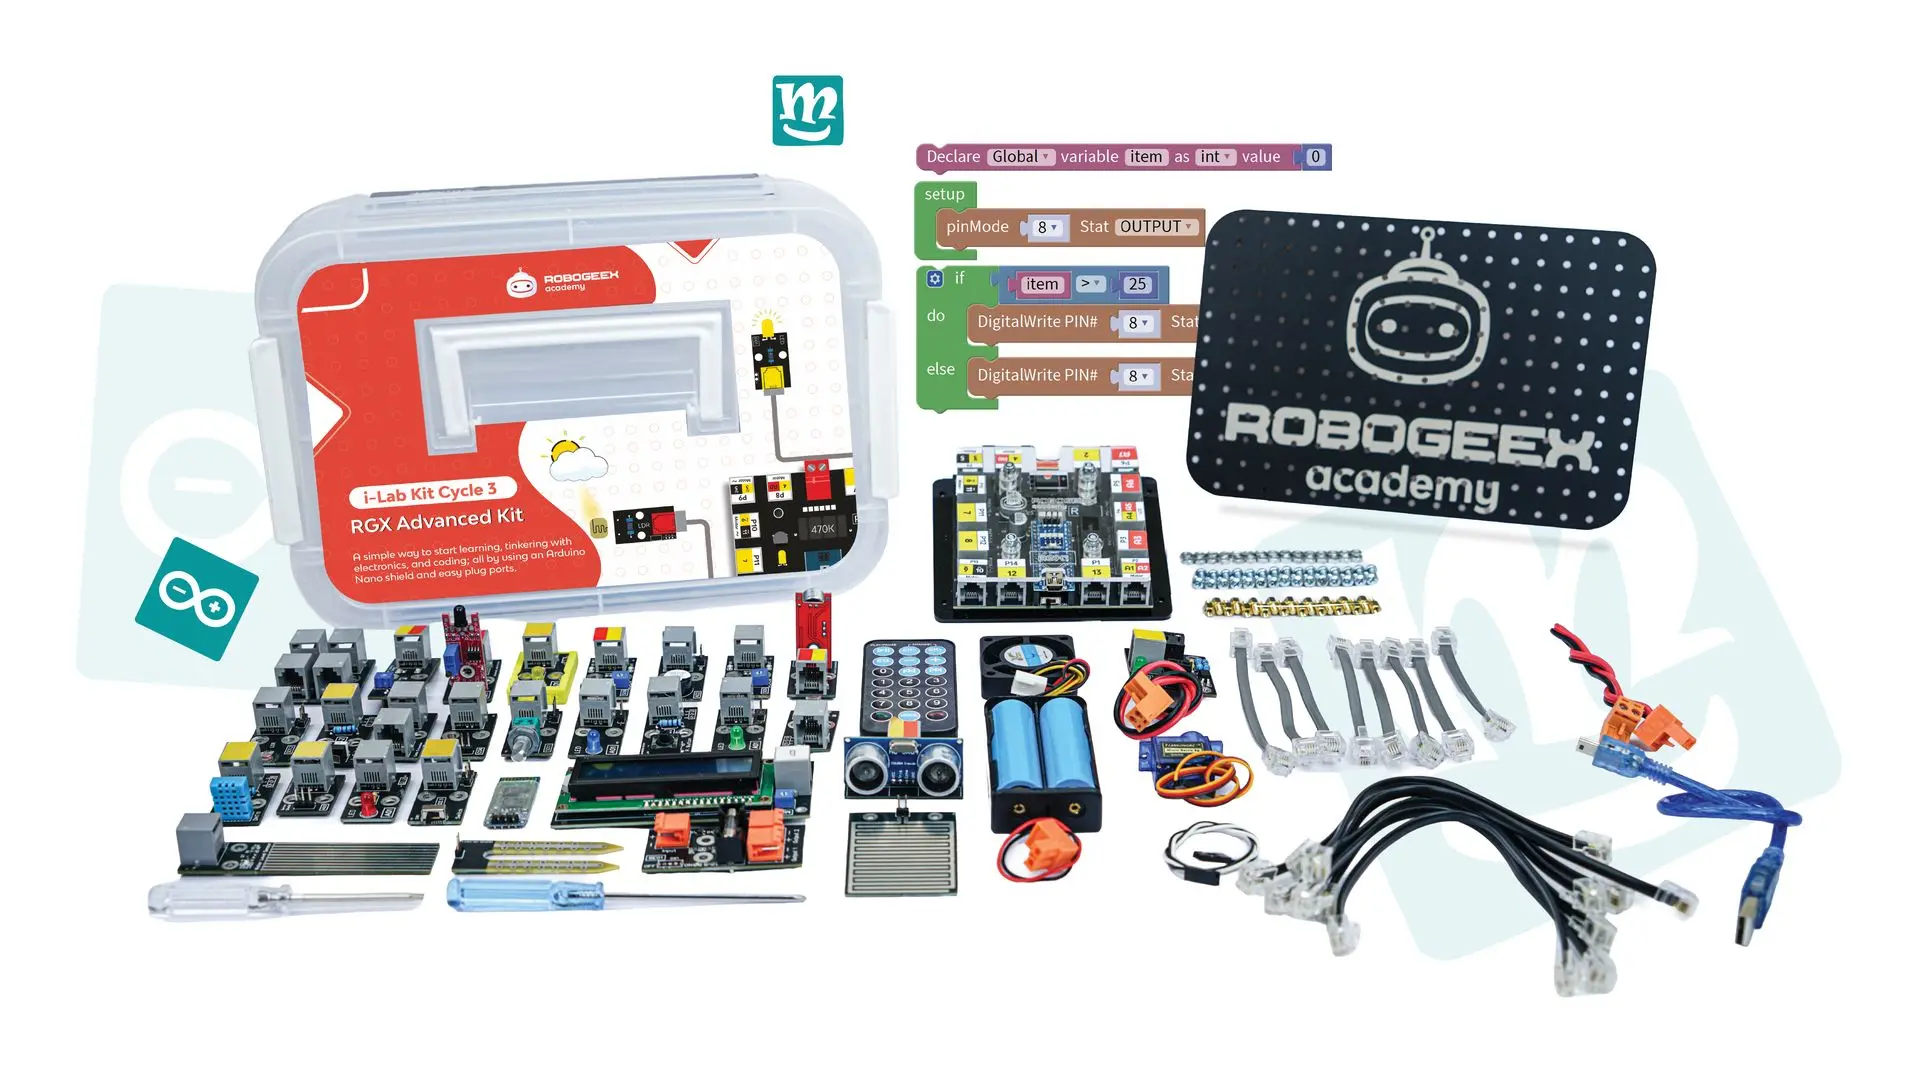
Introduction to the RGX System
Welcome to your journey into the world of robotics and automation! Before we start building, we need to understand the tools in our hands. The RGX Kit is more than just a box of parts; it is a complete ecosystem designed to help you turn your imagination into working technology.
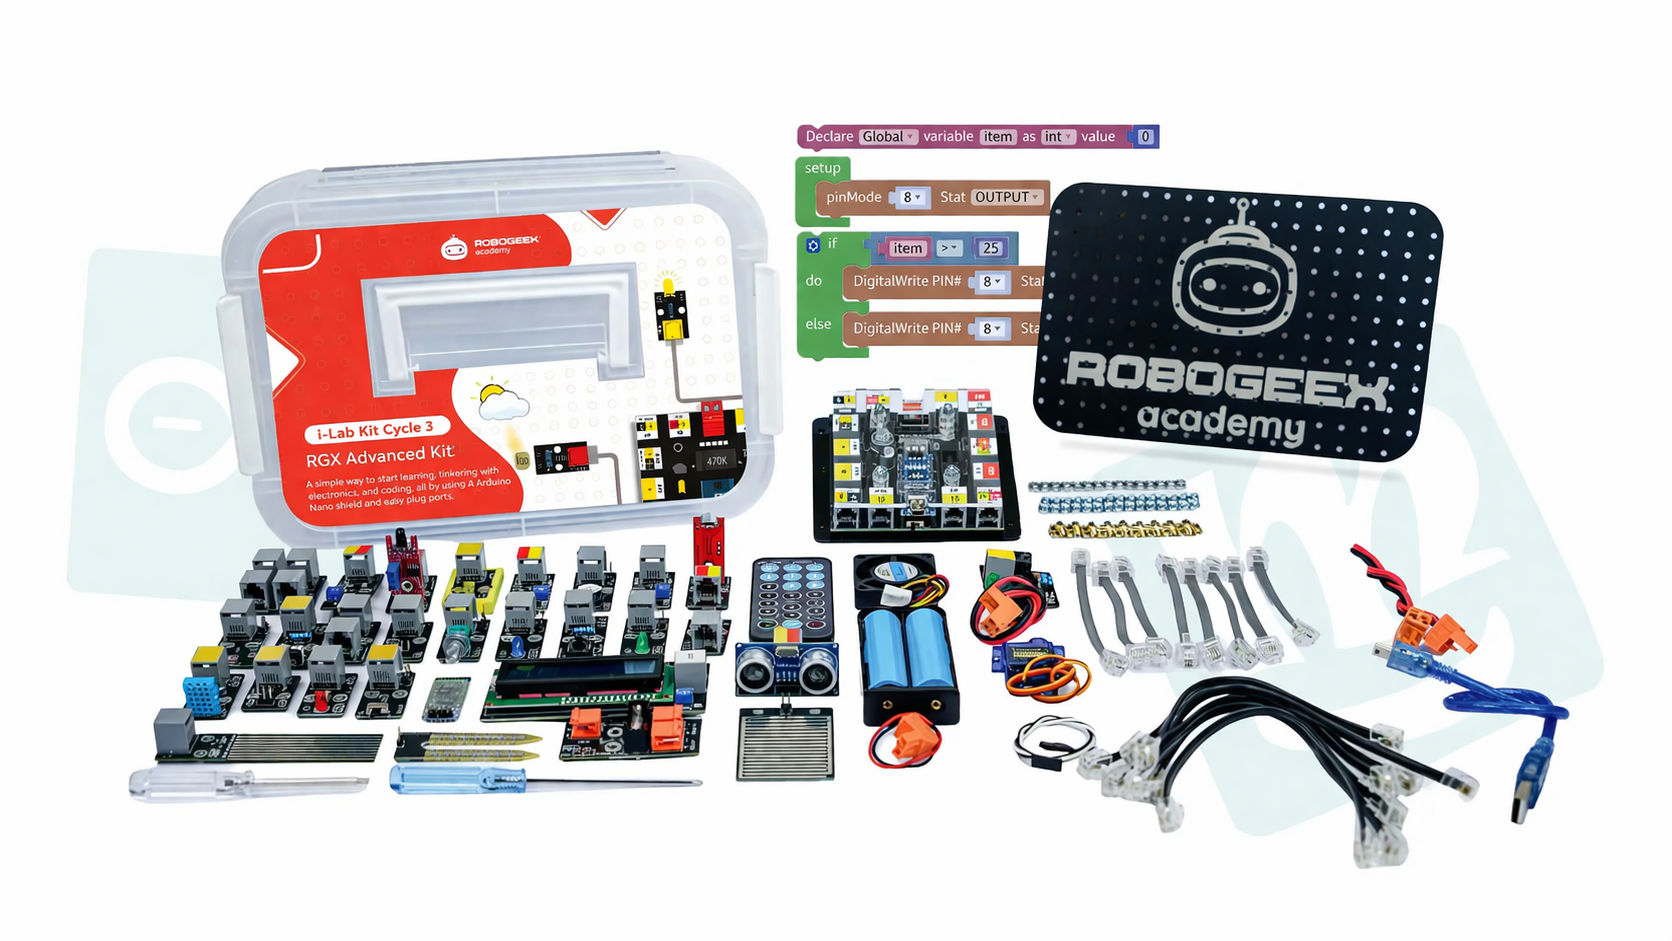
The Kit
Meet the "Boss": The RGX Board
Every project you build has a leader. The RGX Board acts as the central hub that connects your ideas to the physical (or virtual) world.
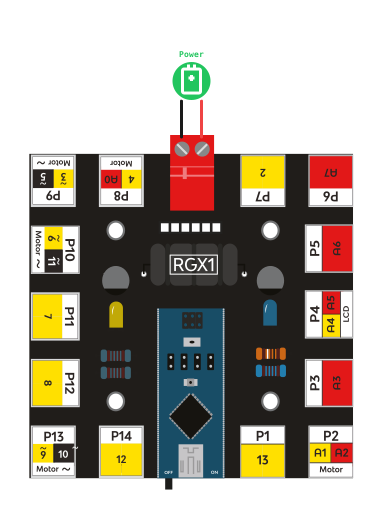
RGX board
1. What is a microcontroller?
Think of a microcontroller as a mini-computer on a single chip. While a laptop is made for surfing the web or playing games, a microcontroller is built for one specific job: Control.
It has:
•
"Brain" (Processor): To process logic and think.
•
"Memory": To remember the instructions (code) you upload.
•
"Arms & Legs" (Pins): To interact with sensors (to feel) and actuators (to act).
2. What is Arduino?
You might hear the word "Arduino" often. Arduino is the most famous platform in the world for learning electronics. The RGX Board is powered by Arduino technology, which means it is reliable, easy to use, and has a huge community of creators behind it.
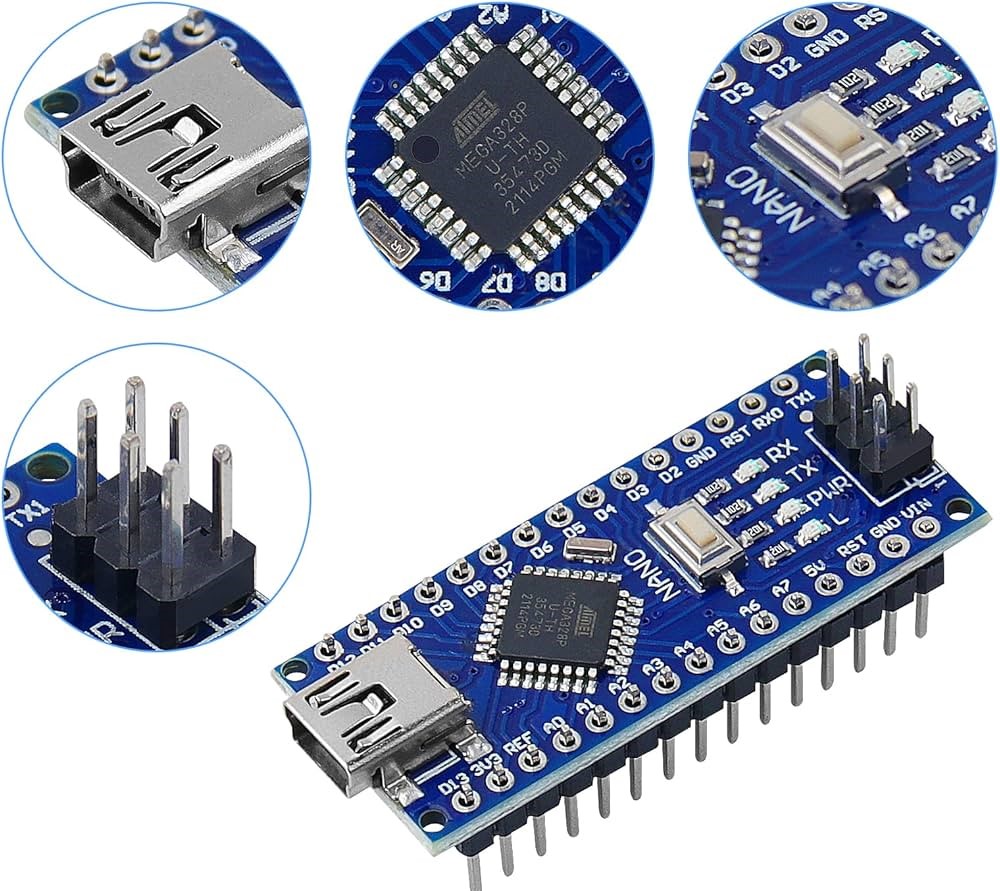
ArduinoNano[atmega328
3. The RGX Kit: Built for Speed
Usually, electronics involve messy wires and confusing breadboards that break easily. The RGX Kit is different. It uses the "Easy-Plug" system.
RJ11 Connectors: These telephone-style cables make building incredibly fast.
Keyed Ports: Notice the small plastic tab on the plug? It ensures you cannot plug a module in the wrong way.
The "Click" Factor: Always listen for the "click" when wiring. It means your connection is mechanically and electrically secure.
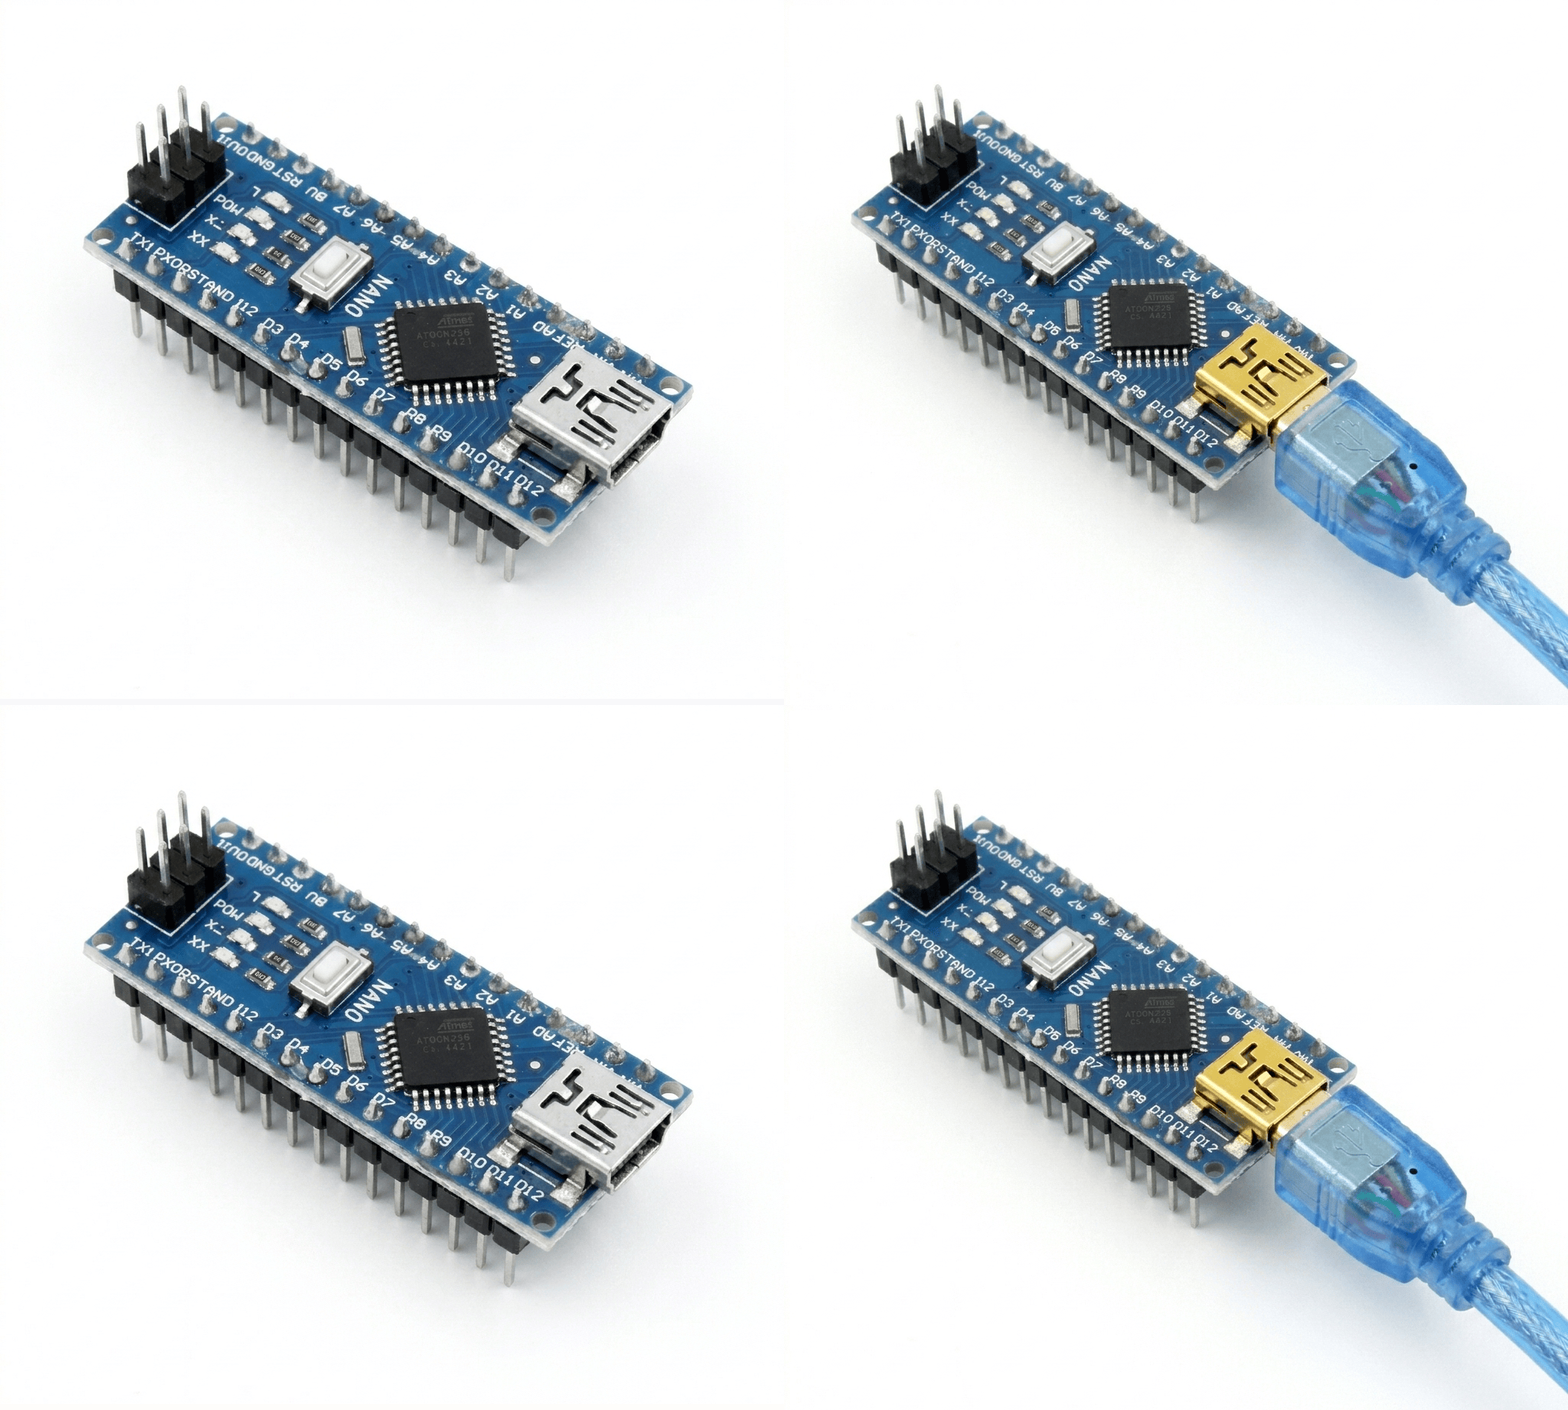
Arduino Plug
4. Powering Your Project: RGX Safe Power
To bring your robot to life, the RGX Board needs a steady and safe supply of energy.
The Golden Rule of Power: The RGX board must be connected to the Battery Management Module to function properly and safely.
•
Why use Battery Management? It regulates the voltage from the batteries, protecting your board from power surges and ensuring the motors have enough "juice" to move.
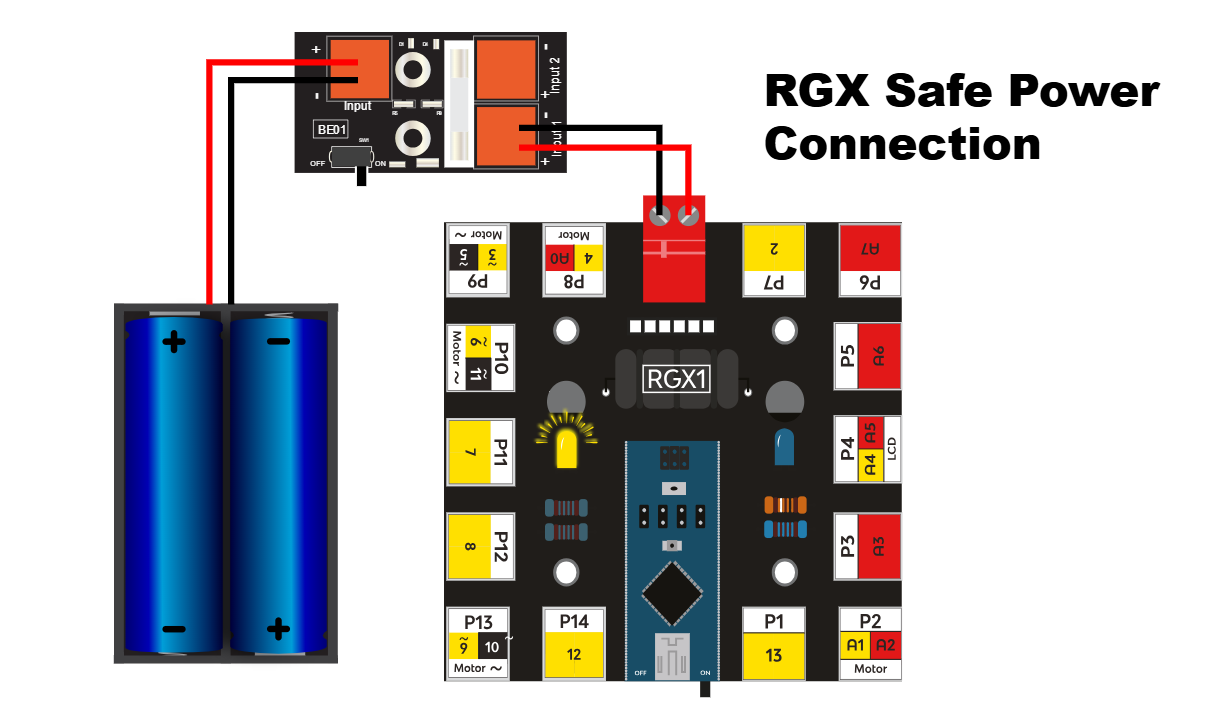
The Setup: Connect your battery pack to the Input of the Management Module, then connect the Output to the Red Power Terminal on the RGX Board.
5. Kit Description
The RGX Extension Kit adds new sensors and controls that are supported with the easy plug feature, making it completely compatible with the Arduino Nano Shield (RGX1).
This kit introduces you to a variety of sensors widely used in industries such as agriculture, security, and robotics. These sensors are extremely useful for interactive projects and data collection. By integrating these with the RGX Starter Kit, you have the tools required to build innovative projects, including remote control via Bluetooth and IR technology.
🔍 Components List: Sensors
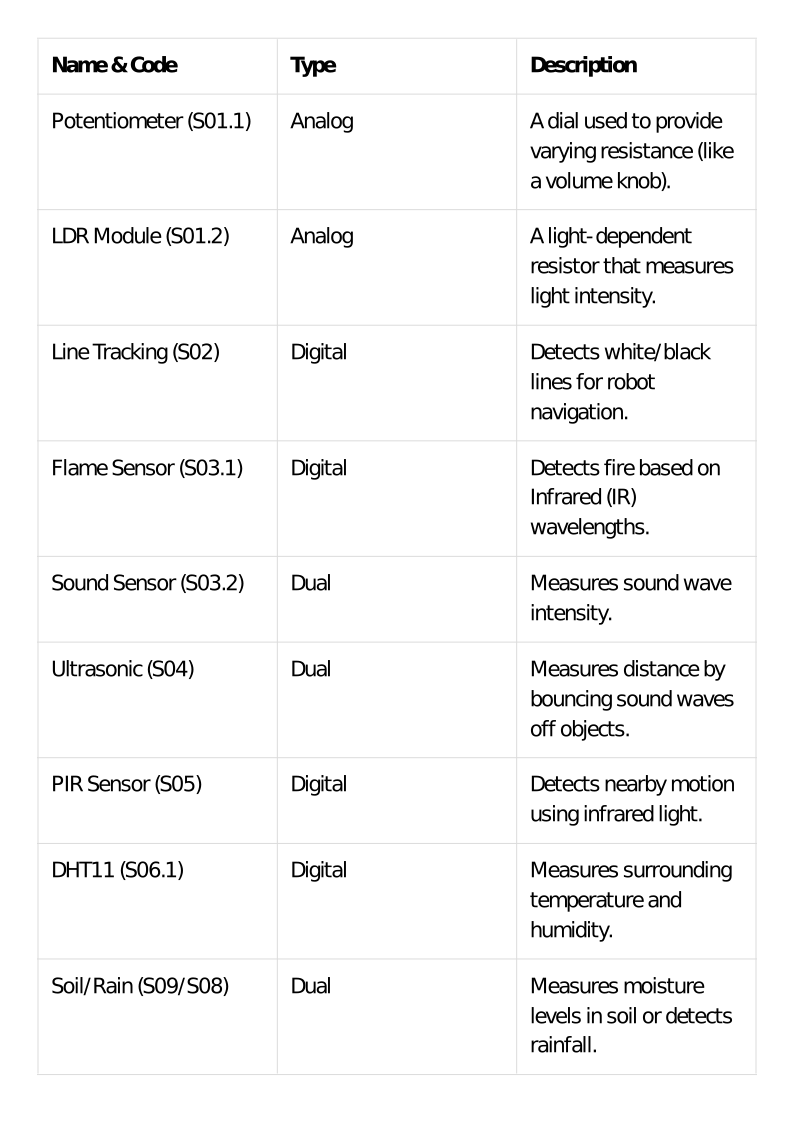
Actuators & Motors (The Muscles)
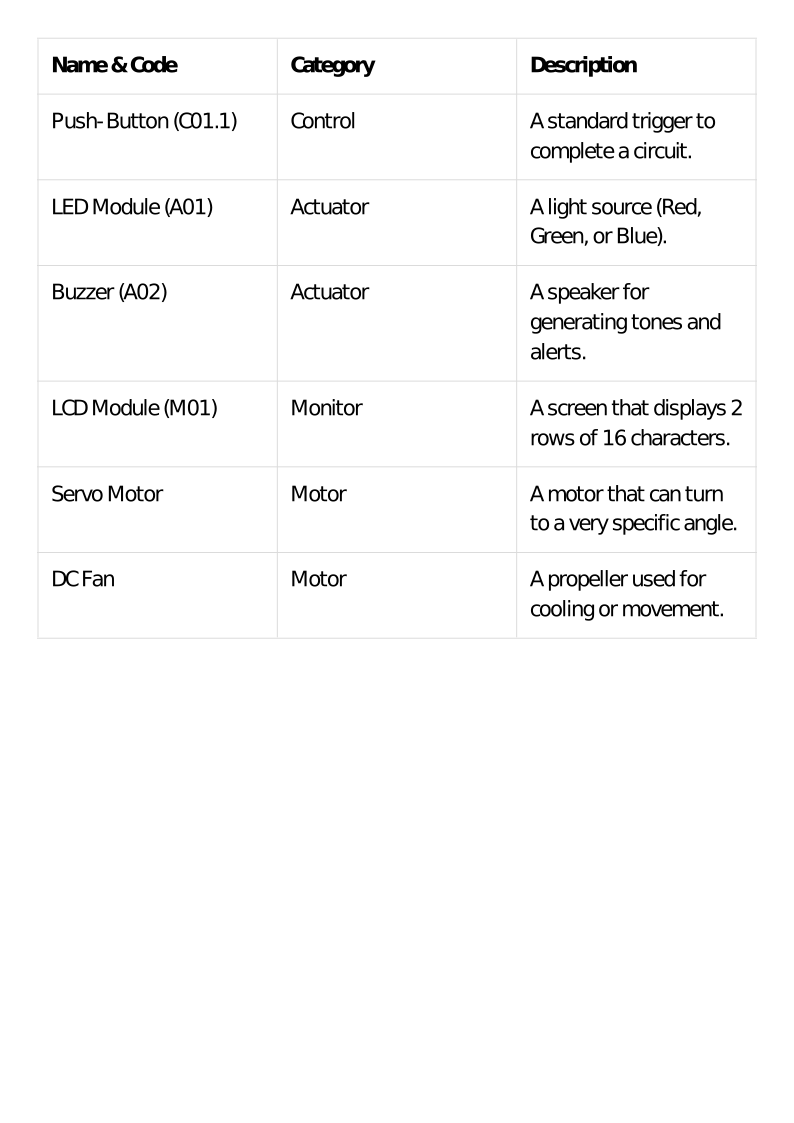
⚙️ Components List: Controls
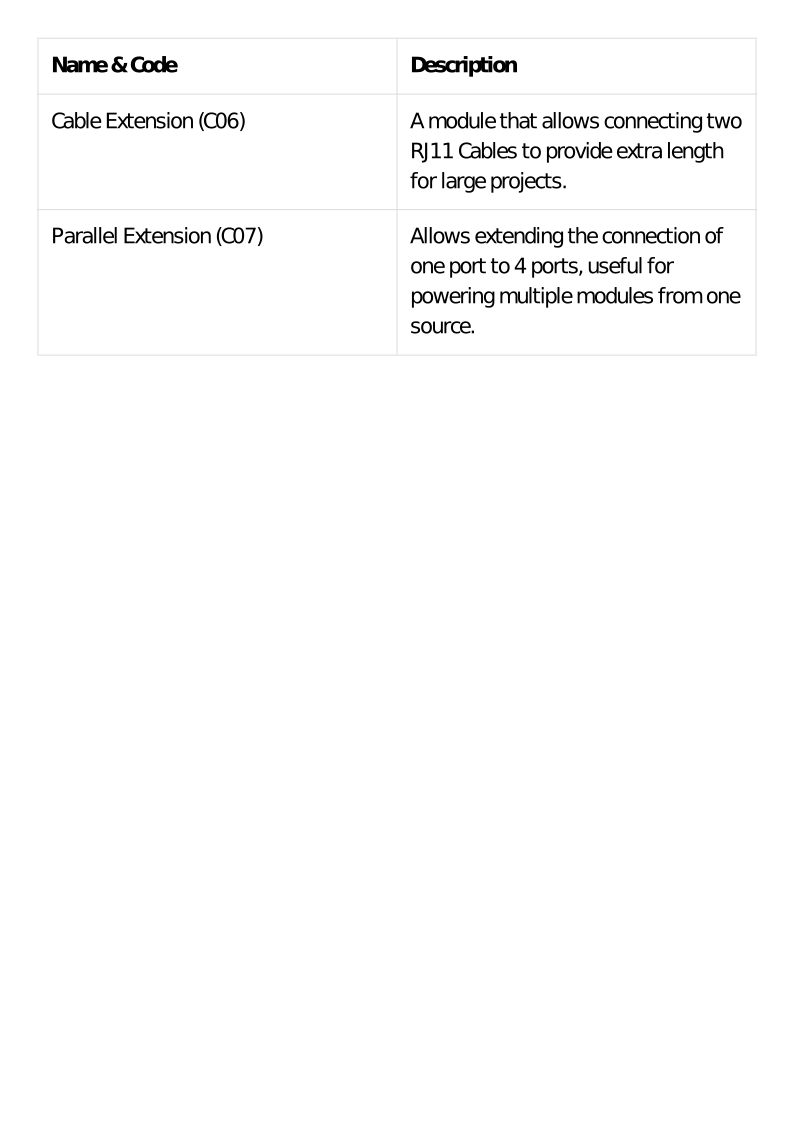
6. The Color Code: Yellow vs. Red Pins
This is the golden rule of the RGX system. Matching the module to the right pin color is the secret to a working project.
Pin Color / Type | Logic |
|---|---|
Yellow / Digital | two states only: ON or OFF |
Red / Analog | Range (0-1023) |
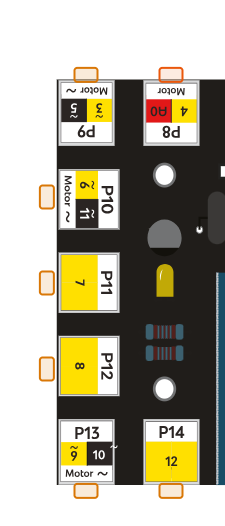
Digital pins
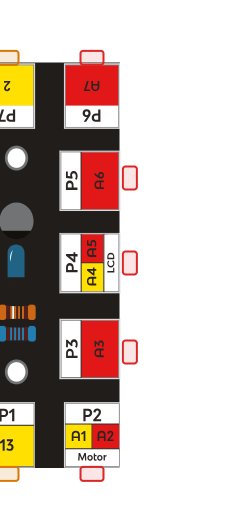
Analog pins
7. Summary: How the Brain Works
To build anything smart, your code must follow this flow:
1.
Input (The Senses): The board "feels" something.
2.
Processing (The Thought): The brain checks your code.
3.
Output (The Action): The board "does" something
🚀 What's Next?
Great job completing the introduction! Now that you understand the "brain" and the "senses" of the RGX Kit, it's time to get hands-on.
Next Lesson: We will dive into the RGX Emulator.
You will learn how to access the virtual lab, navigate the interface, and start building your very first project without needing any physical hardware!