Overview
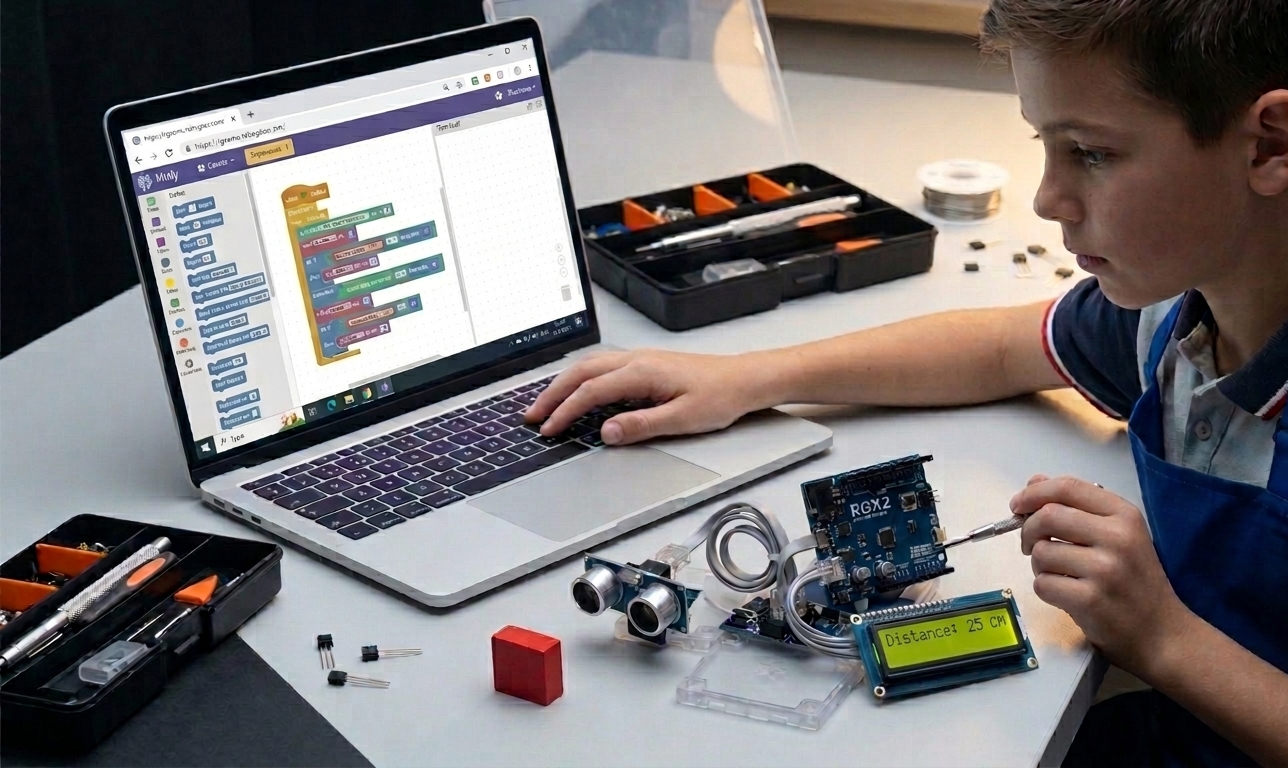
You will build a smart distance-measurement system using the RGX Kit.
The system measures the distance between the sensor and an object using an ultrasonic sensor, then displays the distance in real time on an LCD screen.
This project is inspired by real-world technologies such as the following:
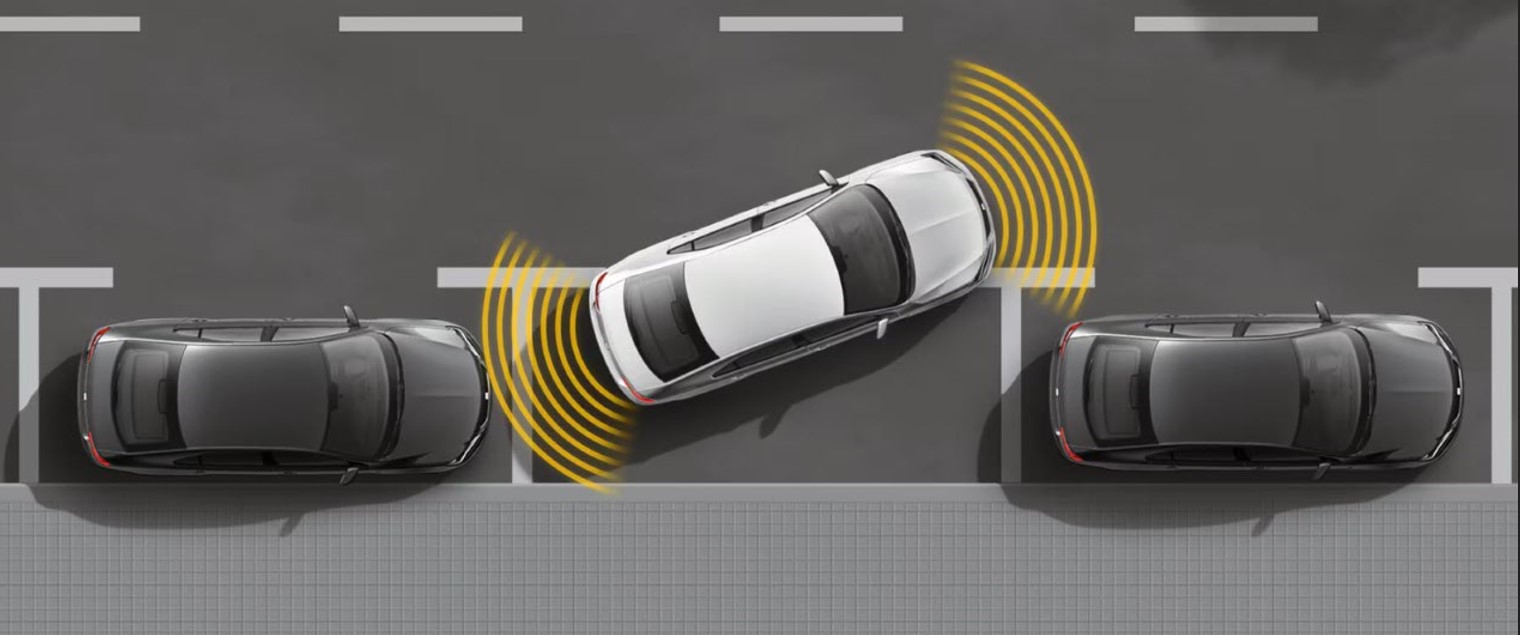
Car parking sensors
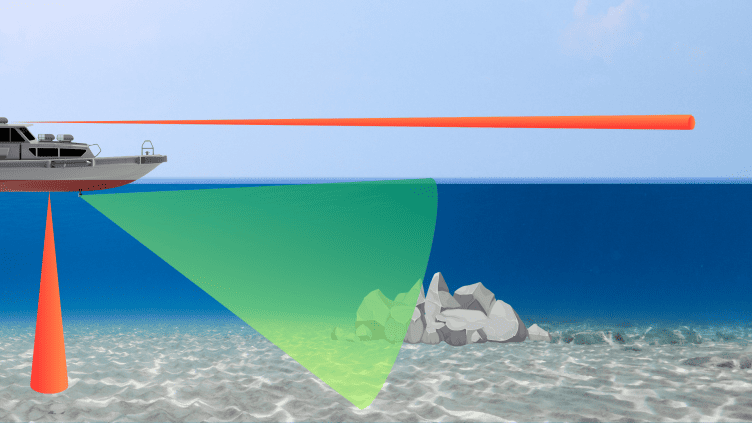
Obstacle detection systems
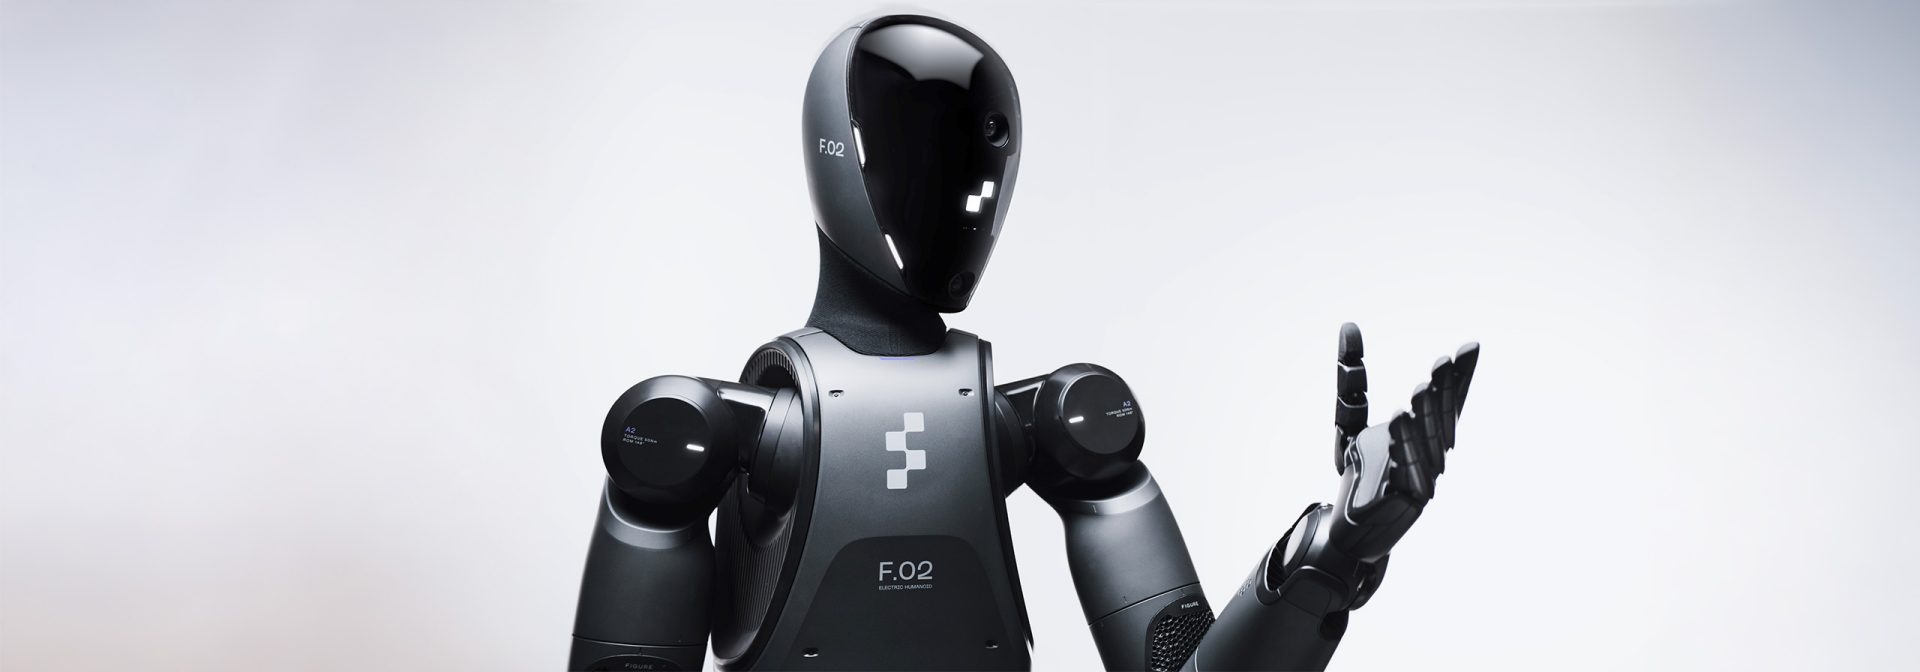
Robots
Objectives
•
How an ultrasonic sensor measures distance
•
How to calculate distance in centimeters
•
How to display sensor data on an LCD screen
•
How sensors and displays work together in smart systems
Meet the Components
You will use:
•
Ultrasonic Sensor
•
LCD Display Module
•
RGX Control Board
•
RJ11 Easy Plug Cables
Hardware Connections
Component | PIN Connection |
Ultrasonic Sensor Trig | PIN 4 |
Ultrasonic Sensor Echo | PIN A0 |
LCD Display | SCL & SDA (I2C, Address 0x27) |
Make sure all connections are secure using RJ11 cables.
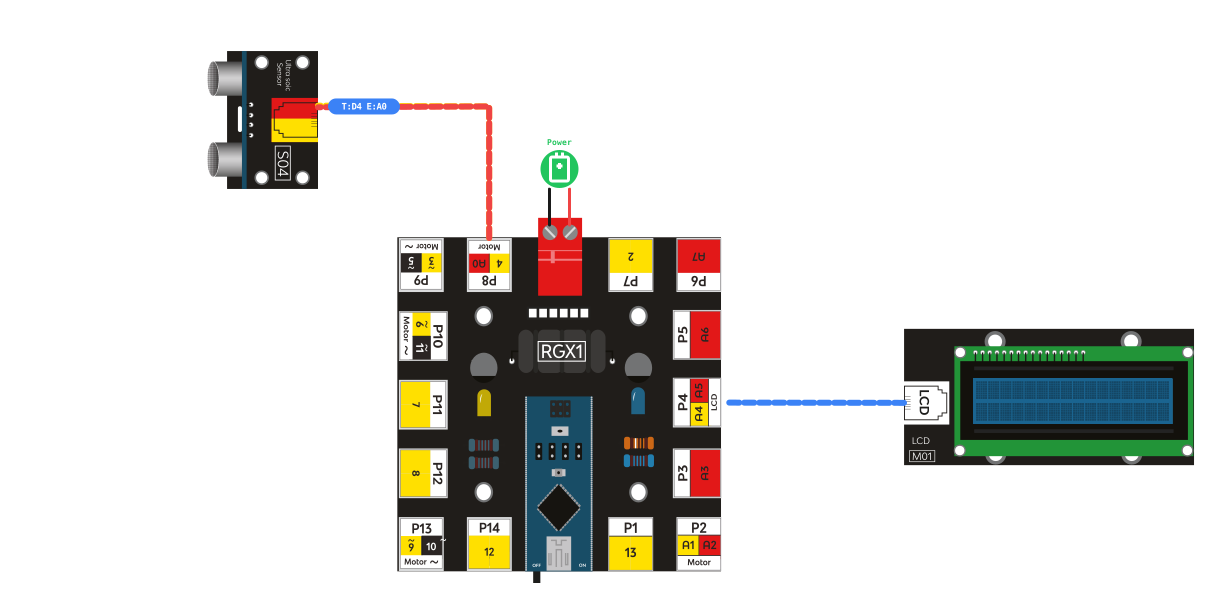
RGX connection
System Logic
Your system constantly measures the distance between the sensor and an object.
Object Detected Distance | LCD Display |
Object Close | Small Number (e.g., 10 cm) |
Object Far | Large Number (e.g., 60 cm) |
Understanding the Ultrasonic Sensor
An ultrasonic sensor measures distance using sound waves.
The sensor sends a short ultrasonic sound pulse that travels through the air.
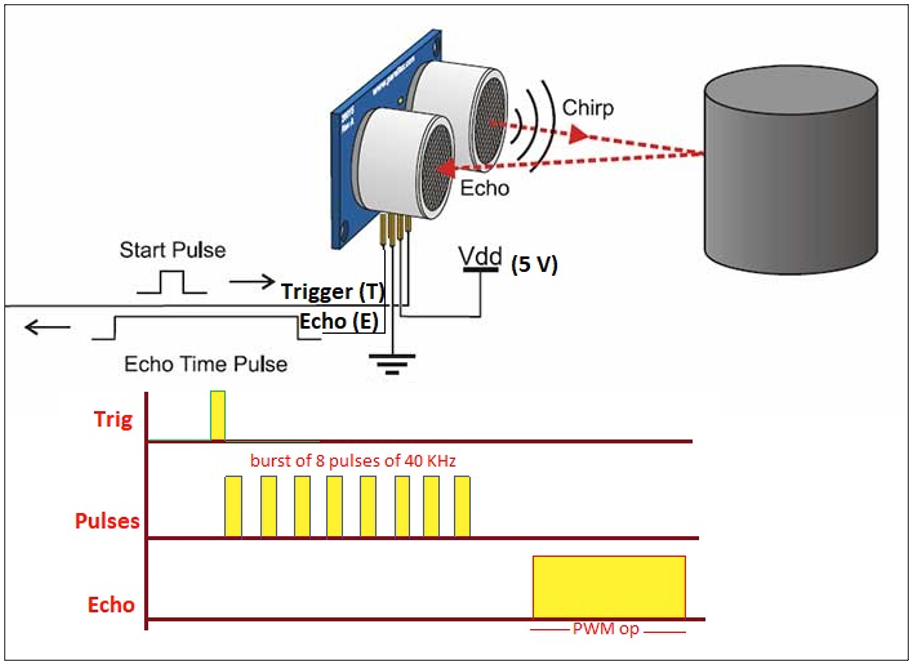
Ultrasonic Explanation
When the sound wave hits an object, it bounces back (echo) to the sensor.
The RGX board measures how long it takes for the echo to return.
Using this time, the system calculates the distance between the sensor and the object.
This process happens very quickly and can repeat many times every second.
How the Ultrasonic Sensor Works
The sensor has two main signal pins:
Pin | Function |
|---|---|
Trig | Sends the ultrasonic pulse |
Echo | Receives the reflected sound |
Working Sequence & Calculation
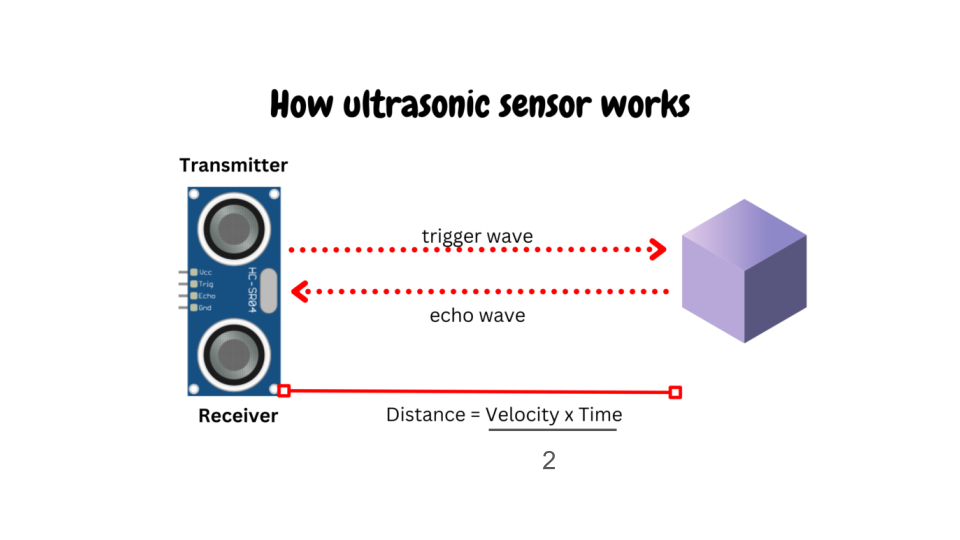
How Ultrasonic work
The RGX board initiates the process by sending a short signal to the Trig pin, prompting the ultrasonic sensor to emit a sound wave that travels until it encounters an object and then reflects back. The Echo pin measures the return time and sends it to the RGX board, which calculates the distance using the formula :
Distance = (Time × Speed of Sound) ÷ 2
with the division by two accounting for the round trip of the wave from sensor to object and back. The system converts this result into centimeters, continuously updating the LCD display to show the distance as the object moves, with closer objects producing shorter echo times.
Understanding the LCD Display
An LCD (Liquid Crystal Display) is used to show information from the system. In this project, it displays the distance measured by the ultrasonic sensor.
The LCD is a 16×2 type, meaning it has 2 rows of text, each capable of showing 16 characters.
The screen updates continuously as the sensor measures new distances.

LCD Display
I2C Communication (SCL and SDA)
The LCD connects to the RGX board using I2C communication.
I2C is a communication method that allows multiple devices to connect using only two signal wires.
Pin | Function |
|---|---|
SCL | Clock signal (controls timing) |
SDA | Data signal (sends information) |
The LCD also has an address (0x27).
This address allows the RGX board to identify the display when communicating with it.
This address allows the RGX board to identify the display when communicating with it.
Using I2C makes wiring simpler because the LCD needs fewer pins.
Coding the System
Step 1: Setup the LCD
•
Condition: Setup LCD 1602 mylcd address 0x27 PIN (SCL SDA)
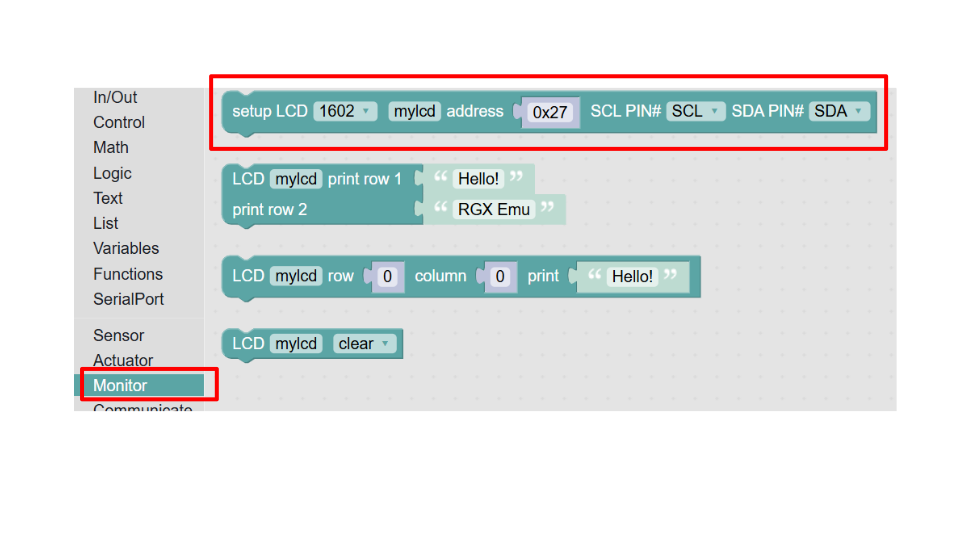
Setup LCD block
Actions:
•
Initialize the LCD screen
•
Set the I2C address to 0x27
•
Enable communication through SCL and SDA pins
This step prepares the LCD to display text.
Step 2: Fill in the Trig and Echo pins
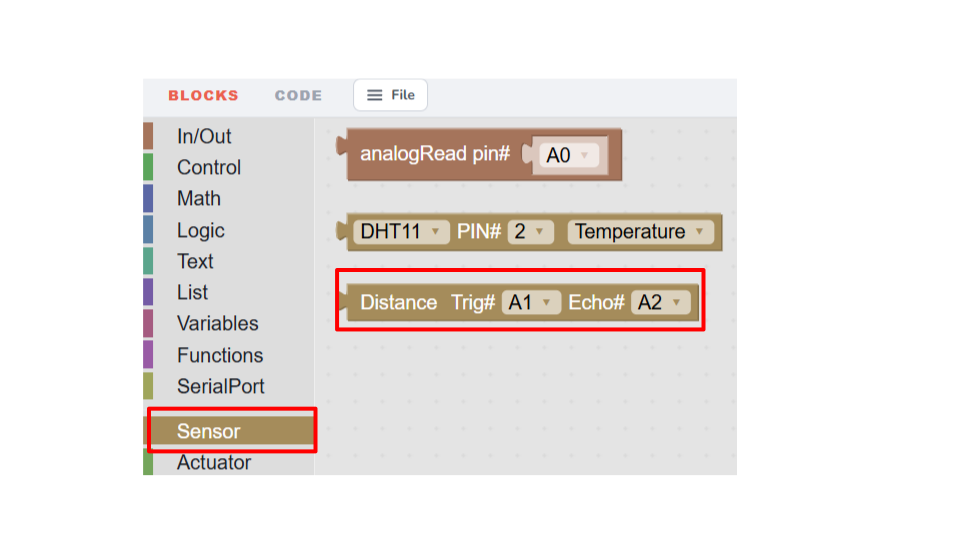
ultrasonic block
Step 3: Display Distance on LCD (Line 1 and Line 2)
Condition: LCD mylcd print line 1 “Distance”
Actions: Read the distance using the ultrasonic sensor Combine the measured value Display the distance in centimetres on the second line (ex: 25 cm)

LCD print block
You can find the join block at text category
Actions:
Display the unit CM Clearly indicate the measurement unit Keep the unit visible while the value updates
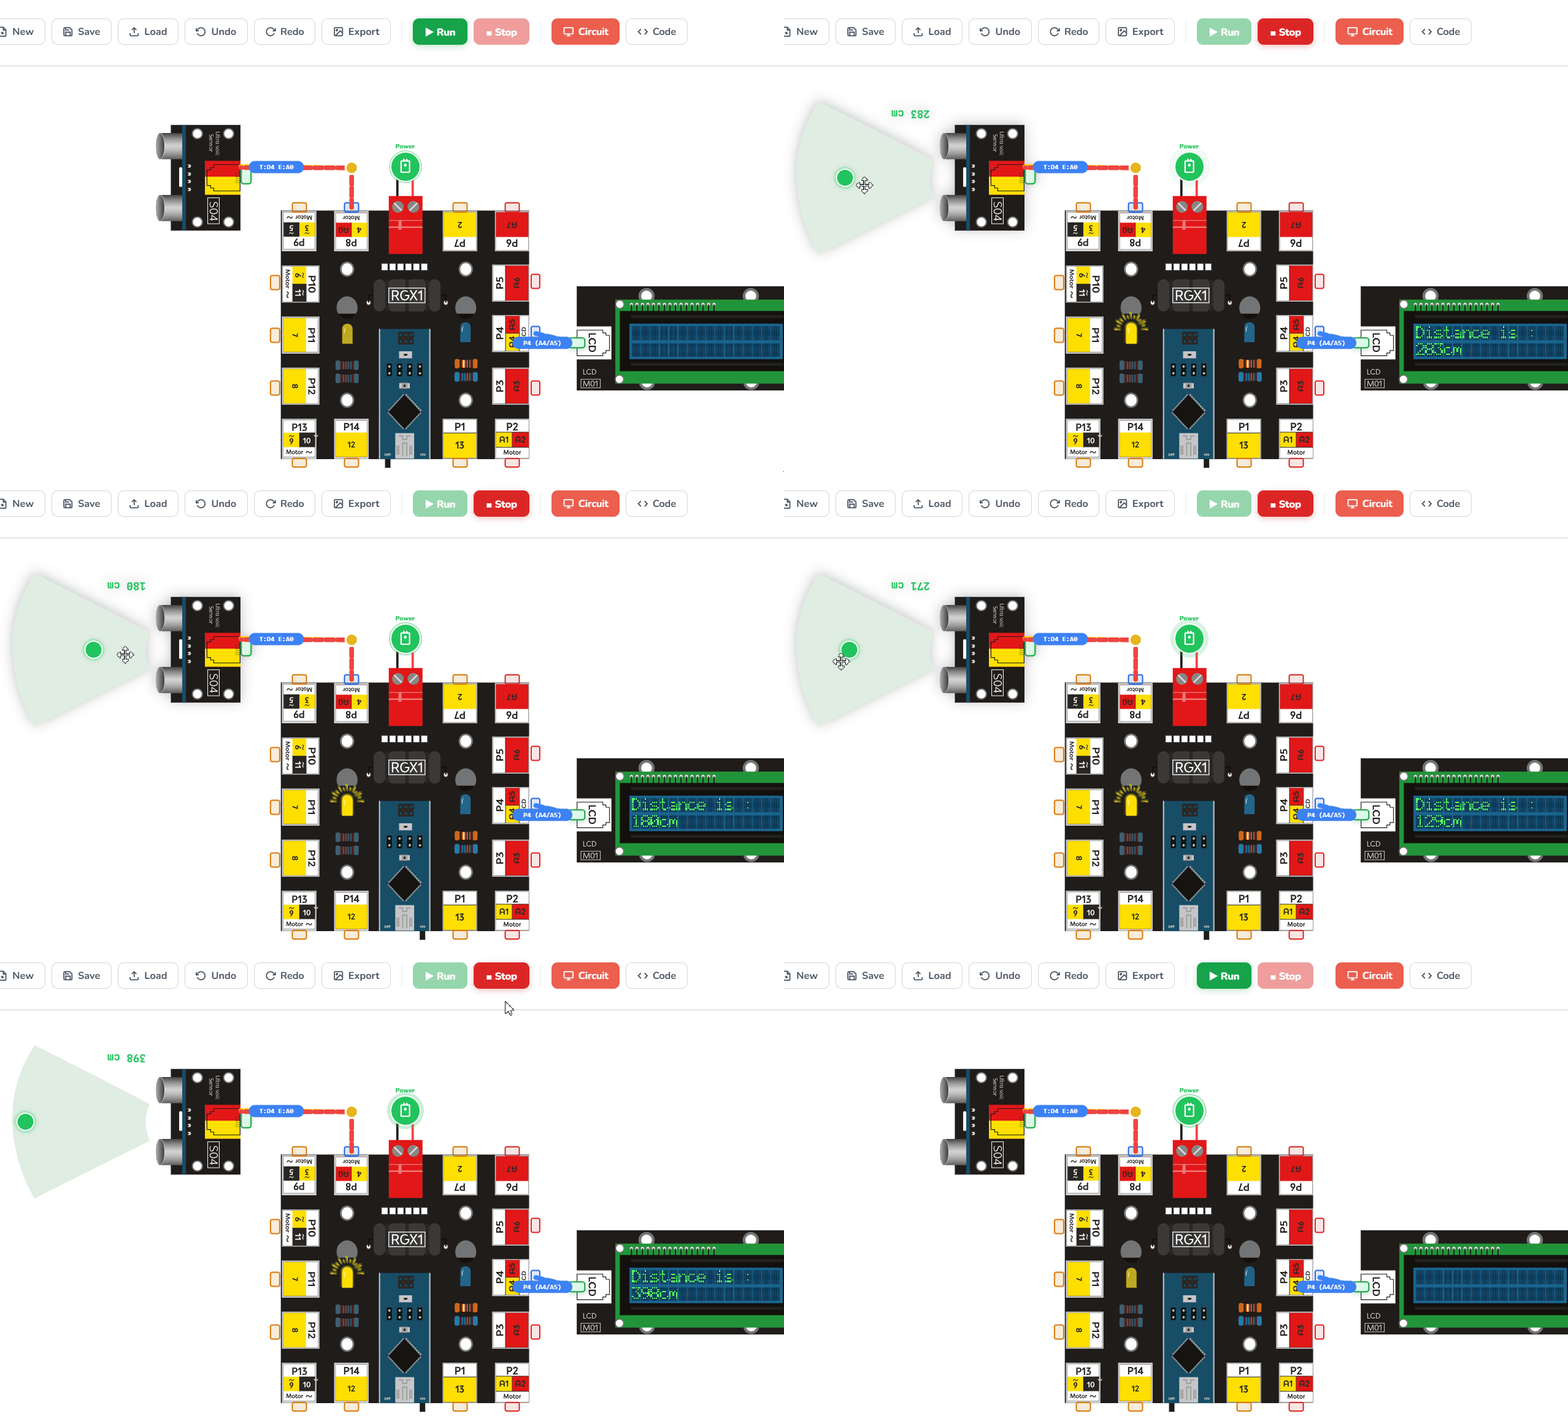
Running the code
Test Your System
Power the RGX board Place an object in front of the ultrasonic sensor. Observe the LCD: Numbers appear on the screen.
Move the object closer or farther. Confirm that the distance changes instantly
If the numbers update smoothly, your system is working correctly.
Improve & Extend
Try upgrading your distance measurement system:
•
Add a buzzer when distance is too small
•
Set distance levels (Safe / Warning / Danger)
•
Display messages like “Too Close!”
•
Application: Can you use this to build a "Smart Trash Can" that opens when your hand is near?