Overview
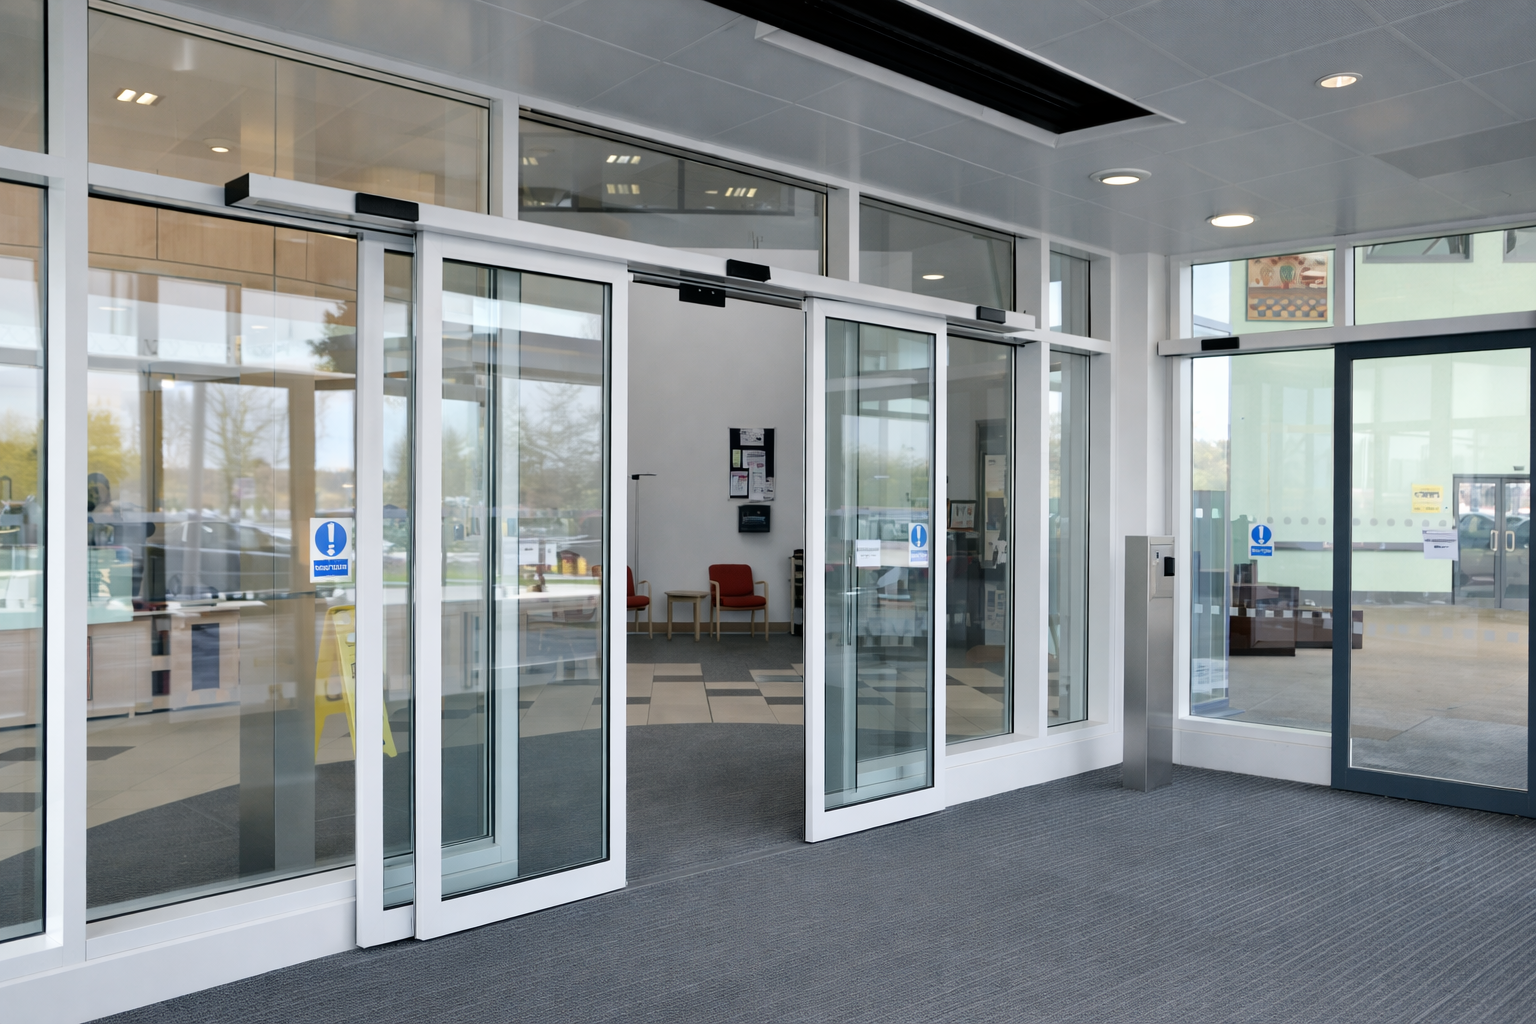
In this lesson, you will build a Smart Automatic Door System using the RGX Kit. The system detects a person approaching using an ultrasonic sensor and opens the door automatically using a servo motor. To make the entry more inviting, a welcome message appears on the LCD screen when the door opens.
Objectives
•
How an ultrasonic sensor detects distance
•
How to control a servo motor for motion
•
How to display messages using an LCD
•
How sensors and actuators work together in a smart system
Meet the Components
You will use:
•
Ultrasonic Distance Sensor
•
Servo Motor
•
LCD Module (1602 I2C)
•
RGX Control Board
Hardware Connections
Component | PIN Connection |
|---|---|
Ultrasonic Sensor Trig | Echo | PIN 4 | PIN A0 |
Servo Motor | PIN 12 |
LCD Module | LCD PIN |
Make sure all connections are secure using RJ11 cables.
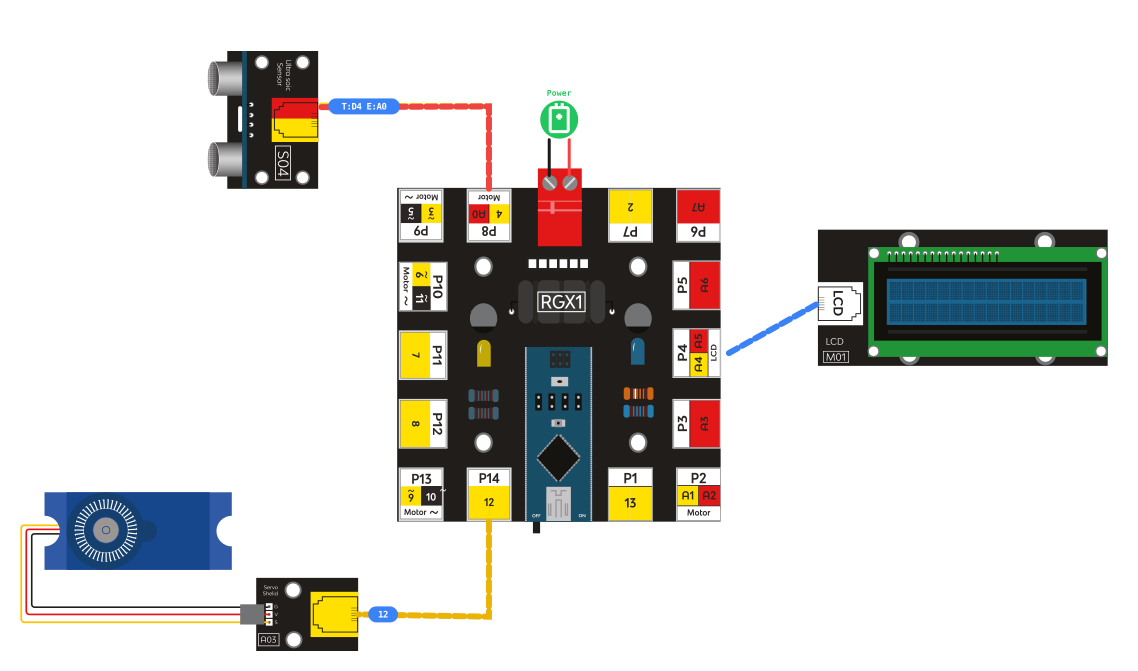
RGX connection
System Logic
Your system constantly measures the distance to detect a nearby person.
Person Detected? | Servo Motor | LCD Display |
|---|---|---|
YES (Distance < 30cm) | OPEN (90°) | First line : “WELCOME" Second line : "To HOME” |
NO (Distance ≥ 30cm) | CLOSED (180°) | Clear Screen |
•
Approach: When a person is close, the door greets them and opens.
•
Leaving: When the area is clear, the door closes automatically to maintain security.
Coding the System
Step 1: Create Variable and Read Distance
Action: Creates a global variable named distance. This variable will store the measured distance from the ultrasonic sensor. This allows the system to "see" how far away the user is at all times.
Step 2: Control the Door (Servo Motor)
Understanding the Servo Motor
A servo motor is a type of motor that can rotate to a specific angle (0 - 180 degree) based on commands from the controller. Unlike regular motors that spin continuously, a servo motor moves to a precise position.
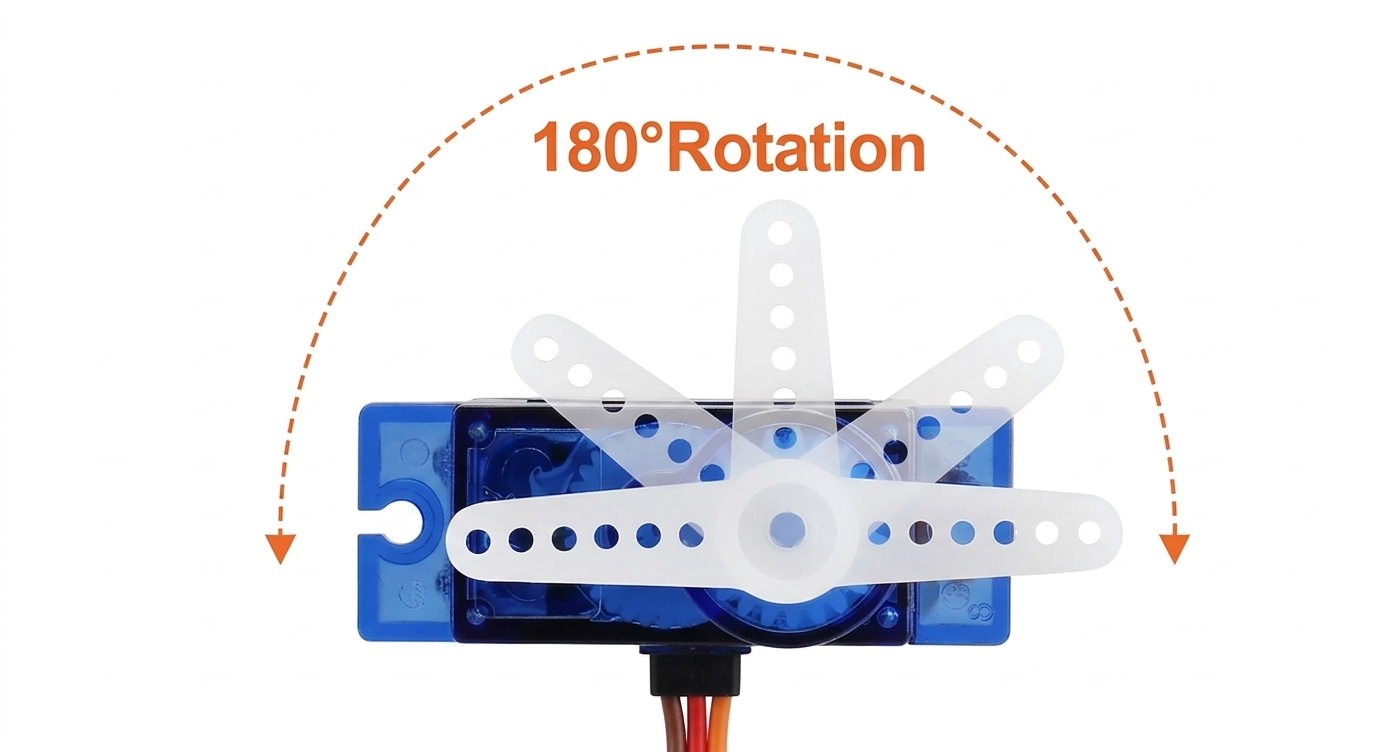
Servo motor rotation
Servo Motor Connections
To connect a servo motor to the RGX Shield:
•
The red wire is for VCC (power) and should be connected to V on the shield.
•
The brown or black wire is for GND (ground) and should be connected to GND on the shield.
•
The yellow or orange wire is the signal wire and should be connected to an S on the shield.
Steps for connection:
1.
Plug the servo motor connector into the servo shield.
2.
Match the power, ground, and signal wires correctly .
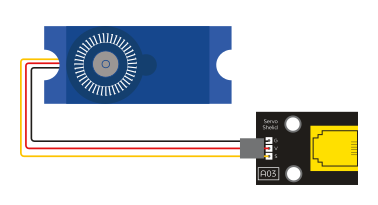
In this project, the servo motor acts as the door mechanism, opening or closing the door depending on the distance detected by the ultrasonic sensor.
Angle | Door Position |
|---|---|
90° | Door Open |
180° | Door Closed |
Servo Motor Block
Use this block to set the servo angle in your code:
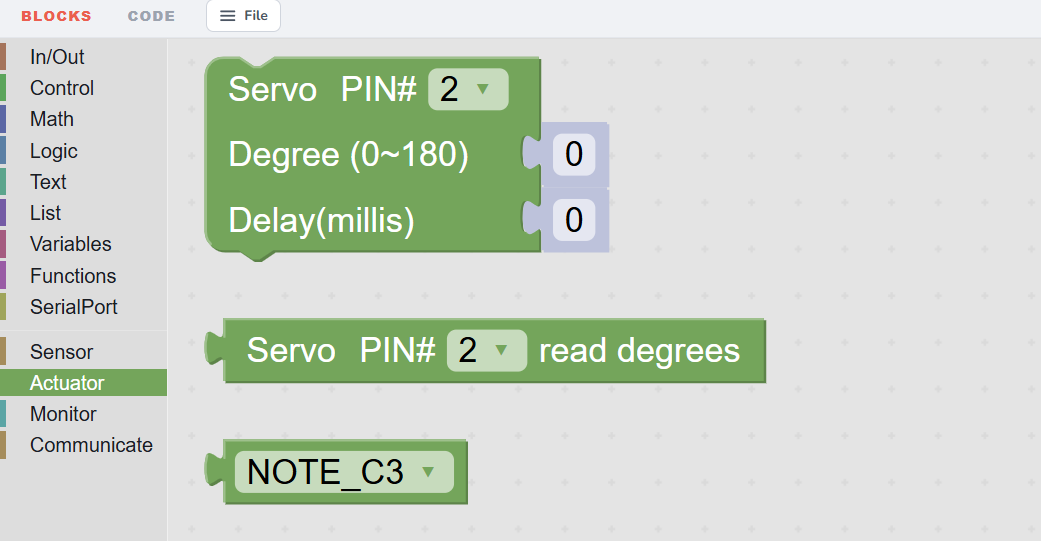
Servo motor block
Select the servo PIN you connected (12)
Set the degree (0–180°) according to the desired door position
This block sends the command from the RGX board to the servo
Action :
When a person approaches the door, the system rotates the servo to 90 degrees to open the door.
When no one is detected, the servo rotates to 180 degrees to close the door.
Step 3: Display Message (LCD)
Action: Checks if a distance is less than 30 cm.
The door opens (servo moves to 90°).
LCD shows a greeting message:
•
Line 1 → WELCOME
•
Line 2 → TO HOME
If distance is greater than 30cm (meaning no one is close):
The door closes (servo moves to 180°).
The LCD screen is cleared.
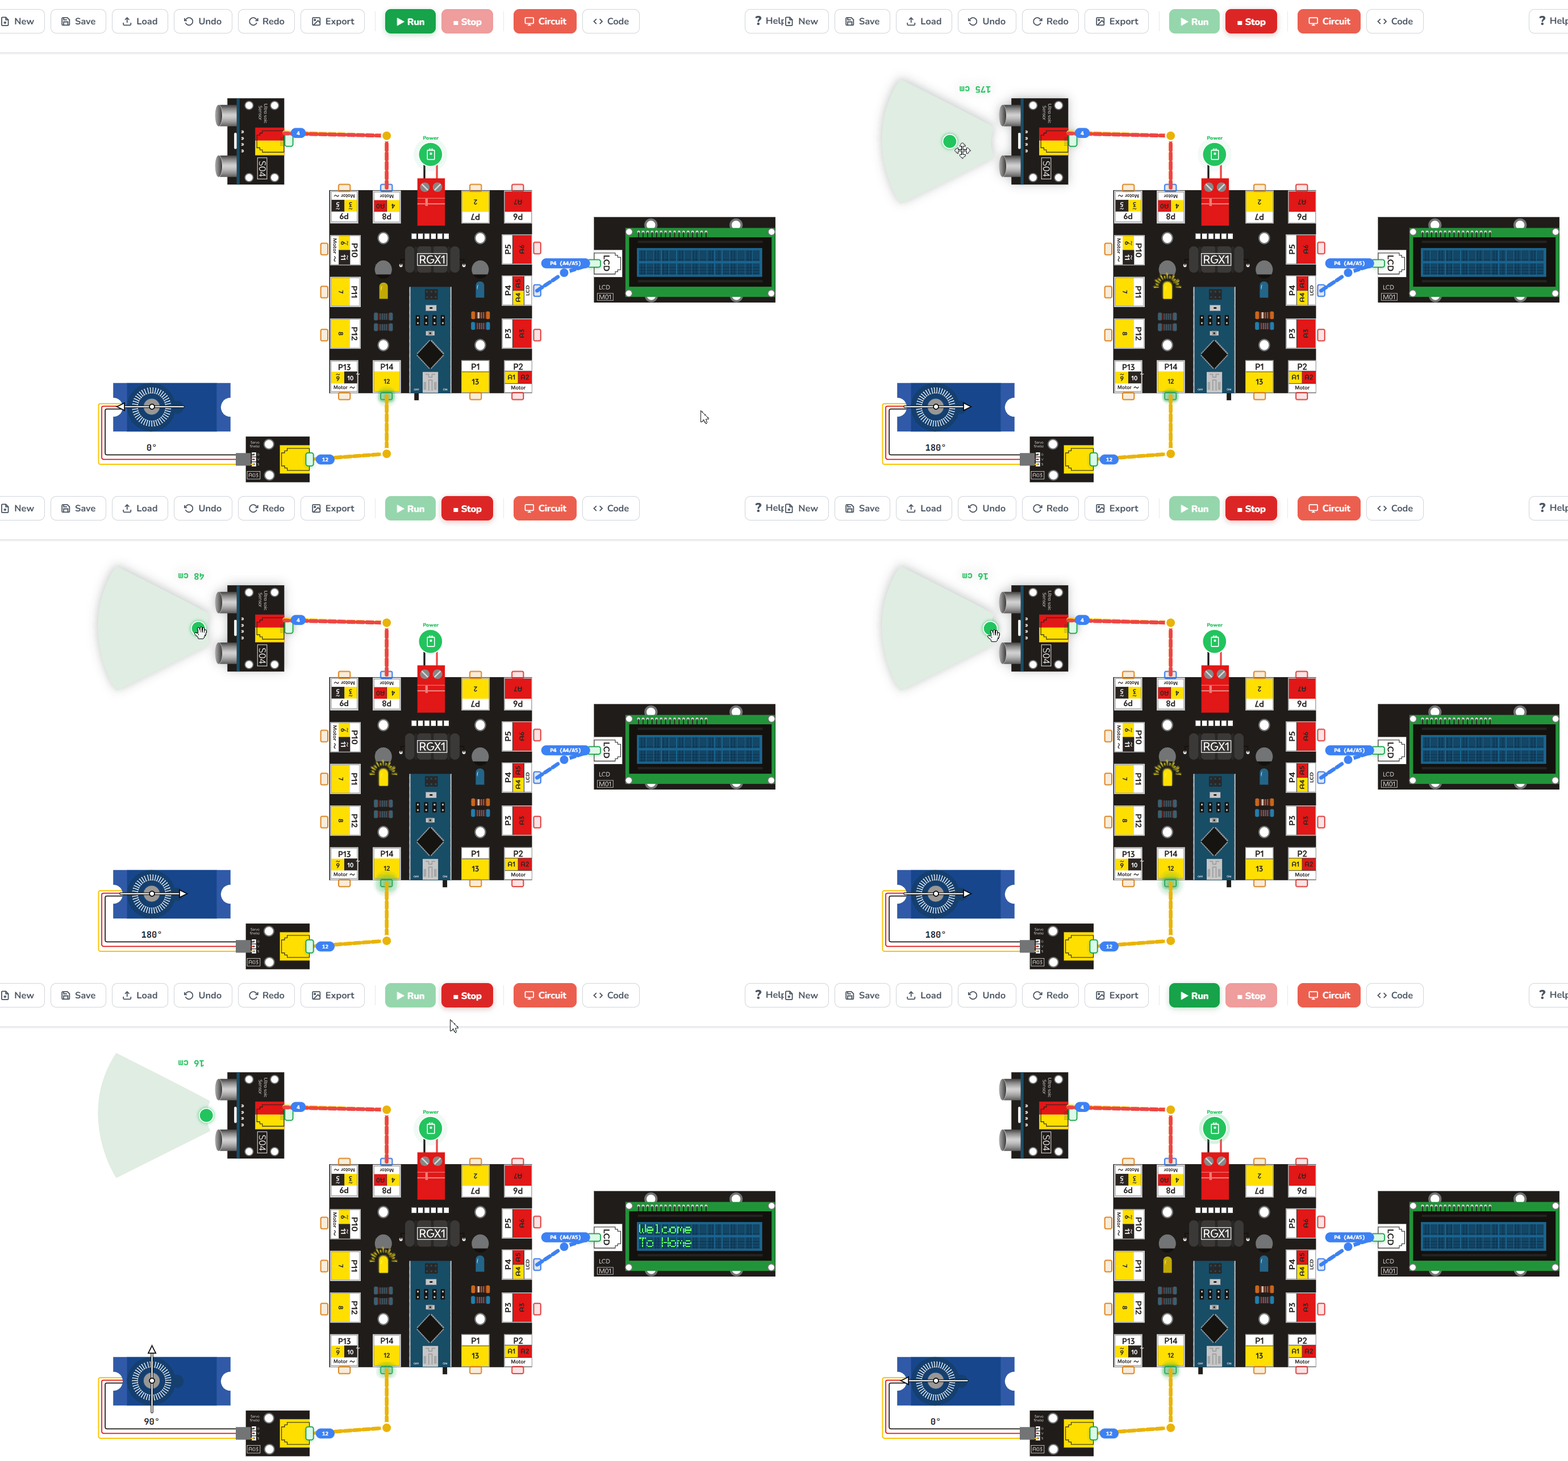
Running the code
Do not forget to add the Setup LCD block before printing any message on the screen.
This block initializes the LCD and allows the RGX board to communicate with it
This block initializes the LCD and allows the RGX board to communicate with it
Test Your System
Power the RGX board Place your hand in front of the sensor
Observe: ✔ Door opens ✔ LCD shows welcome message
Move your hand away, Confirm: ✔ Door closes ✔ LCD is cleared
If this happens, your system is working correctly.
⚠️ NOTE: Be very careful with the servo motor connections! Ensure the signal, power, and ground wires are plugged into the correct pins on the RGX board. Swapping them can damage the motor or the controller.
Improve & Extend
Try upgrading your automatic door:
•
Security Lock: Add a password keypad. The door only opens if the distance is < 8 cm AND the correct code is entered.
•
Visual Status: Add a Red LED for "Locked" and a Green LED for "Open."
•
Doorbell Sound: Use the Buzzer to play a short tune when the door opens.
•
Safety Delay: Add a delay after opening so the door doesn't close too fast on someone walking through!