Overview
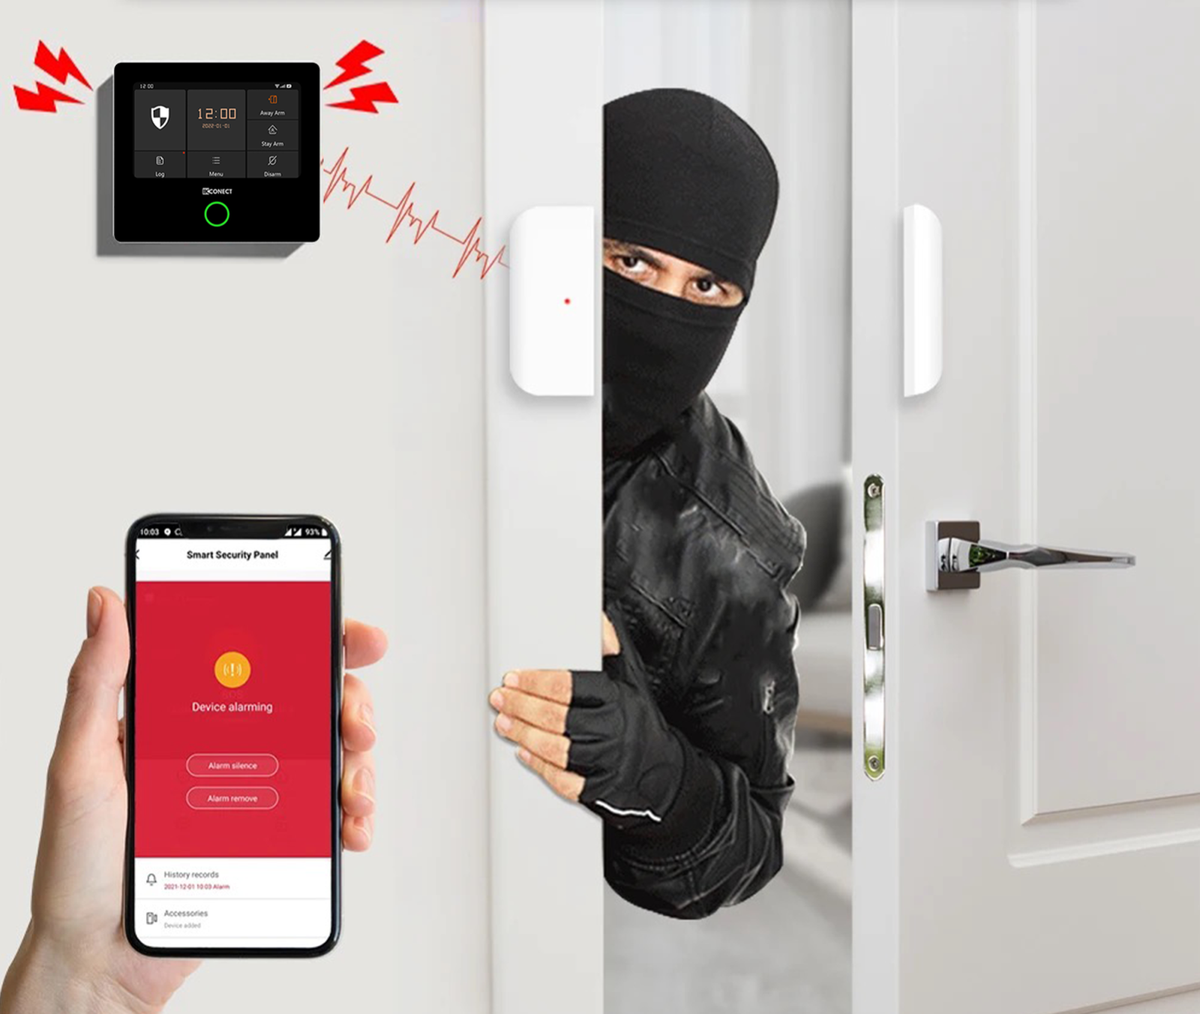
In this lesson, you will build a Smart Home Security System using the RGX Kit. This system monitors a room and automatically triggers multiple alerts when it detects movement:
•
LED flashing as a visual warning.
•
Buzzer sound as an audible alarm.
•
LCD screen displaying a critical security alert.
This project is a simplified version of real-world security systems used to protect homes, offices, and restricted areas from intruders.
Objectives
•
Understand how a PIR (Passive Infrared) sensor detects motion.
•
Learn how to trigger multiple outputs (LED, Buzzer, LCD) simultaneously.
•
Master the use of Variables for pin management to make code cleaner.
•
Explore the detection range and field of view of infrared sensors.
Meet the Components
You will use:
•
LED Module (Visual Alert)
•
Buzzer (Audible Alarm)
•
LCD Module
•
RGX Control Board
•
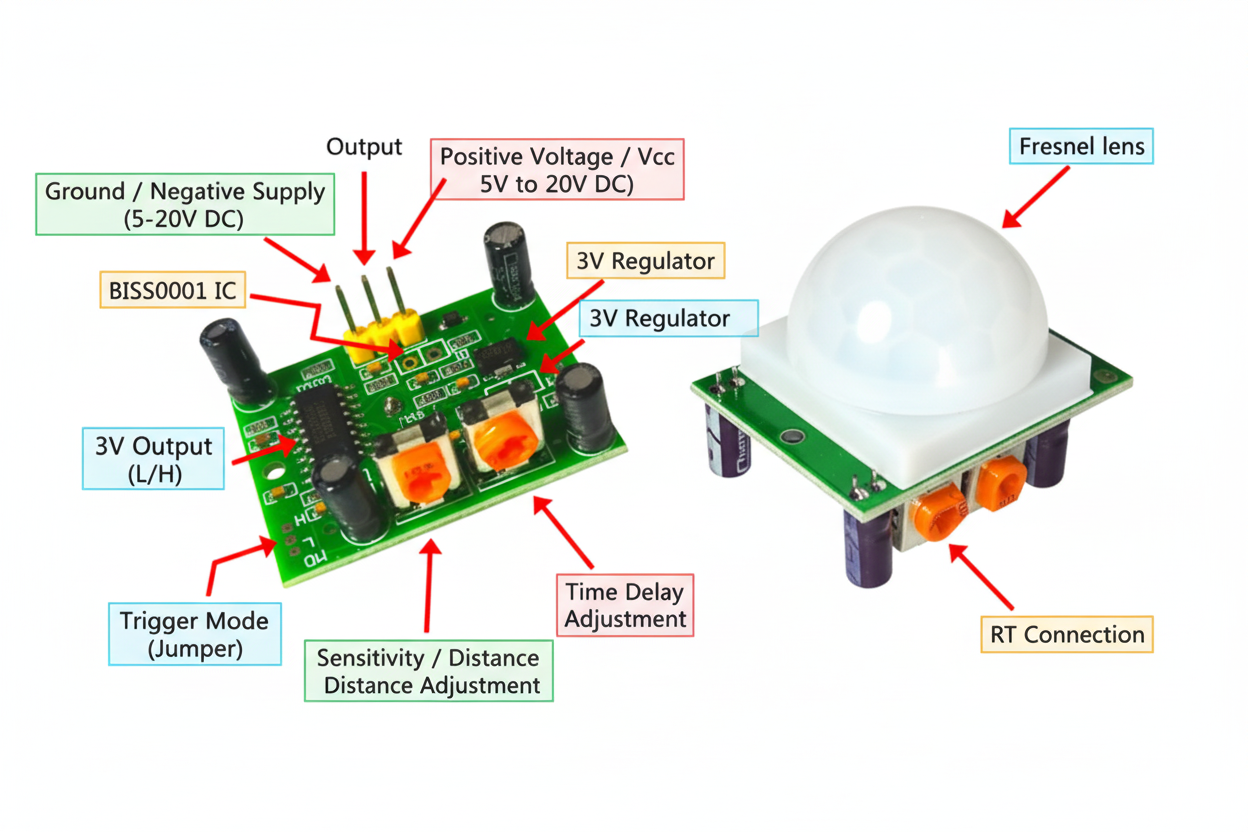
NEW COMPONENT: (The "Eyes")
Hardware Connections
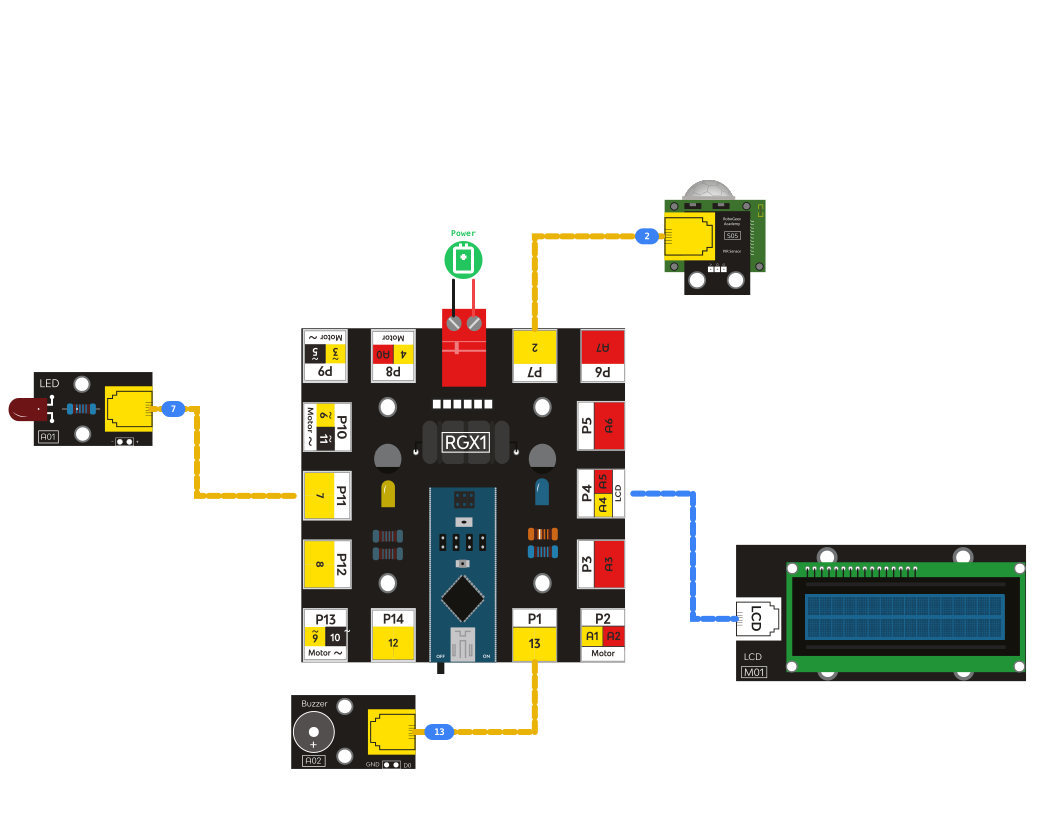
Component | PIN Connection |
|---|---|
PIR Sensor | Digital PIN 2 |
LED Module | PIN 7 |
Buzzer | PIN 13 |
LCD Module | LCD PIN |
Make sure RJ11 cables are firmly connected.
RGX connection
System Logic
The system continuously checks for motion.
Motion Detected? | LED/Buzzer | LCD Display |
|---|---|---|
YES | ON | ALERT!!!! |
NO | OFF | Clear |
•
When motion is detected → the system alerts loudly and clearly
•
When no motion is detected → the system stays silent and dark
This allows real-time intrusion detection without human intervention.
Coding the System
Step 1: LCD Setup
Action: Activates the LCD screen Prepares display communication
Step 2: Declare Global Variables
Condition:
Declare global variable motionvalue as int value 2
Declare global variable buzzer as int value 13
Declare global variable led as int value 7

Variables blocks
💡 Note:
Variables can also be used to store the number of a connecting pin.
Instead of writing the pin number directly in every block, we store it in a variable (for example led = 2). Then we can use the variable name in the program.
This makes the code easier to read and easier to modify. If the pin changes later, you only need to update the value in the variable instead of changing it everywhere in the code.
Variables can also be used to store the number of a connecting pin.
Instead of writing the pin number directly in every block, we store it in a variable (for example led = 2). Then we can use the variable name in the program.
This makes the code easier to read and easier to modify. If the pin changes later, you only need to update the value in the variable instead of changing it everywhere in the code.
Step 3: Motion Detection
Understanding the PIR Sensor
A PIR (Passive Infrared) sensor detects motion by sensing changes in infrared radiation in its surroundings.
•
When a person moves in front of the sensor, it detects the change in heat.
Output Behavior:
•
HIGH → Motion detected
•
LOW → No motion
This allows the system to know when someone enters the monitored area.
PIR Detection
PIR Sensor Detection Range
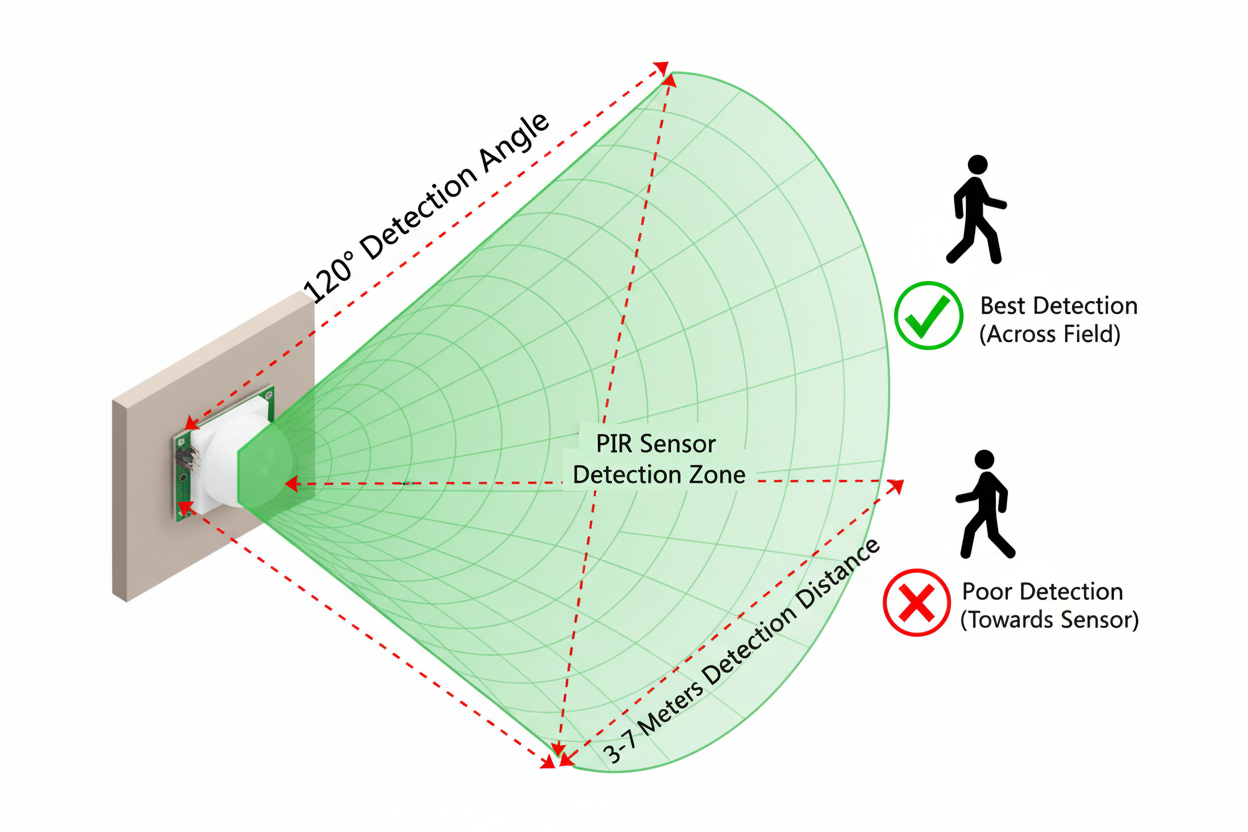
A PIR sensor can detect motion within a limited distance and angle.
The typical detection range is about 3 to 7 meters in front of the sensor.
The sensor can detect motion within a wide angle (about 120°).
This means the PIR sensor works best when a person moves across its field of view, not directly toward it.
A PIR sensor can detect motion within a limited distance and angle.
The typical detection range is about 3 to 7 meters in front of the sensor.
The sensor can detect motion within a wide angle (about 120°).
This means the PIR sensor works best when a person moves across its field of view, not directly toward it.
Action: PIR detected motion (human passing):
1.
LED turns ON.

2.
Buzzer sounds security alarm.
3.
LCD warns with bold alert message.
ELSE:
Turn everything OFF and Clear the LCD.
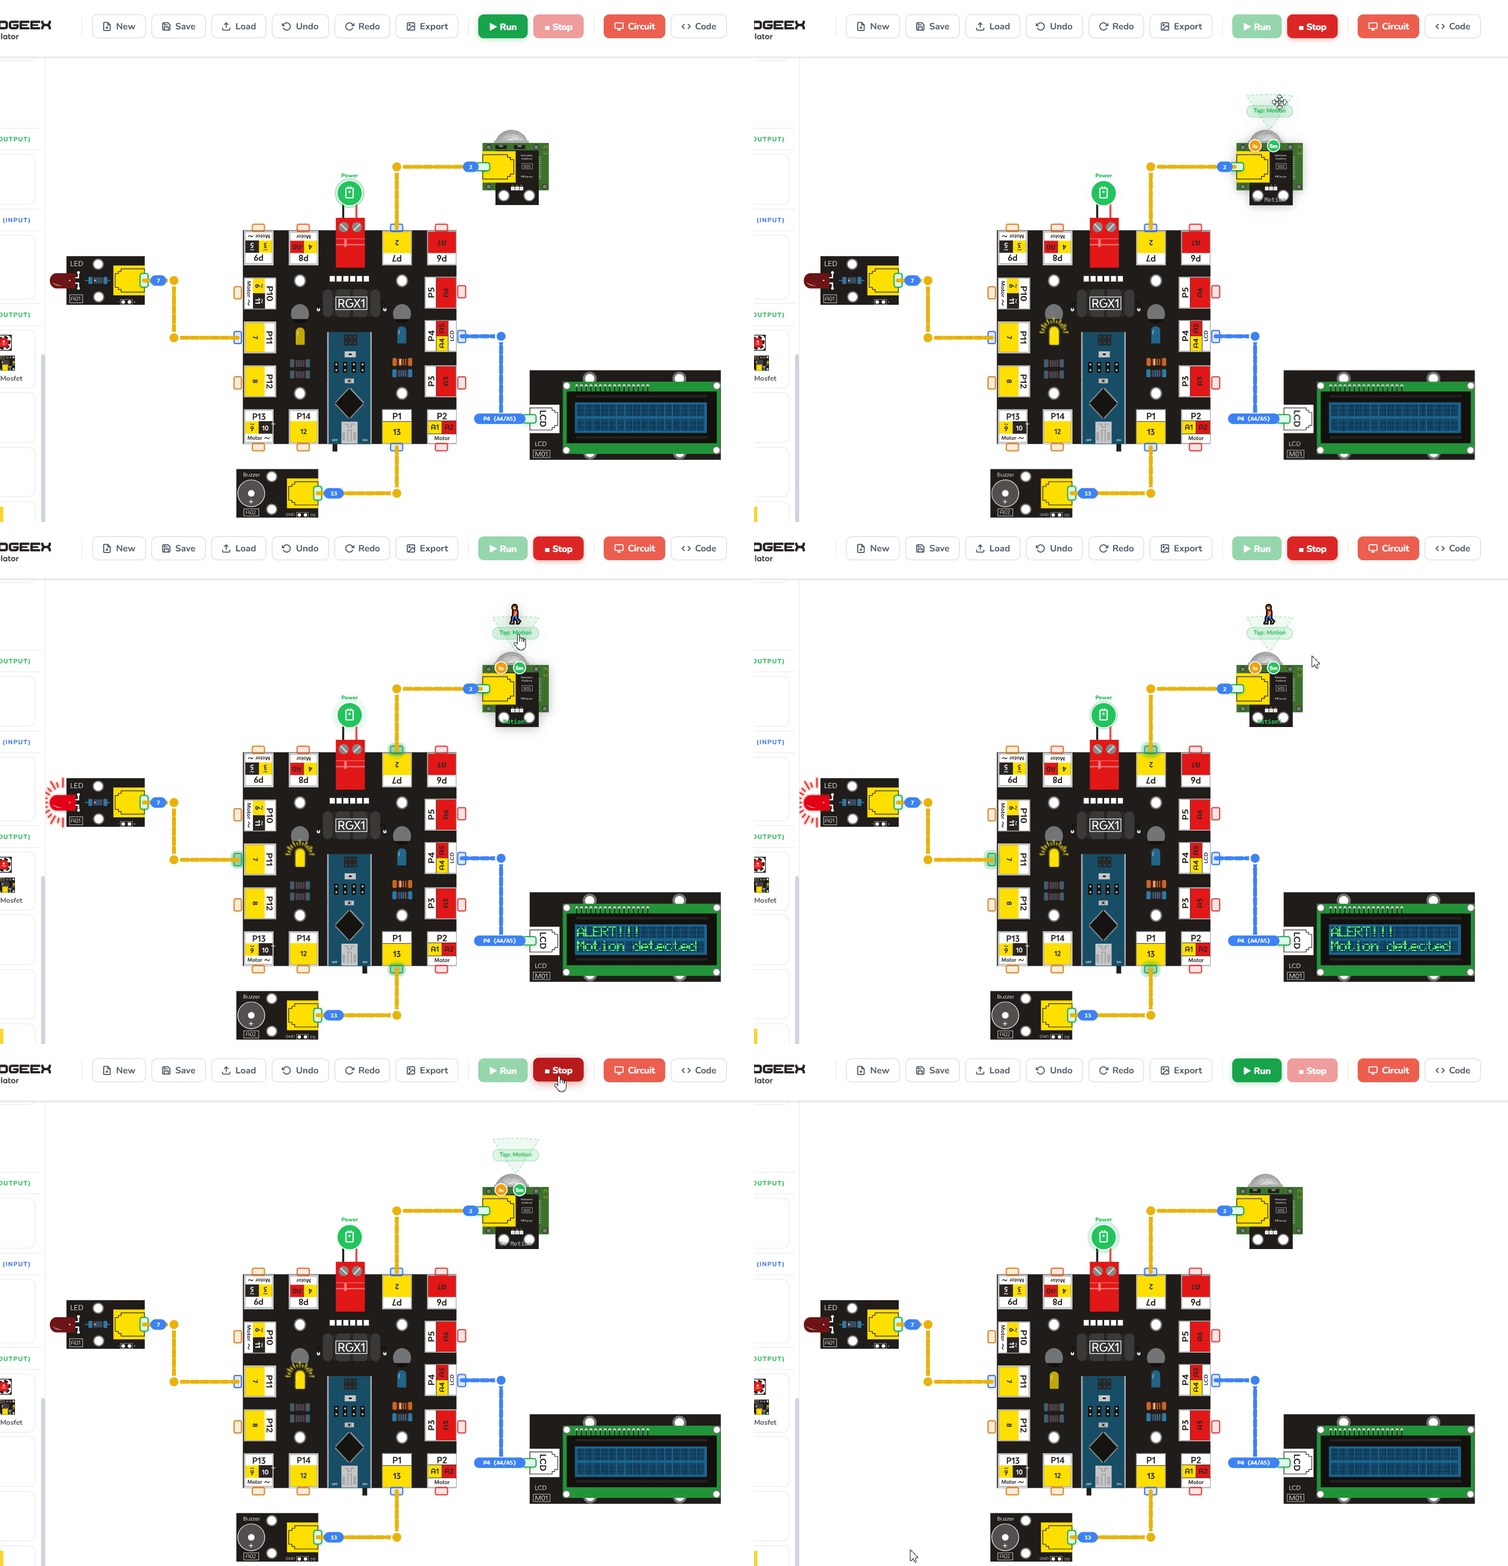
Running the code
Test Your System
Power the RGX board
Move your hand in front of the PIR sensor.
Check results: LED lights up The buzzer sounds, and the LCD prints “ALERT!!!!”
Move away Everything shuts off If yes → Your Smart Security System works correctly!
Improve & Extend
Try adding upgrades:
•
Add door lock control with a servo motor
•
Send wireless alerts using Wi-Fi or Bluetooth
•
Flash LED with different alert patterns