Overview
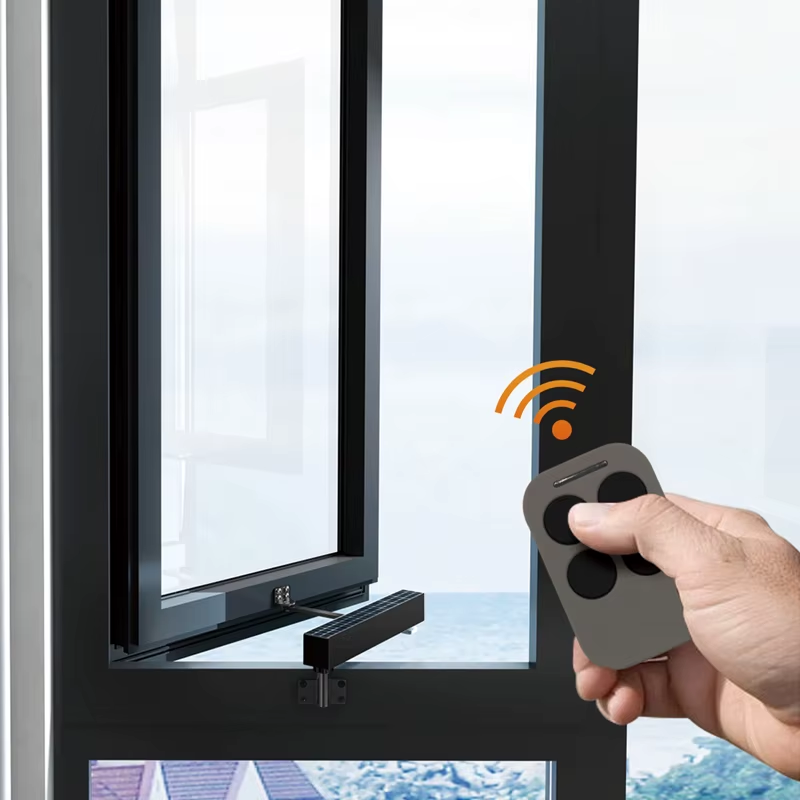
In this lesson, you will build a Smart Window Controller using the RGX Kit. Instead of walking over to open a window, you will use an IR Remote to send invisible signals to a Servo Motor, allowing you to open and close the window from across the room.
Objectives
•
Learn how Infrared (IR) communication works.
•
Control a Servo Motor using specific angles.
•
Understand how to use Conditional Logic to map remote buttons to physical actions.
New Component: The IR Receiver & Remote
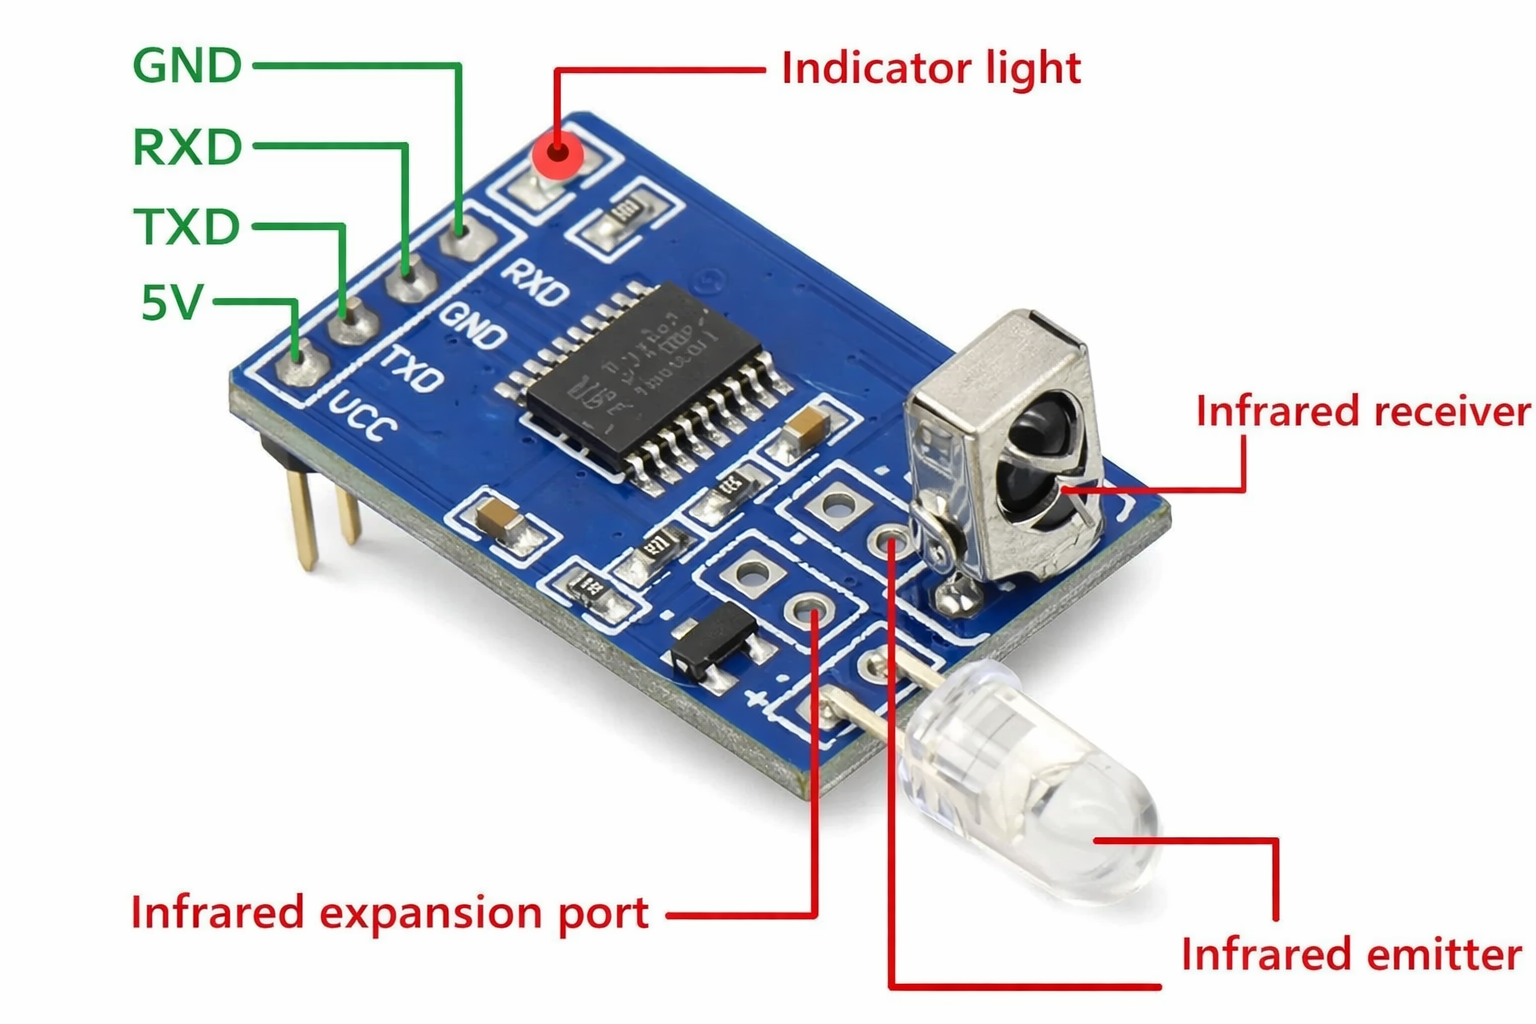
IR Receiver Module
The IR receiver is like a "Digital Eye" that only sees infrared light.
How it works: When you press a button on the remote, it flashes an invisible pattern of light. The receiver "sees" this pattern and turns it into a unique number for the computer.
Line of Sight: Infrared light usually needs a clear path. If you hide the receiver behind a wall, it won't see the remote!
IR Receiver
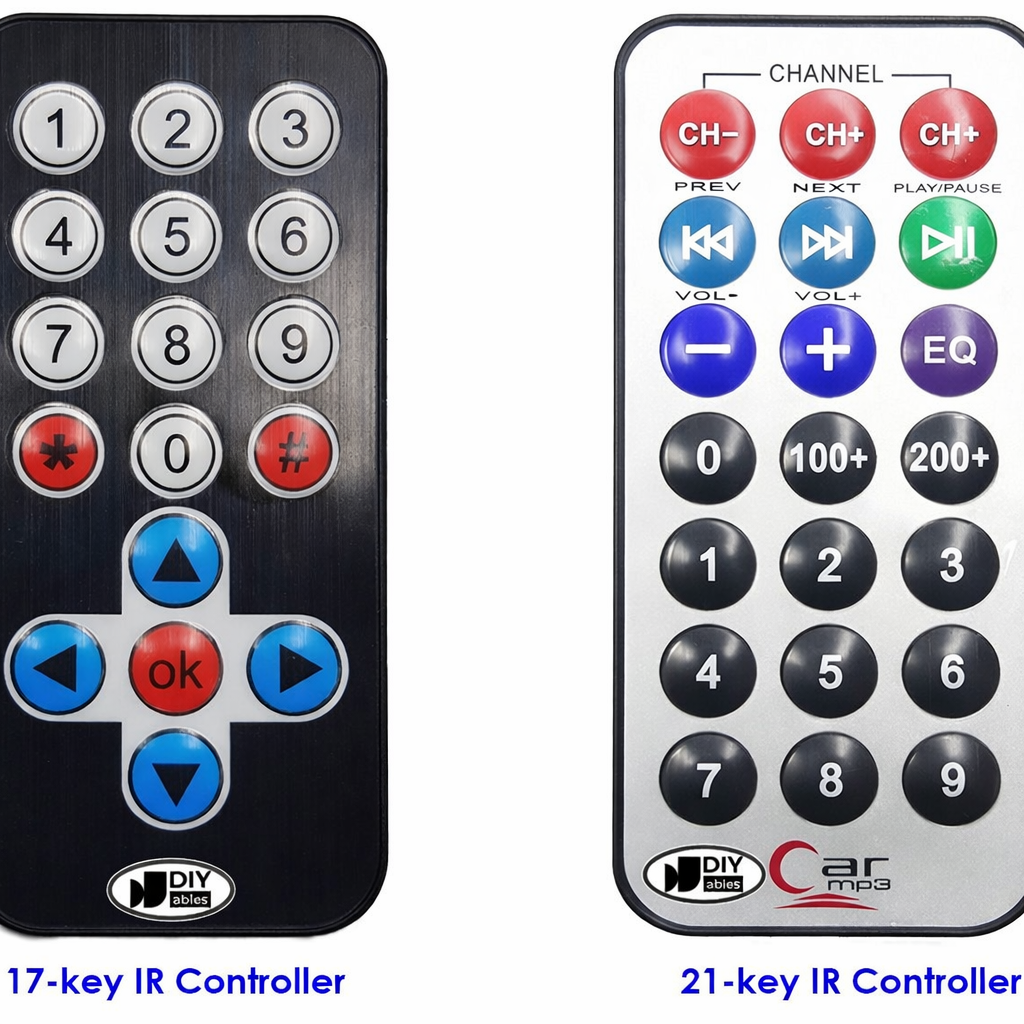
IR Remote Control
IR Remote
Main Components of an IR Remote
Inside the Remote
•
Buttons / Keypad
•
Battery
•
Microcontroller chip
•
IR LED transmitter
How an IR Remote Works
When you press a button on the remote:
1.
A microcontroller inside the remote detects the button press.
2.
It generates a digital code for that button.
3.
An IR LED flashes rapidly in a coded pattern.
4.
The device receives the signal through an IR receiver sensor.
5.
The device decodes the signal and performs the command.
Example:
•
Press 1 → 0xFFA250
Meet the Components
You will use:
•
IR Receiver Module
•
IR Remote Control
•
Servo Motor
•
RGX Control Board
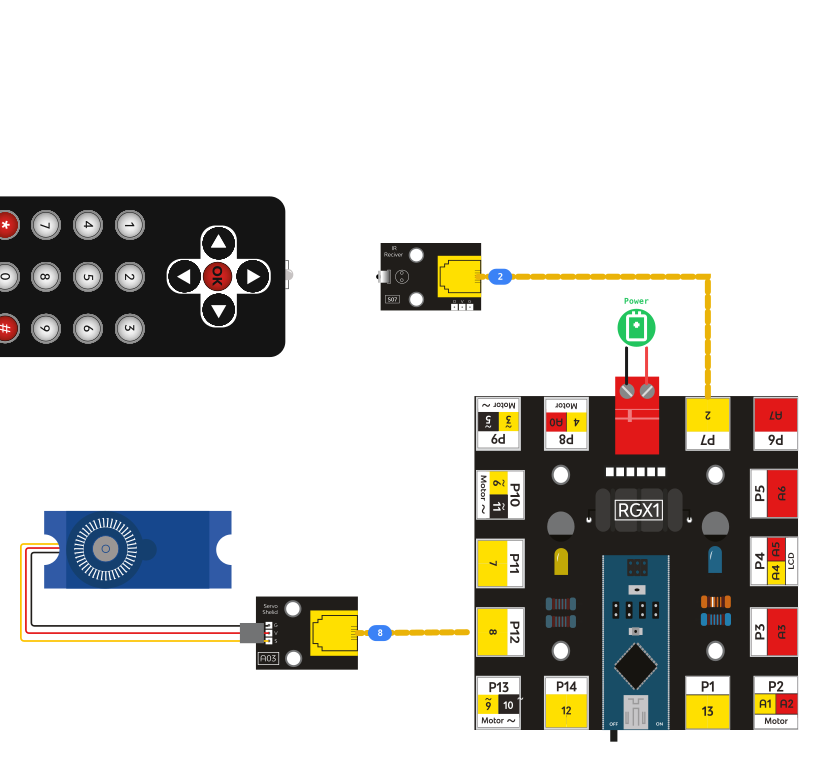
Hardware Connections
Component | PIN Connection |
IR Receiver | Digital PIN 2 |
Servo Motor | Digital PIN 8 |
Make sure all connections are secure using RJ11 cables.
RGX connection
How the System Works
The system waits for a signal from the IR remote.
Remote Button | Servo Action | Window State |
Open Button | Rotate to 180° | Window Opens |
Close Button | Rotate to 0° | Window Closes |
•
When a valid IR signal is received → the servo moves
•
When no signal is received → the system waits
This allows wireless control without touching the system.
Coding the System
Follow the structure below to build your program:
Step 1: Setup IR Input
Use the IR Receive block.
•
Set the PIN# to 12.
•
Set the variable name to ir_item.
•
Ensure Serial Print is active so you can see the codes in your monitor.

Setup IR Input
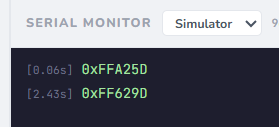
serial print
Step 2: Open Window Command
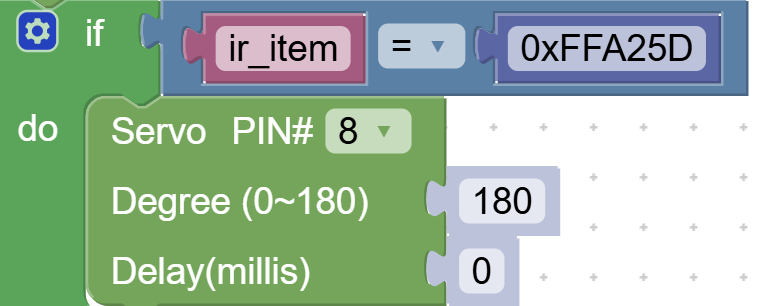
clicking nb1
•
IF Logic: Check if ir_item is equal to 0xFFA25D.when click nb1 .
•
Action: Use the Servo PIN# 8 block and set the Degree to 180.
Step 3: Close Window Command
Else If Logic: Check if ir_item is equal to 0xFF629D.
•
Action: Use the Servo PIN# 8 block and set the Degree to 0.
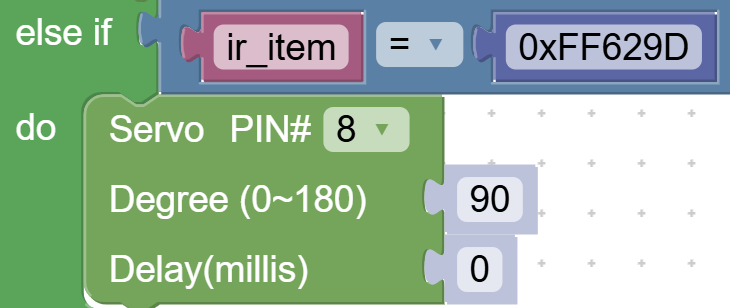
clicking nb2
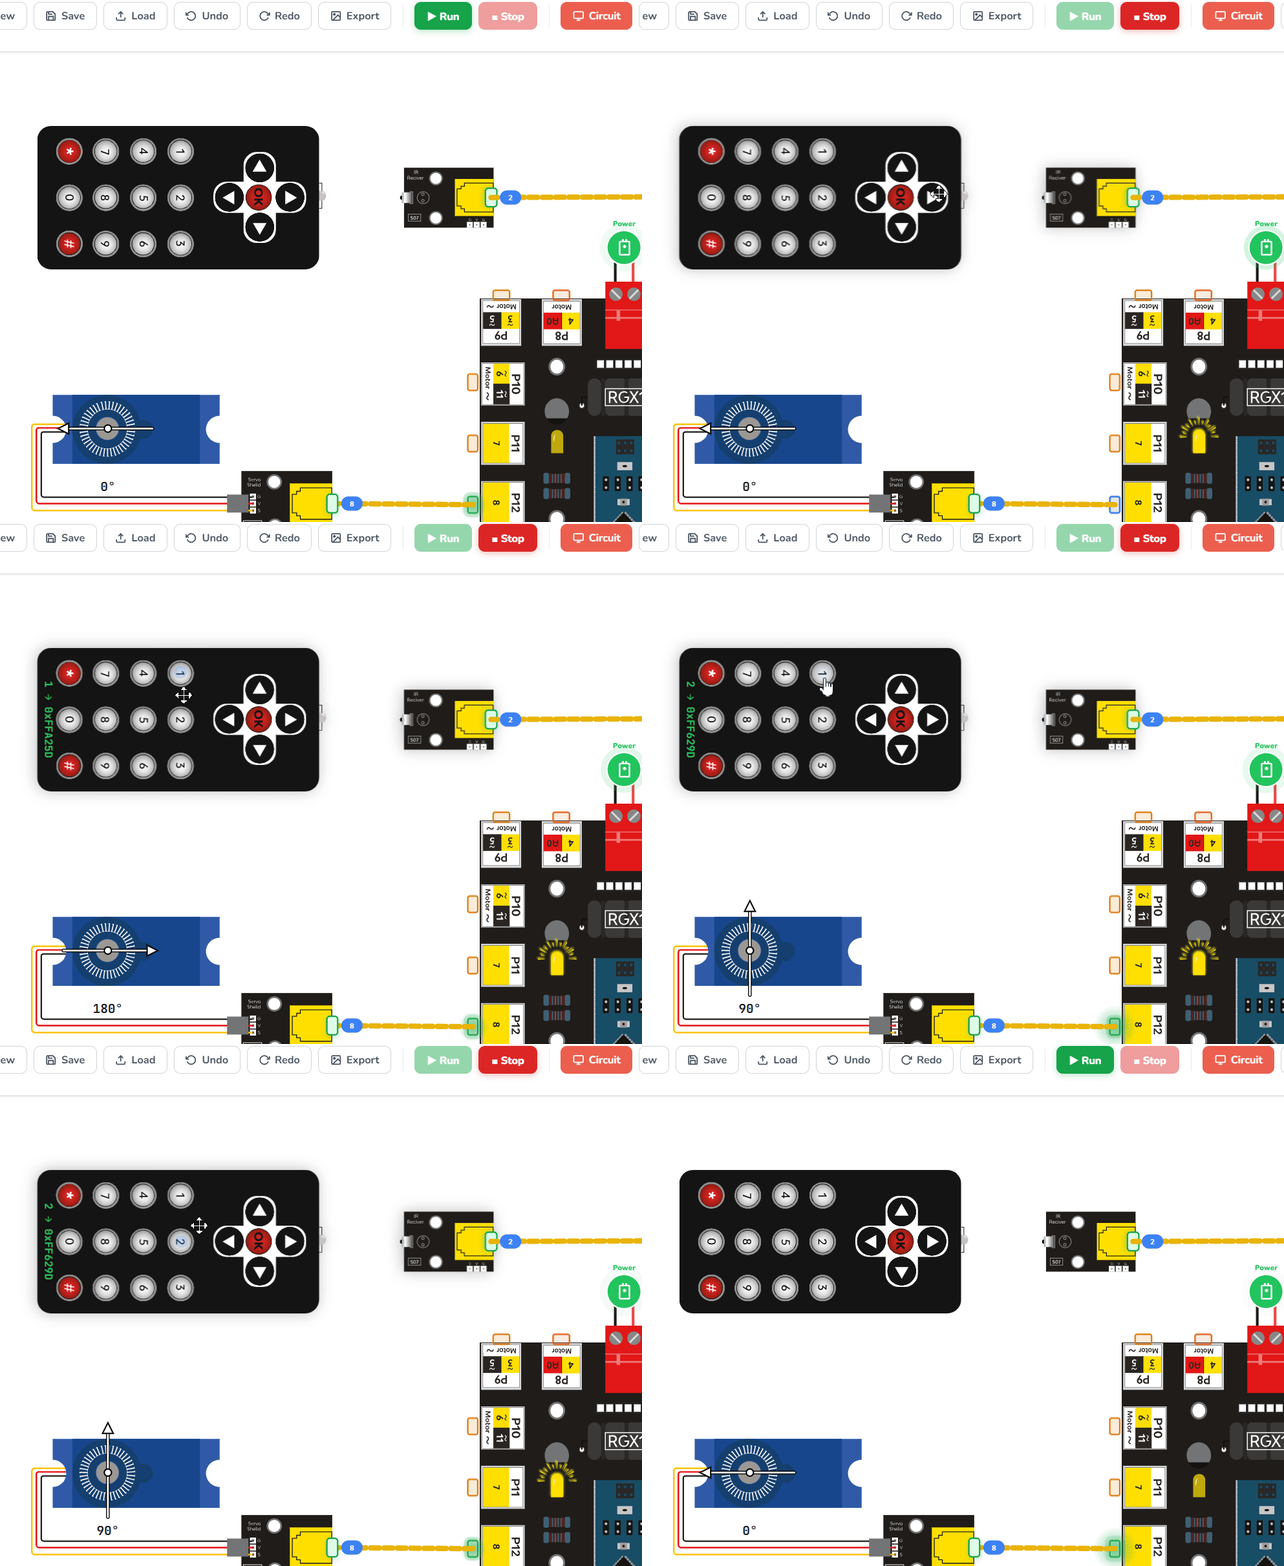
Running the code
Test Your System
1.
Open the Serial Monitor: Upload your code and open the monitor in your software.
2.
The Open Button: Press the button you chose for "Open." The monitor should show0xFFA25D and the servo should rotate to 180°.
3.
The Close Button: Press the button you chose for "Close." The monitor should show 0xFF629D and the servo should return to 0°. Note: If your remote sends different numbers, simply copy the number from the Serial Monitor and paste it into your code!
Improve & Extend
Try upgrading your smart window controller:
•
Step-by-Step Opening: Instead of jumping to 180°, can you make the window open 10 degrees at a time using the Volume Up/Down buttons?
•
Auto-Lock: Add a logic where the window automatically closes (moves to 0°) after 10 seconds of being open.
•
Visual Feedback: Add an LED that turns Green when the window is fully open and Red when it is closed.