Overview
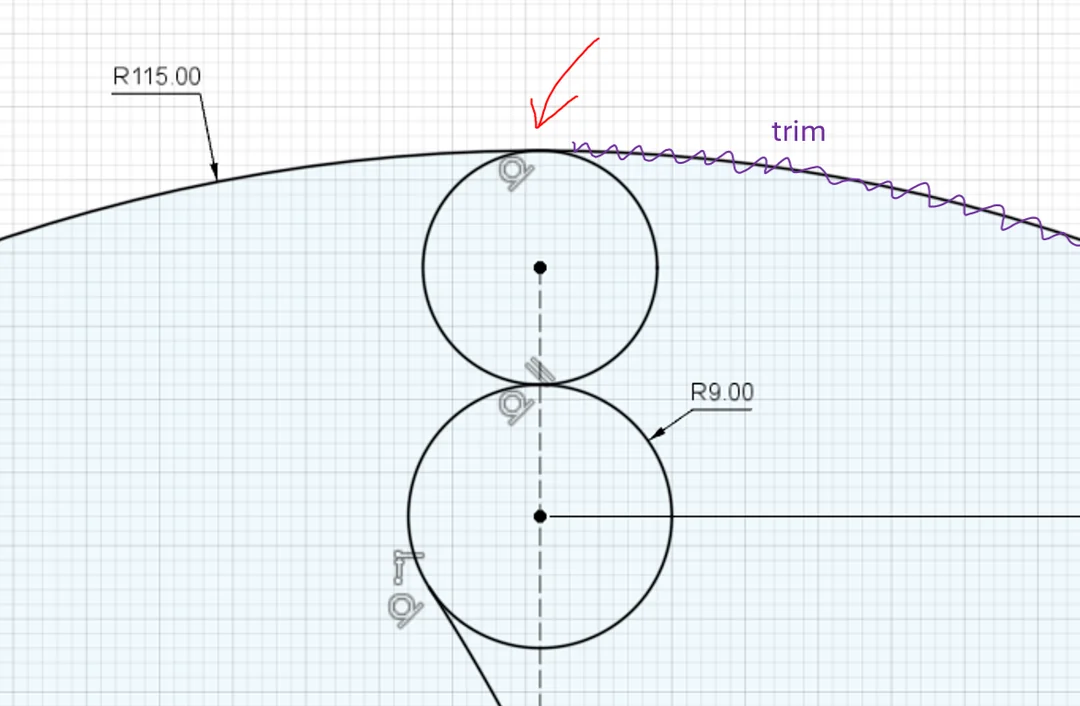
In this lesson, you will learn how to use the Tangent Constraint in Autodesk Fusion 360. The tangent constraint is used when a line, circle or arc needs to touch another curve smoothly without crossing it. This is very useful when creating mechanical parts that have rounded ends, circular features and sloped sides connected smoothly together.
Learning Objectives
By the end of this lesson, you will be able to
•
Understand what tangent means in sketching.
•
Apply the Tangent Constraint between a line and a circle.
•
Use tangent lines to connect circles smoothly.
•
Combine dimensions and constraints to control the sketch.
What is Tangency?
A tangent line touches a circle at only one point.
It does not cut through the circle.
It does not leave a gap.
It only touches the circle smoothly.
In Fusion 360, the Tangent Constraint forces two sketch elements to touch smoothly.
You can apply tangent between:
•
A line and a circle.
•
A line and an arc.
•
Two circles.
•
A circle and an arc.
•
Two arcs.
Simple Tangent Constraint Example
A tangent constraint keeps two sketch elements touching smoothly.
In this example, the curve stays connected to the circle without crossing it or leaving a gap.
Mirroring
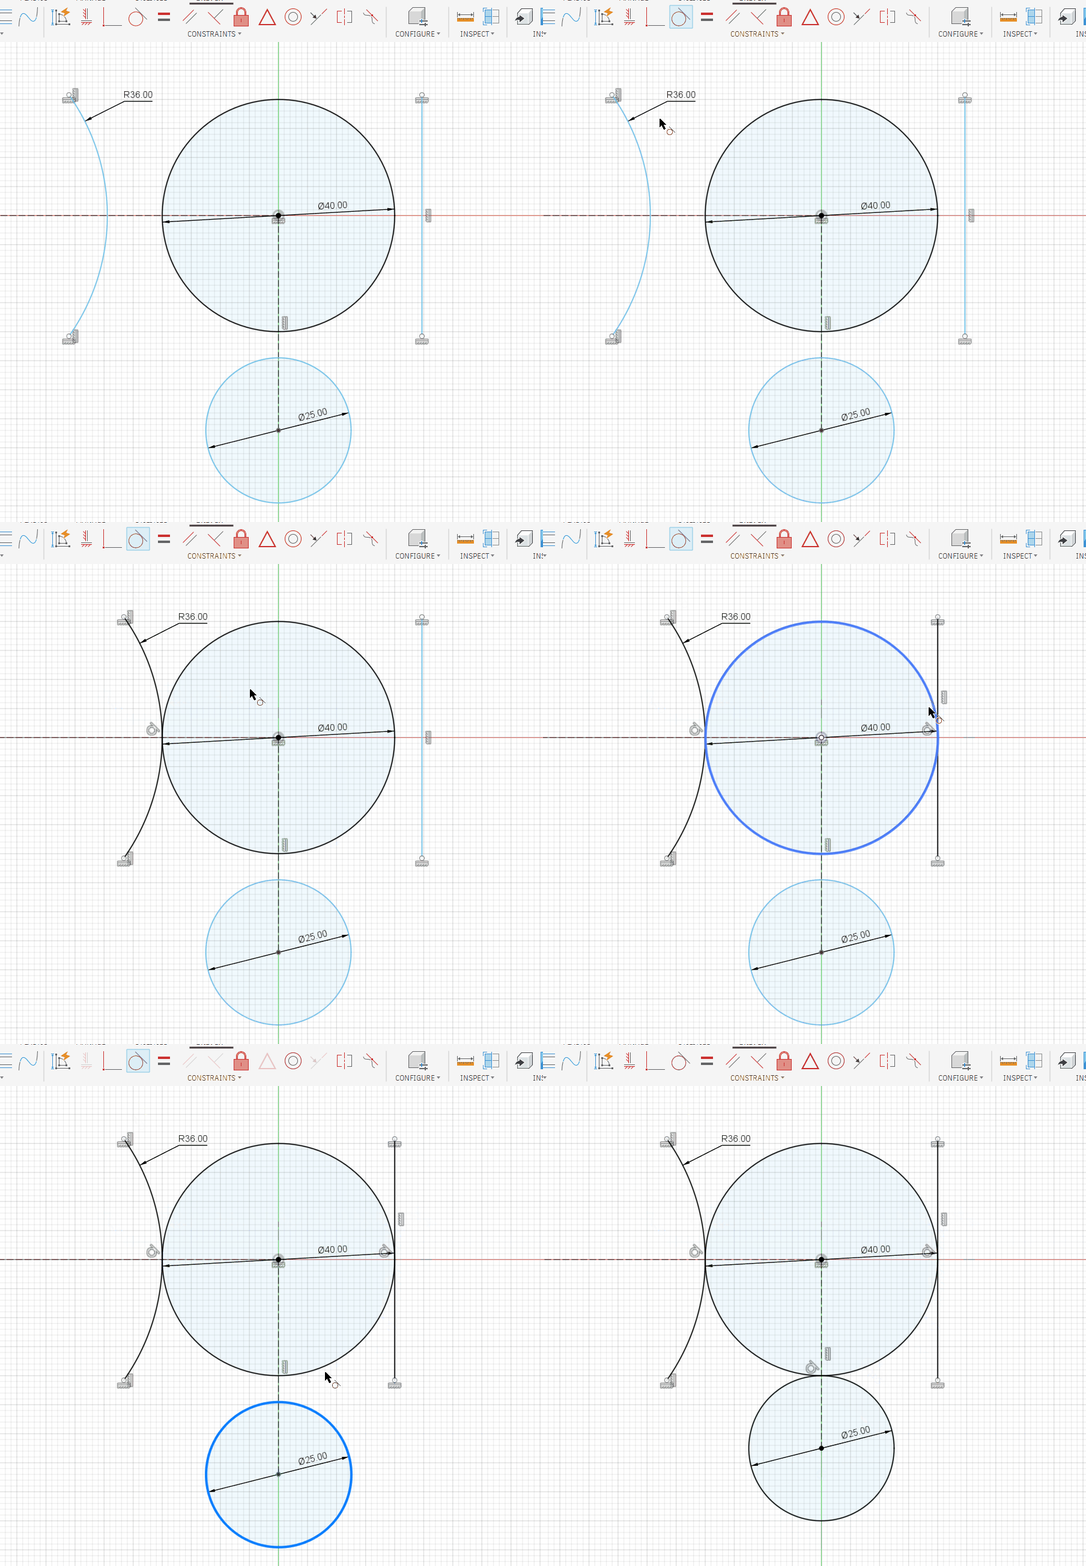
This video shows how to use Mirror to copy tangent sketch geometry to the opposite side.
The tangent lines are first created on one side, then mirrored across the centerline to make the sketch symmetrical.
Important Notes
If the tangent line cuts through the circle, the tangent constraint was not applied correctly.
If the sketch moves in a strange way, add dimensions first, then apply constraints.
If the profile cannot be selected, check for:
•
Open gaps.
•
Extra lines.
•
Untrimmed circle parts.
•
Missing constraints.
A good sketch should be clean, controlled and easy to edit.
Common Mistakes
•
Drawing the line manually and thinking it is tangent.
•
Forgetting to apply tangent to both circles.
•
Adding too many dimensions before understanding the needed constraints.
•
Leaving extra circle segments inside the profile.
•
Trying to extrude before the sketch is fully closed.
Practice Tasks
1
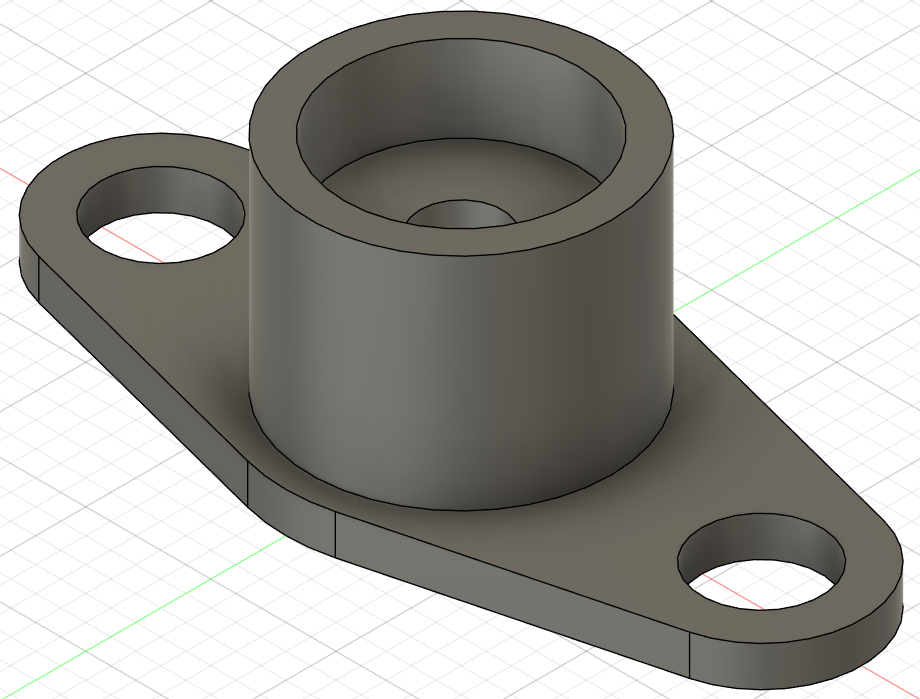
Use the drawing as a reference to build 3D model.
Create one side first, apply tangent connections, then mirror the geometry to keep the part symmetrical before extruding.
2
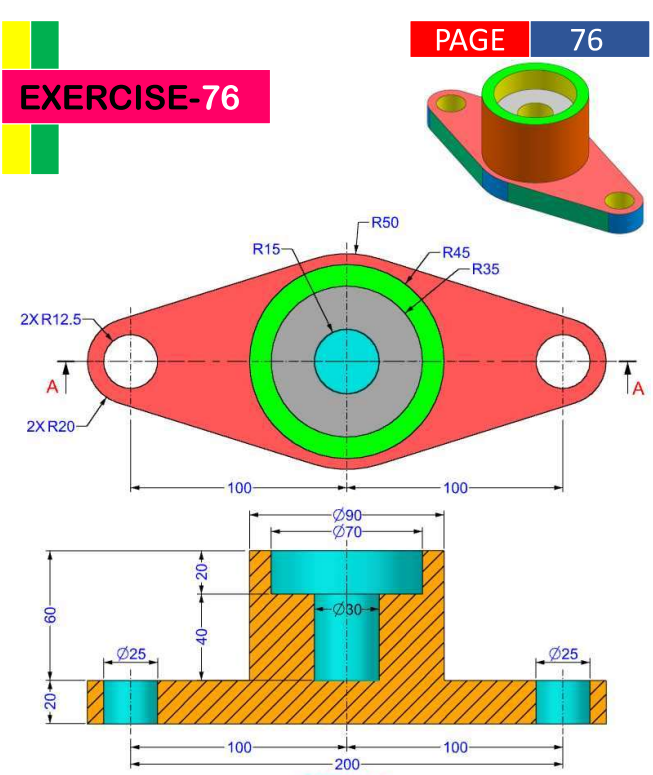
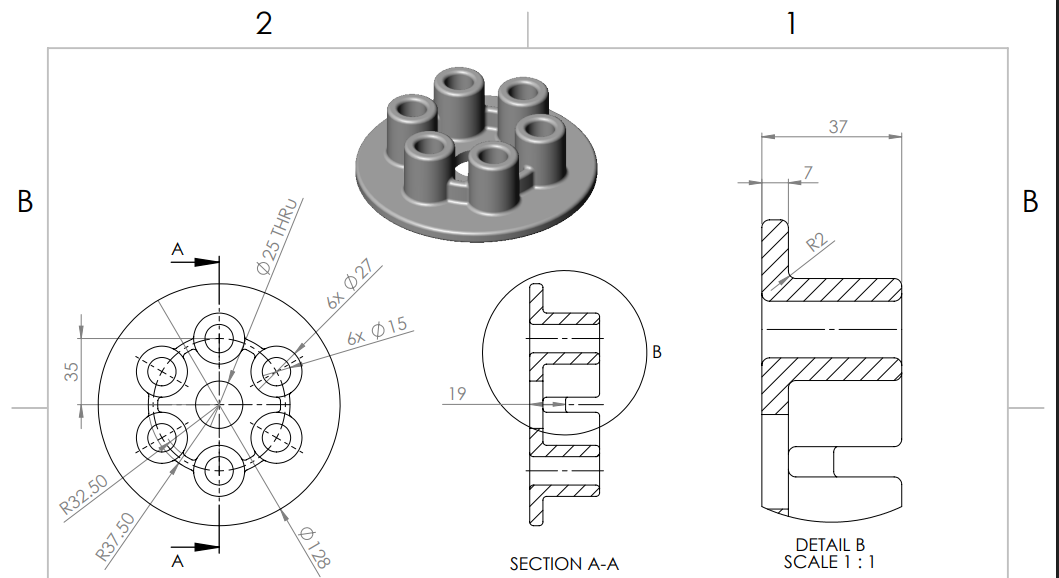
This practice task combines skills from previous lessons.
Use the drawing dimensions to create the circular base, holes, raised cylinders and cut sections. Focus on accurate sketching, constraints, extrudes and repeated circular features.
Reflection Questions
1.
What does the tangent constraint do?
2.
Why is tangent better than manually placing a line near a circle?
3.
What happens if the line is tangent to one circle but not the other?
4.
Why should dimensions and constraints be used together?
5.
How can you know if your sketch profile is closed?
6.
If the model does not update correctly after changing a dimension, what should you check first?