Overview
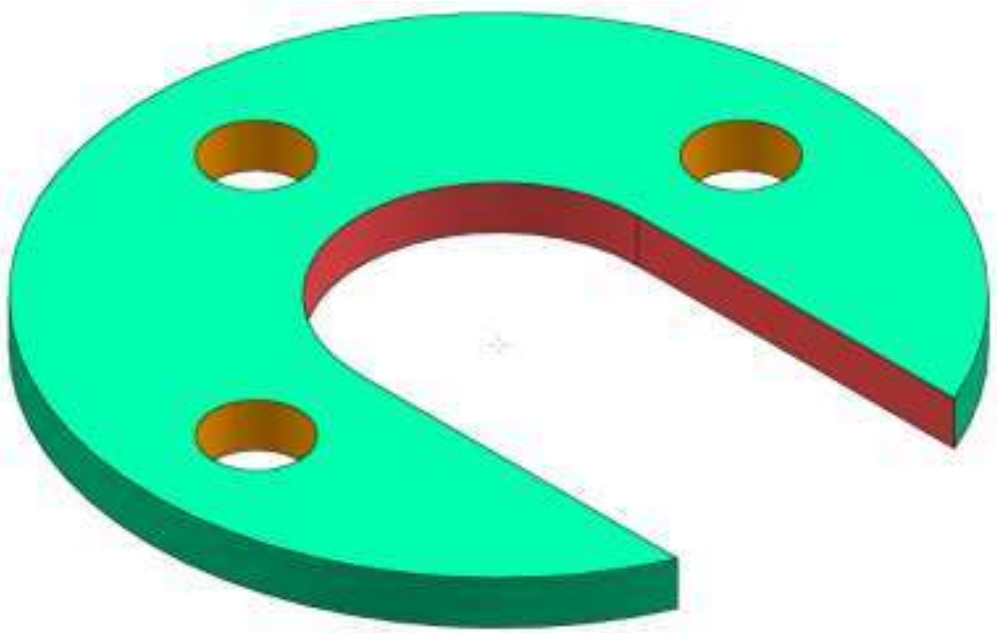
In this lesson, you will create a C-shaped circular plate and use the Circular Pattern tool to repeat one hole around a center axis.
Objectives
By the end of this lesson, you will be able to
•
Create a circular 3D body using sketches and extrusion.
•
Cut an opening in the circular plate.
•
Create one hole and repeat it using Circular Pattern.
•
Understand the difference between drawing many holes manually and using a parametric pattern.
Sketching
Let’s create the main sketch step by step.
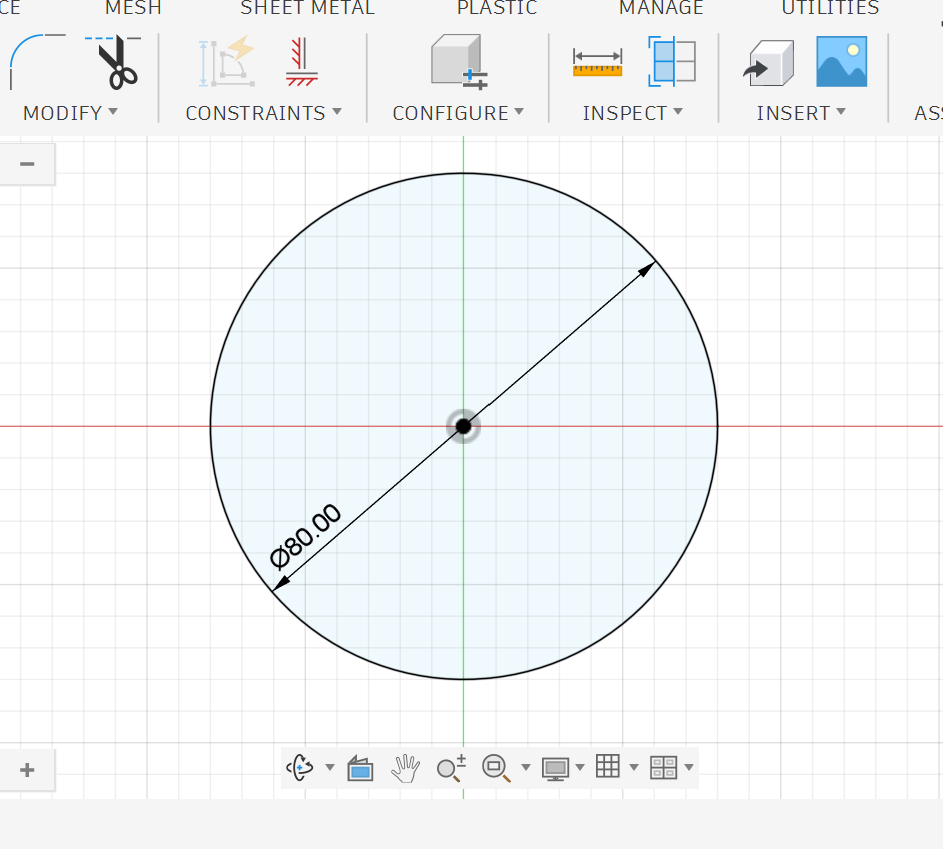
1. Draw the outer circle.
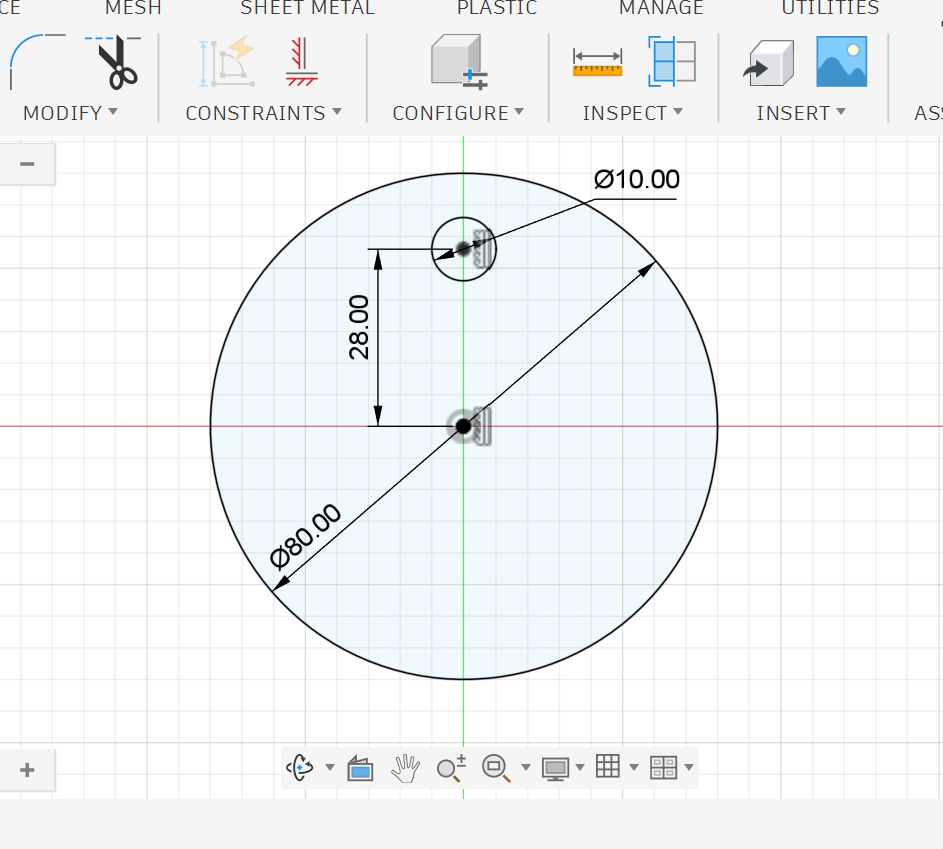
2. Draw the first small circle.
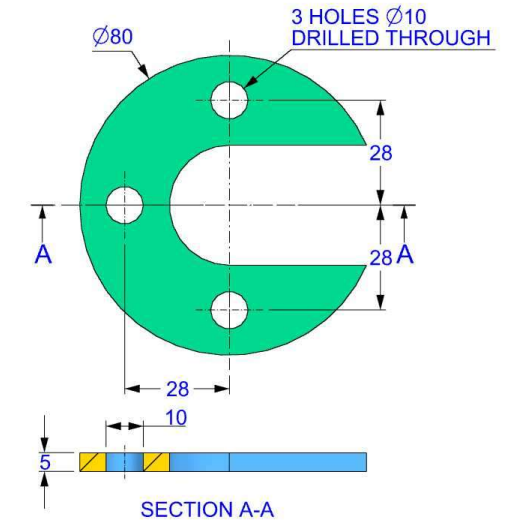
Find the middle circle diameter
•
The first small circle center is
28 mm above the origin.•
The distance from the small circle center to the top of the middle circle is
12 mm.•
So the radius of the middle circle is:
28 - 12 = 16 mm•
Therefore, the middle circle diameter is:
16 × 2 = 32 mm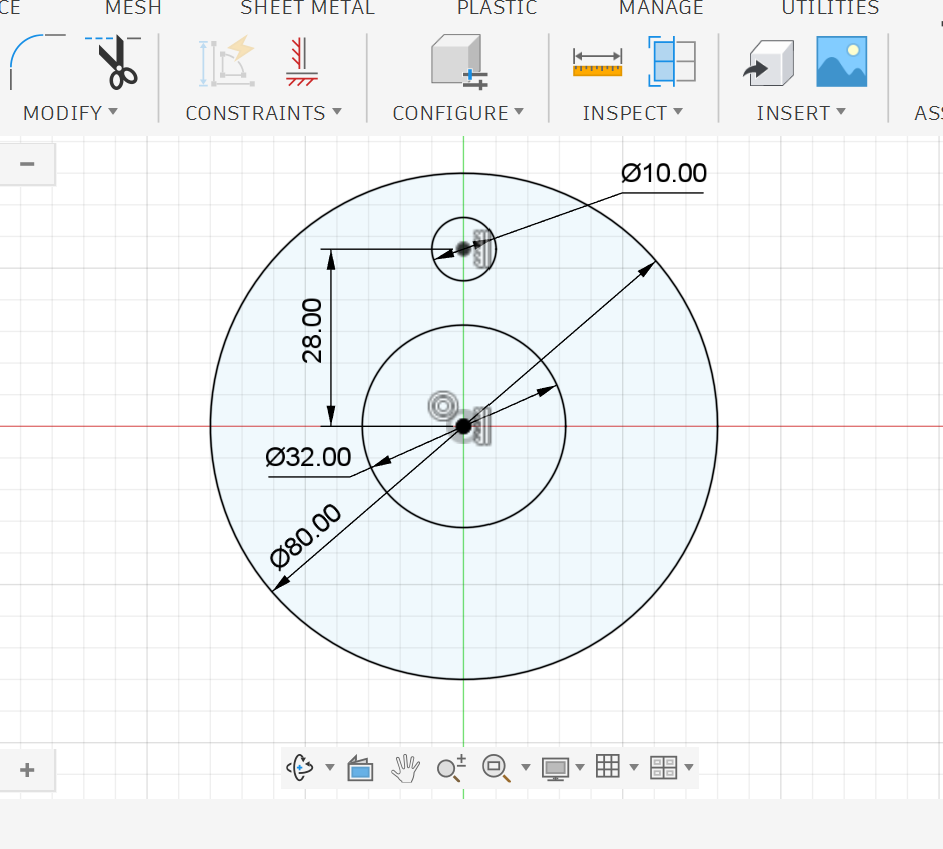
3. Now that you know the dimensions, draw the middle circle.
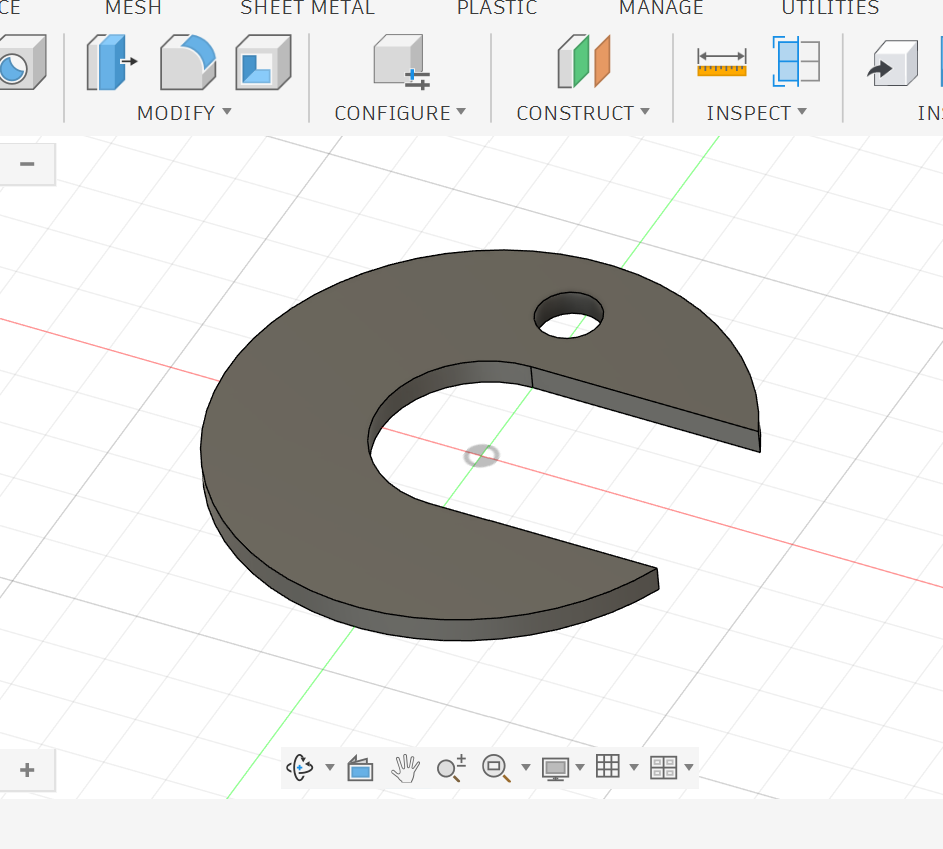
5. Extrude.
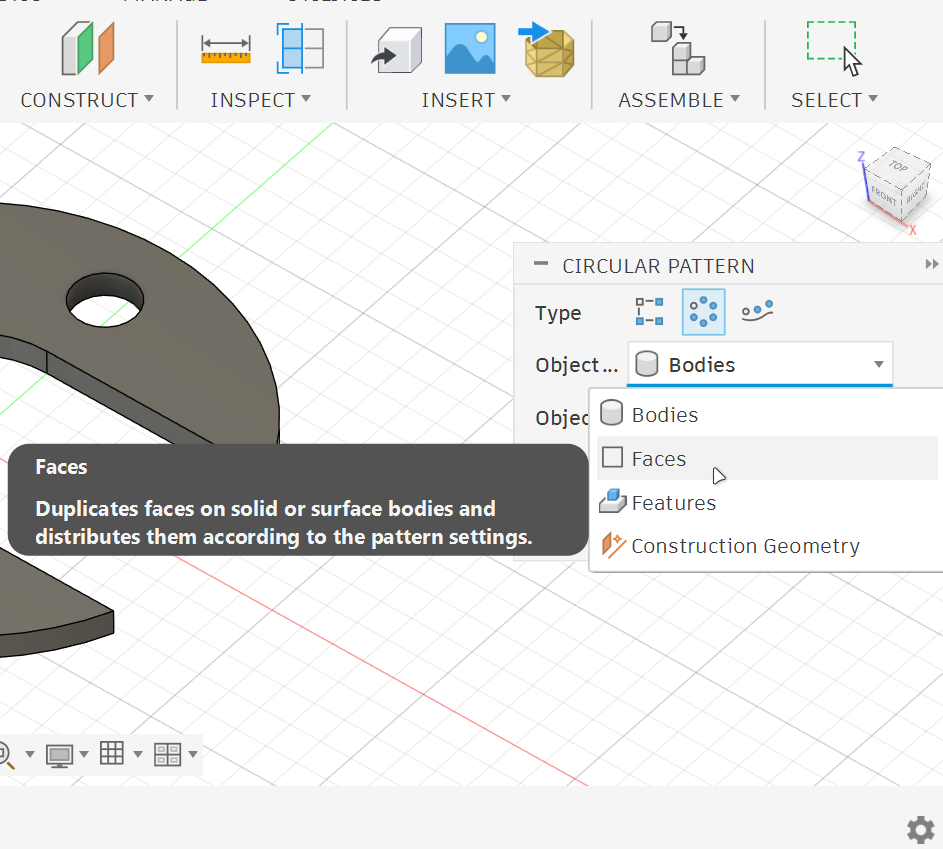
7. Select Face.
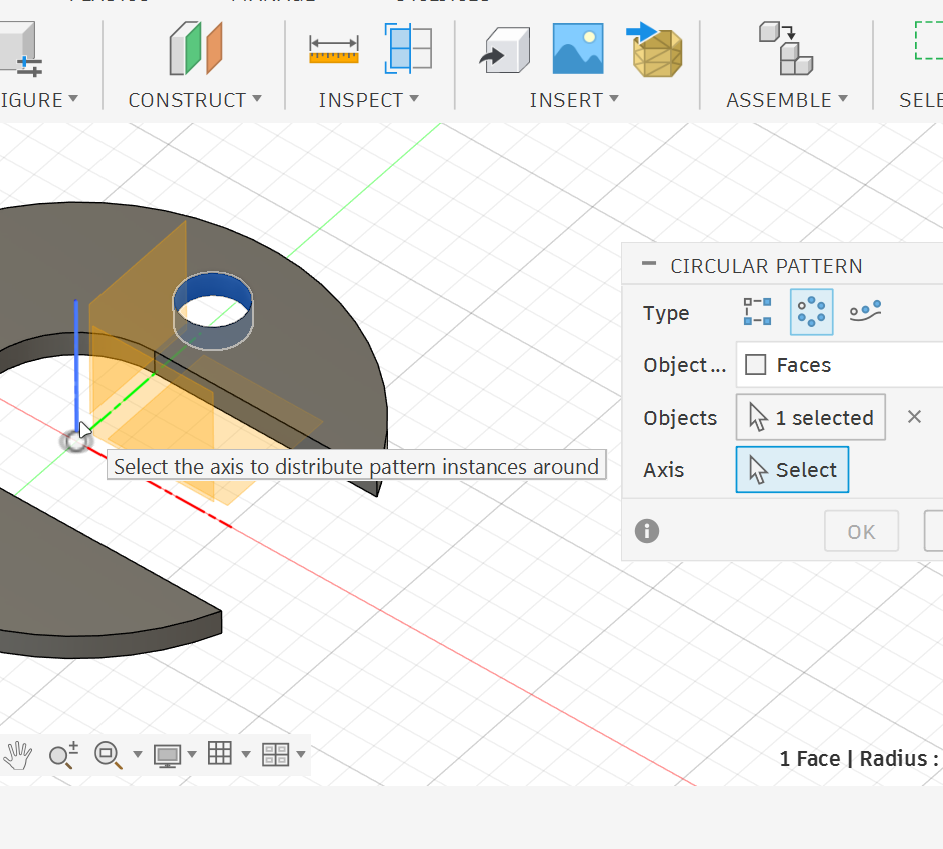
9. Select the Z axis (the middle axis).
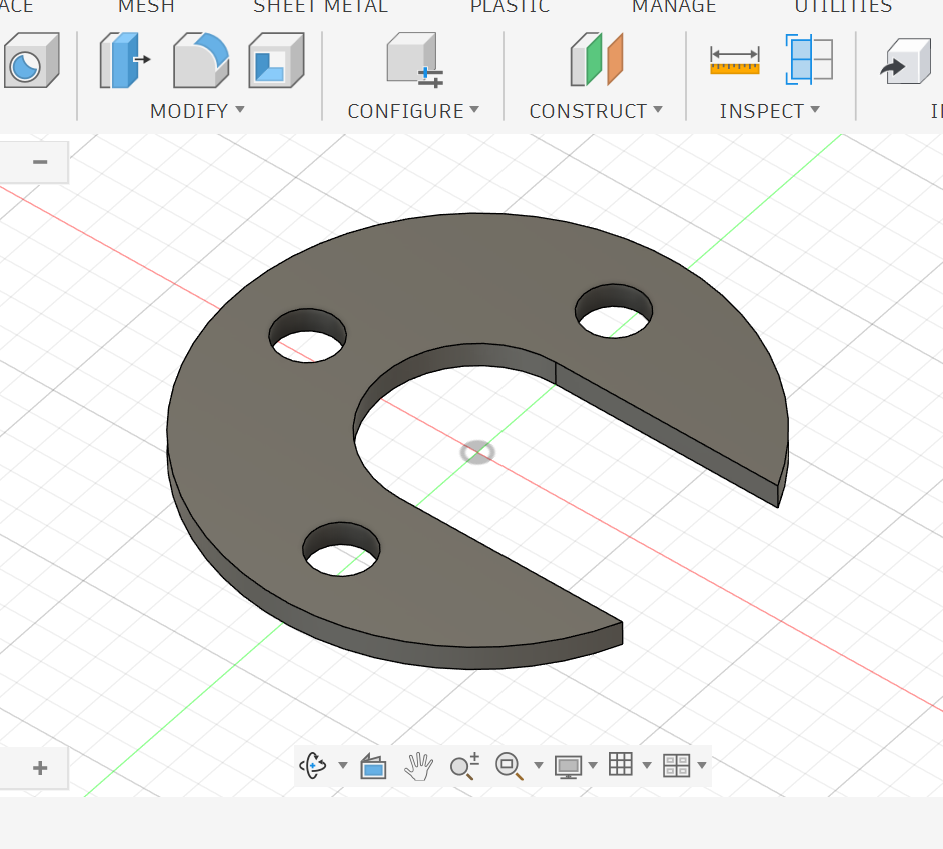
Success
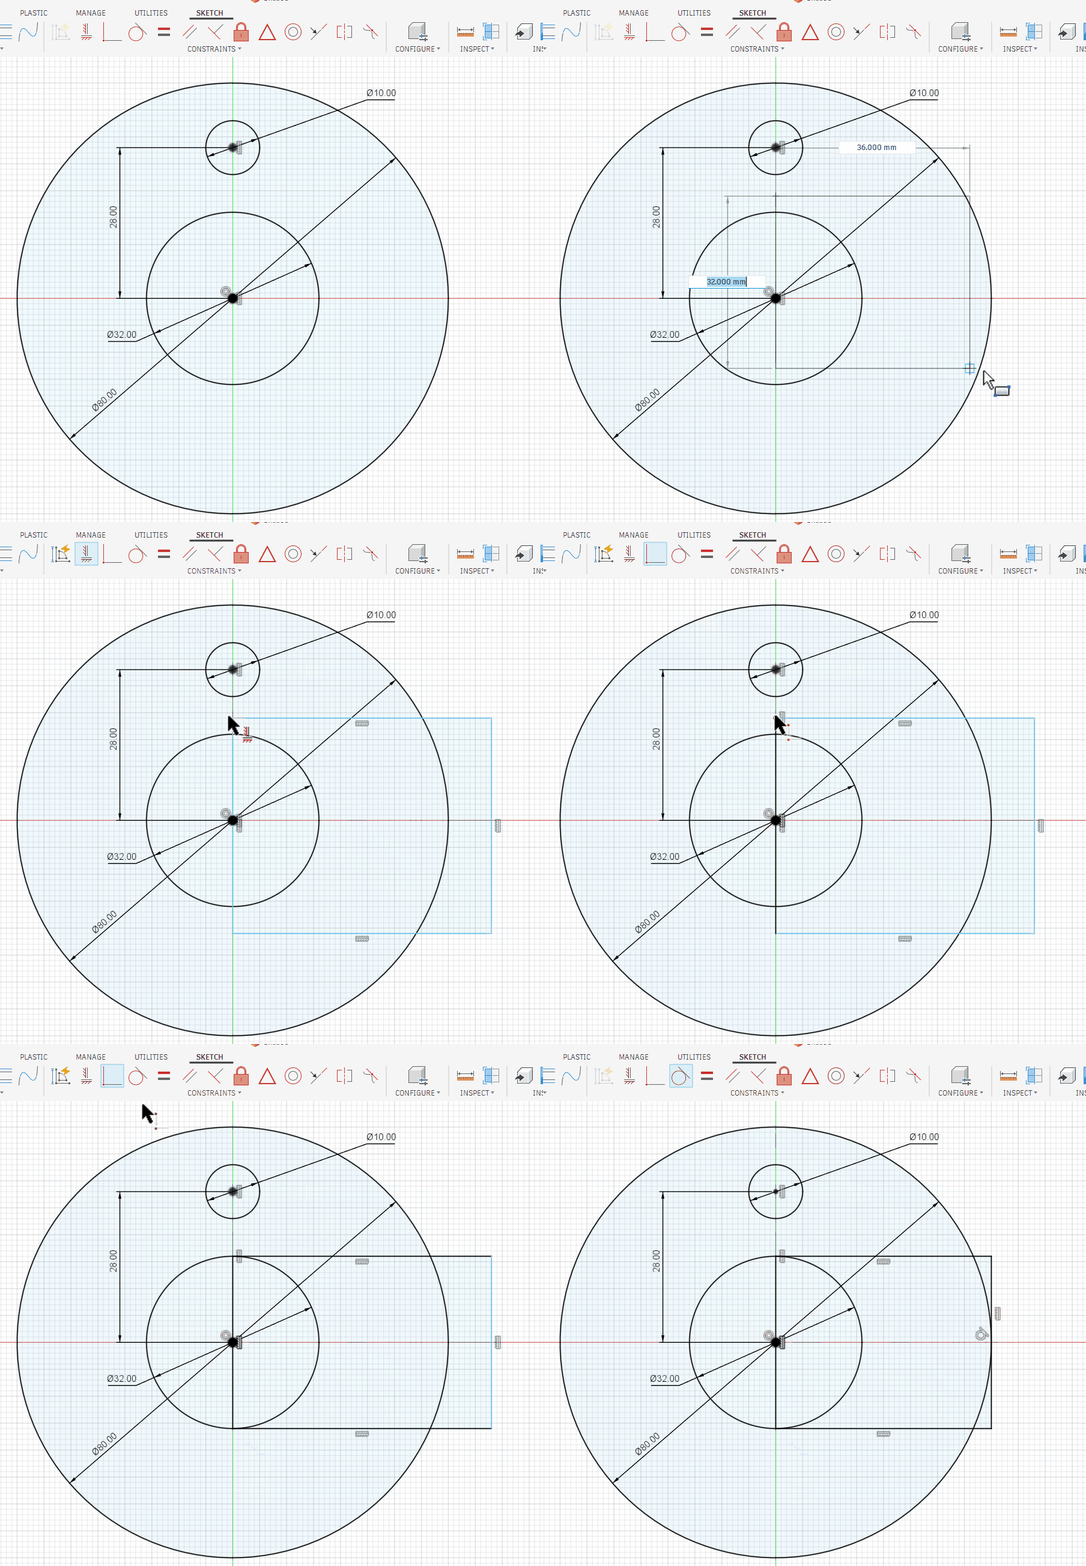
4. Watch the GIF carefully, then use the constraints to draw the rectangle.
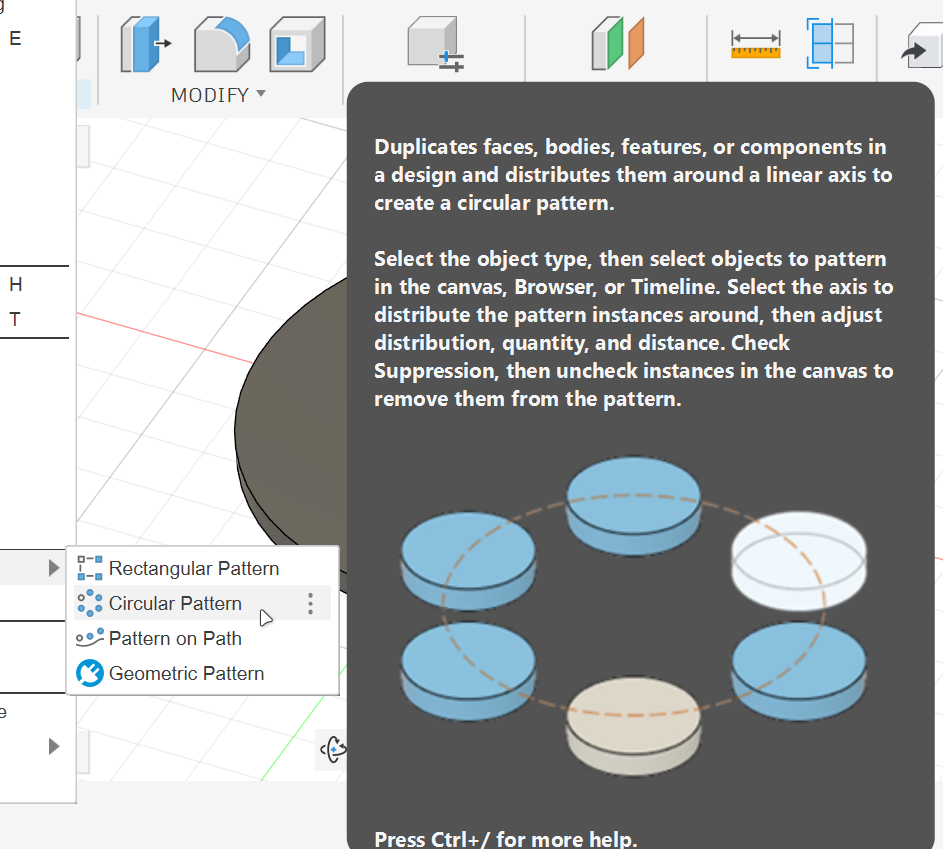
6. Circular pattern.
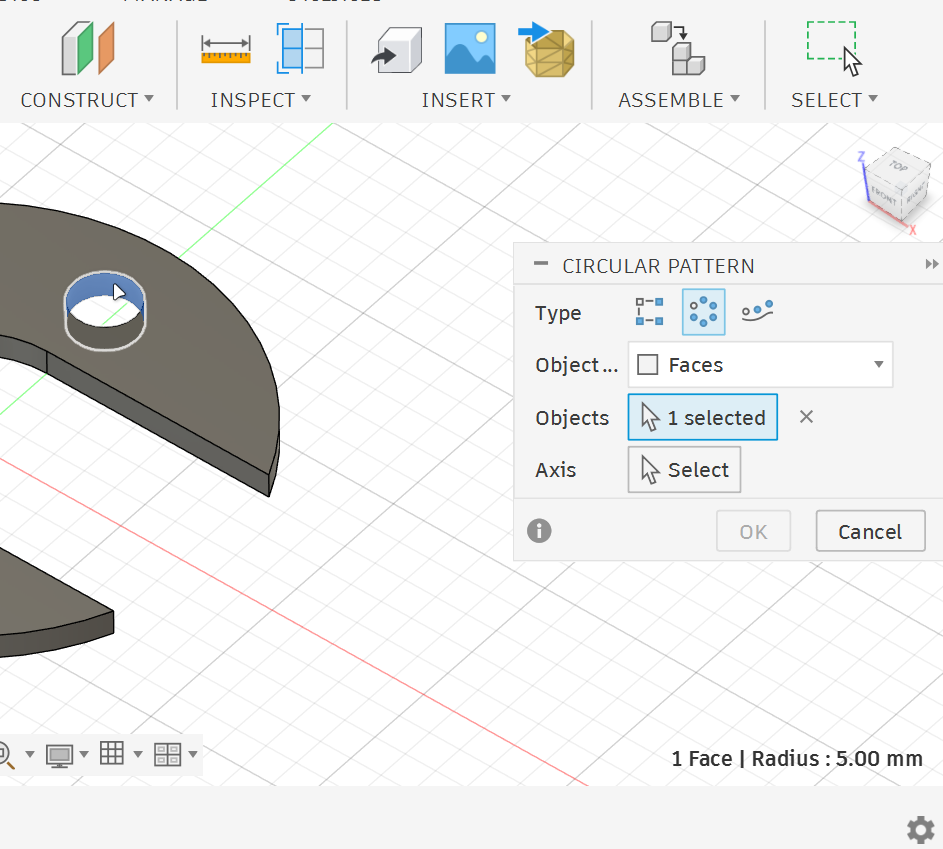
8. Select the small circle.
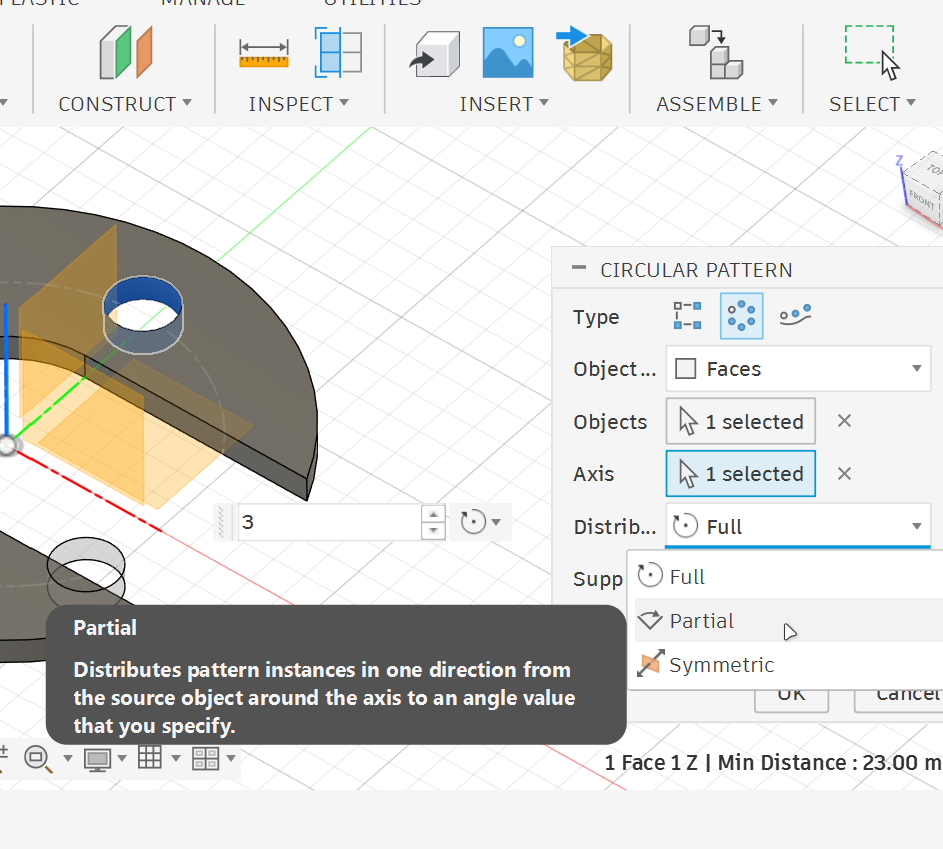
10. Distribution Partial.
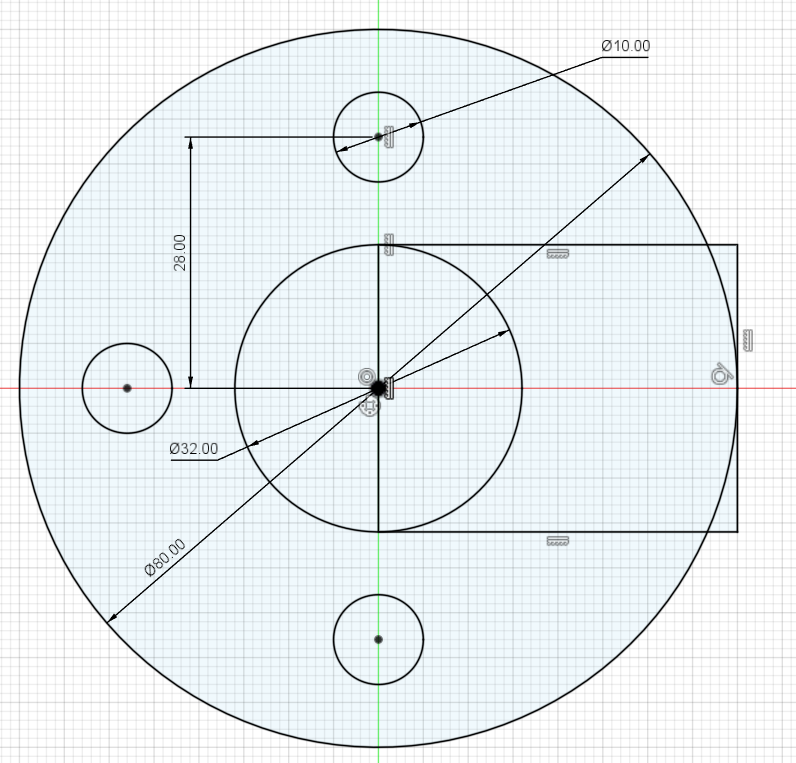
You can also try creating the pattern in Sketch. Give it a go and see how it turns out.
Key Concept
The Circular Pattern tool is useful when the same feature is repeated around a center point or axis. In this example, we only created one hole, then repeated it. This makes the model cleaner and easier to edit later.
Important Notes
•
Always choose the correct center axis for the circular pattern.
•
Use Feature Pattern when you want to repeat a 3D operation, such as a hole cut.
•
Use dimensions and constraints to keep the sketch accurate.
•
Check the final model from different views to make sure all holes go through the body correctly.
Practice Task
Create the same circular part again, then test if your sketch is fully controlled by editing the main dimensions.
After finishing the model, make these changes:
•
Change the outer circle from
Ø80 mm to Ø90 mm.•
Change the middle circle from
Ø32 mm to Ø40 mm.•
Change the small hole diameter from
Ø10 mm to Ø12 mm.•
Change the distance of the first small circle from the center from
28 mm to 32 mm.After each change, check if the model updates correctly.
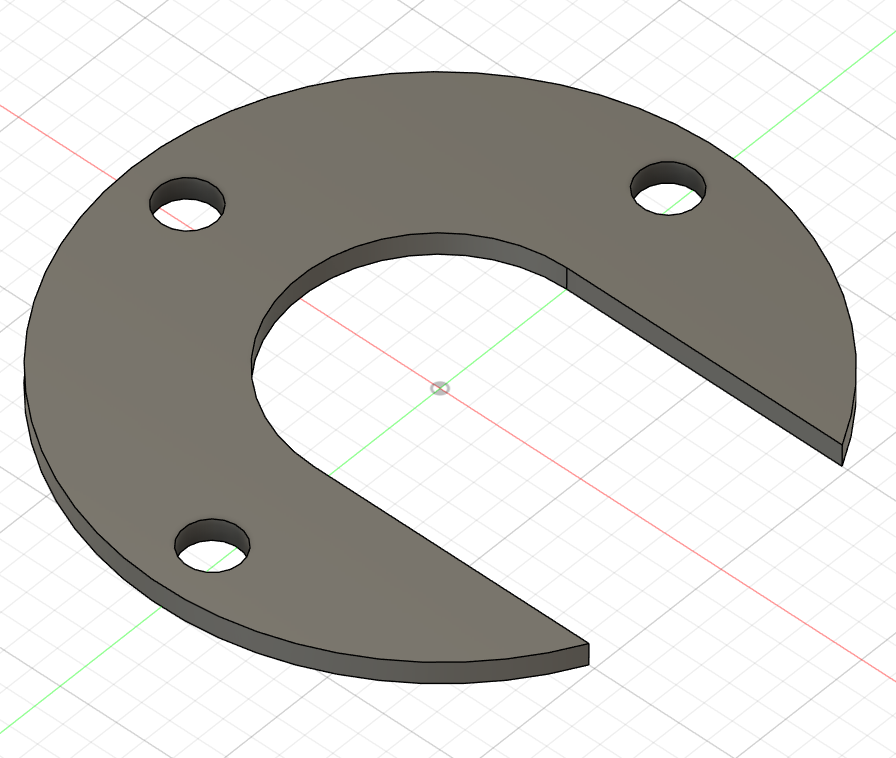
The rectangle opening should stay aligned with the center of the circle, its height should follow the middle circle, and its right side should stay tangent to the outer circle.
The circular pattern should still create three holes correctly around the center.
If something does not update correctly, go back to the sketch and check which constraint or dimension needs to be fixed.
Reflection Questions
•
What is the benefit of using Circular Pattern instead of drawing each hole manually?
•
How did we calculate the
Ø32 mm middle circle?•
Why is it important to use constraints when drawing the rectangle opening?
•
What happened when you changed the circle dimensions?
•
Which part of the sketch was easiest to edit? Why?
•
Which part of the sketch needed the most careful constraints?