Overview
In this lesson, you learn how to use the Revolve feature to create round and symmetrical 3D objects. Unlike Extrude, which pushes a sketch in a straight direction, Revolve rotates a sketch profile around an axis. This makes it very useful for creating parts such as cylinders, shafts, wheels, rings, knobs, pins and mechanical components with circular shapes.
Objectives
By the end of this lesson, you should be able to
•
Understand the difference between Extrude and Revolve.
•
Create a 3D body by rotating a 2D sketch around an axis.
•
Select the correct profile and axis for the Revolve command.
•
Use a full 360° revolve or a partial revolve angle.
•
Read technical drawings and convert them into revolved 3D models.
•
Add details such as fillets and revolved cuts.
What is the Revolve Feature?
The Revolve feature creates a 3D shape by rotating a 2D profile around a selected axis.
To use Revolve correctly, you need two main things:
1.
Profile
A closed sketch area that will be rotated.
A closed sketch area that will be rotated.
2.
Axis
A line, sketch line, construction line or model edge that the profile rotates around.
A line, sketch line, construction line or model edge that the profile rotates around.
When the profile rotates 360°, it creates a complete round body.
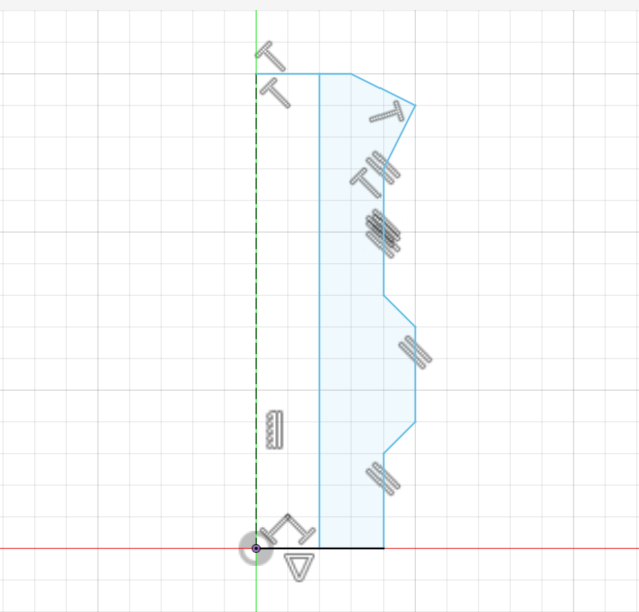
1. Closed profile.
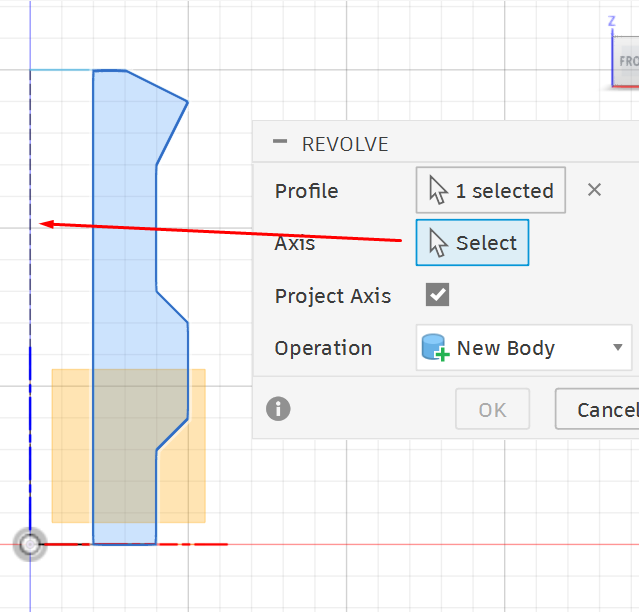
4. Select axis.
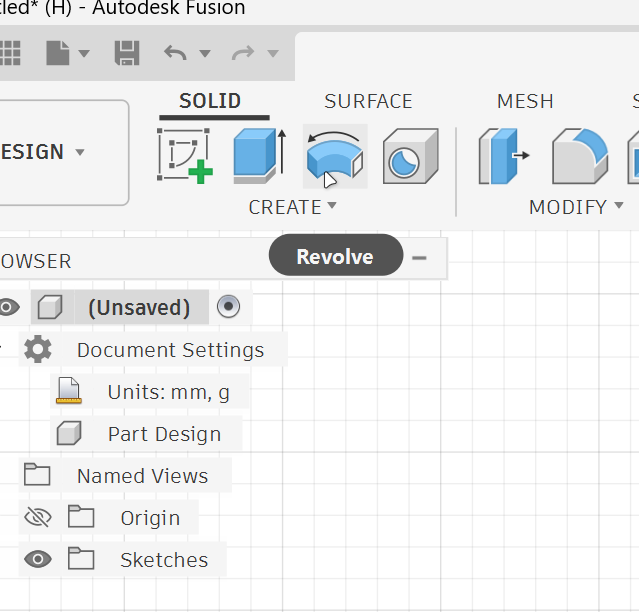
2. Solid tab --> Revolve.
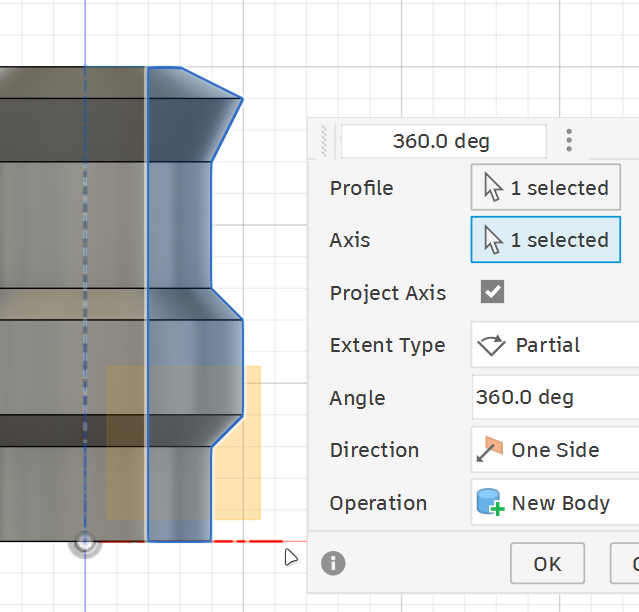
5. Click OK.
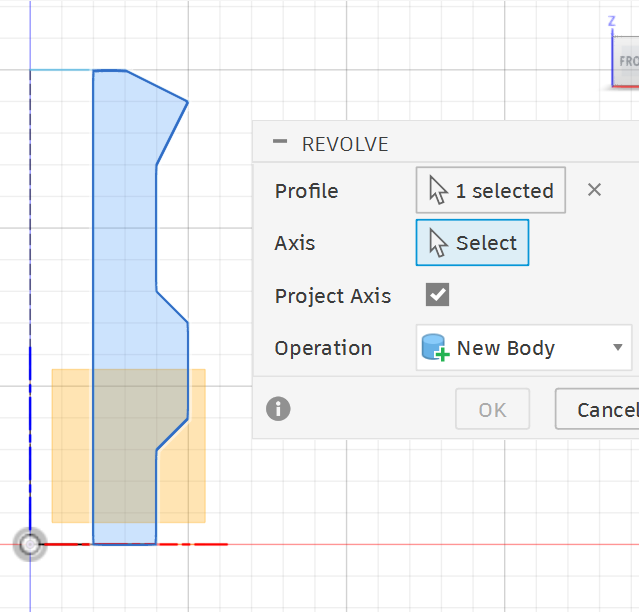
3. Select profile.
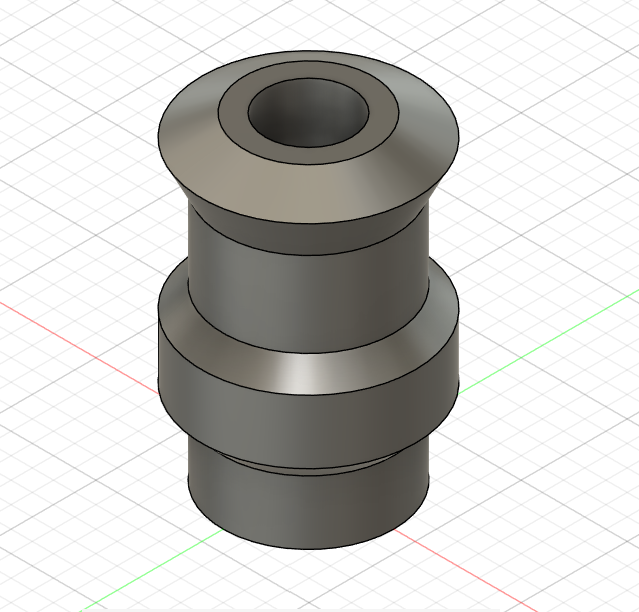
Success
Revolve vs Extrude
Extrude takes a 2D sketch and pushes it in a straight direction.
Example:
•
A rectangle becomes a box.
•
A circle becomes a cylinder.
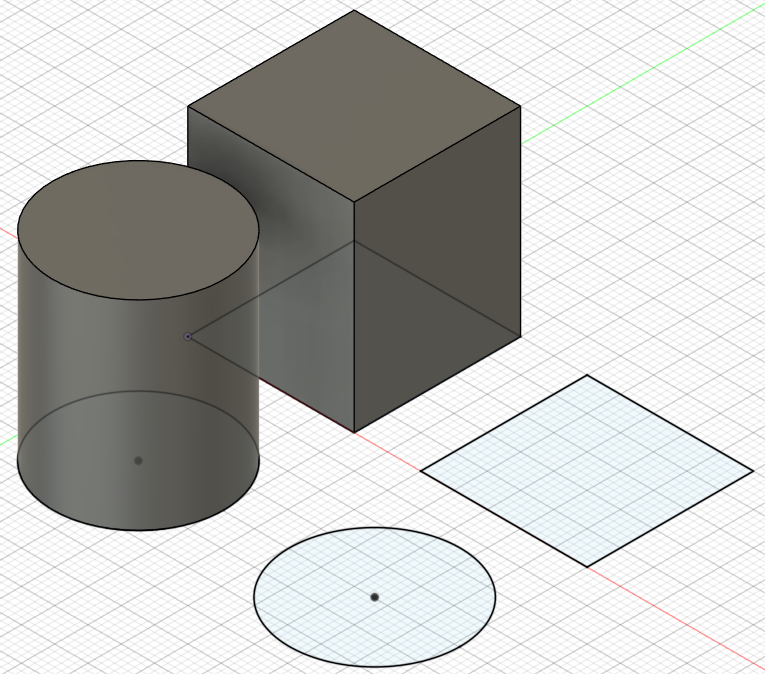
Revolve takes a side profile and spins it around an axis.
Example:
•
A half-circle around a centerline becomes a sphere or rounded end.
•
A stepped side profile becomes a shaft with different diameters.
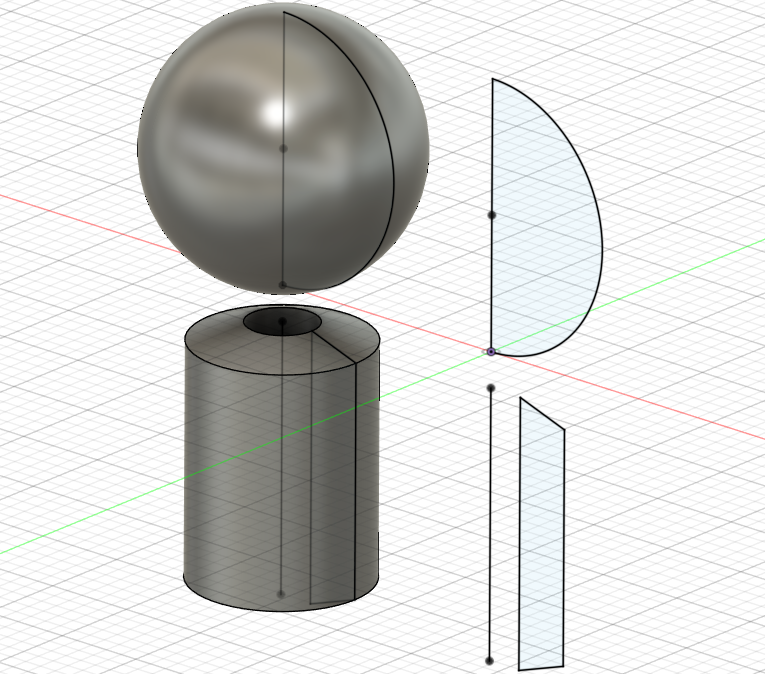
Use Revolve when the object is circular or symmetrical around a center axis.
Important Revolve Settings
Profile
This is the closed sketch region that will be rotated.
If your profile is not closed, Fusion 360 will not allow you to select it properly.
Axis
This is the centerline of rotation.
The profile rotates around this line to create the 3D shape.
Angle
The angle controls how much the profile rotates.
Examples:
•
360° creates a full round object.
•
180° creates half of the object.
•
90° creates a quarter shape.
•
315° creates an almost complete shape with an opening.
Operation
The operation controls how the revolve affects the model.
•
New Body creates a new object.
•
Join adds the revolved shape to an existing object.
•
Cut removes material from the model.
Key Rule When Using Revolve
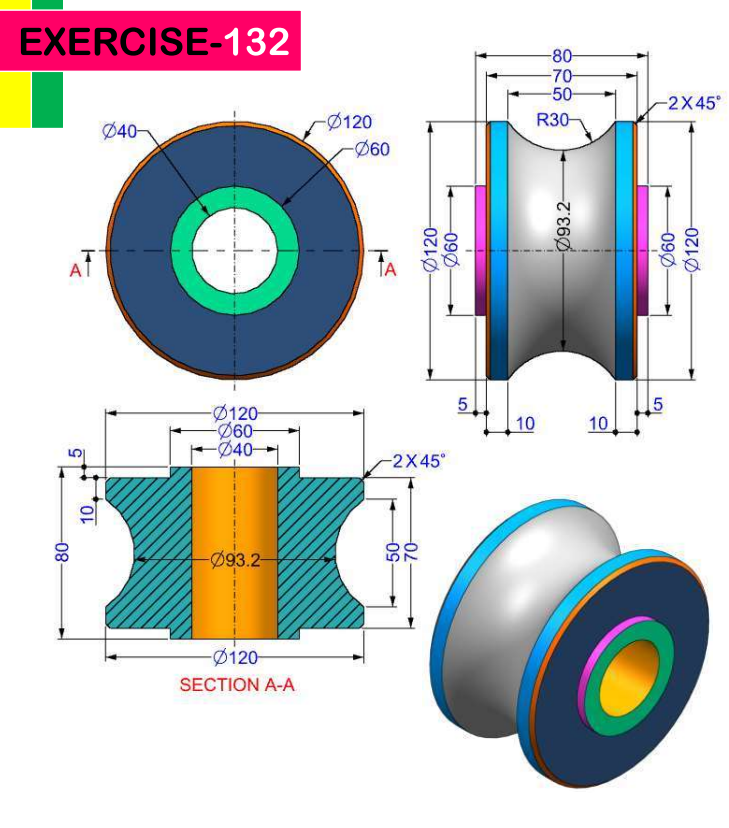
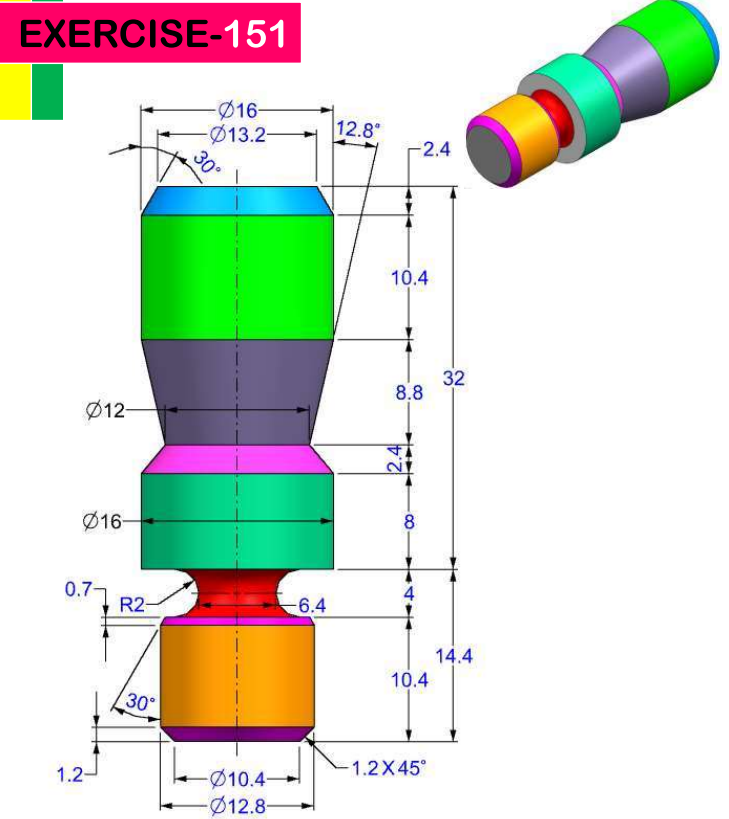
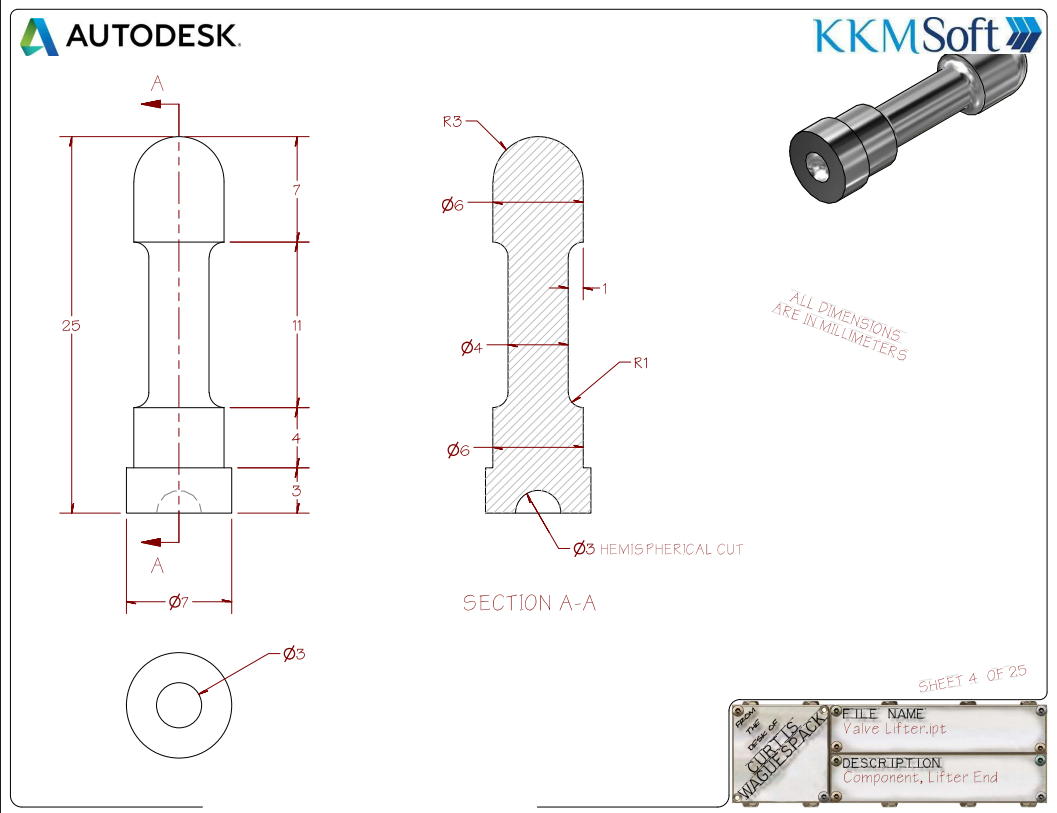
When you model a round object from a technical drawing, you usually draw only half of the section view.
For example, if the drawing gives a diameter of Ø6 mm, you do not draw 6 mm from the axis.
You draw the radius:
Ø6 mm → radius = 3 mm
The Revolve command will rotate this half-profile around the axis and create the full diameter automatically.
Practice Task
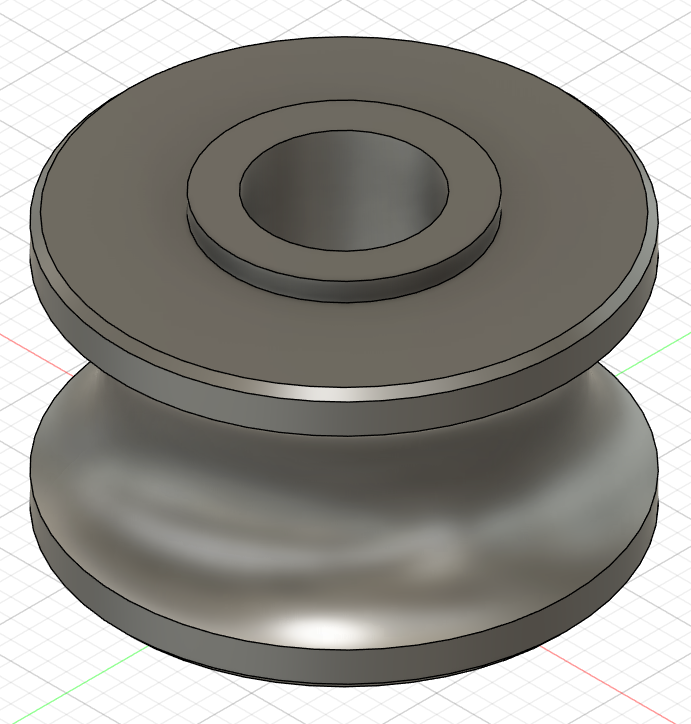
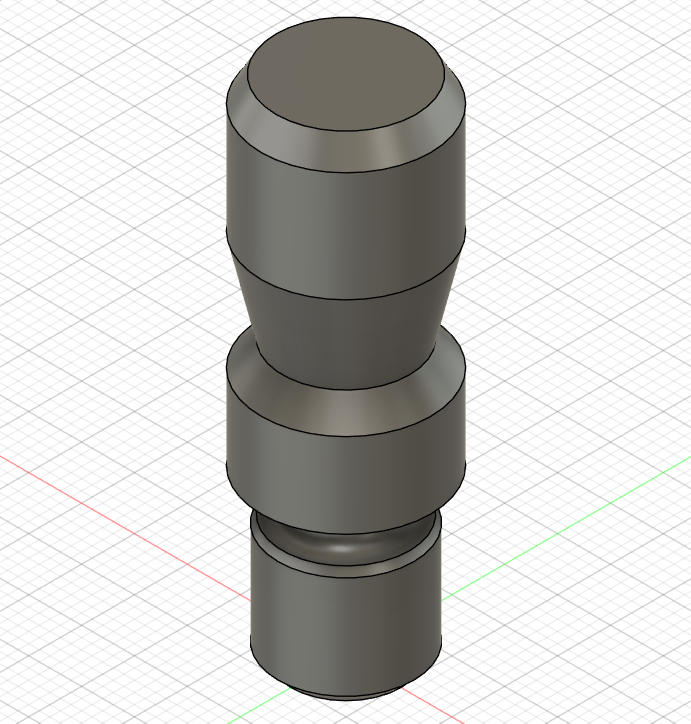
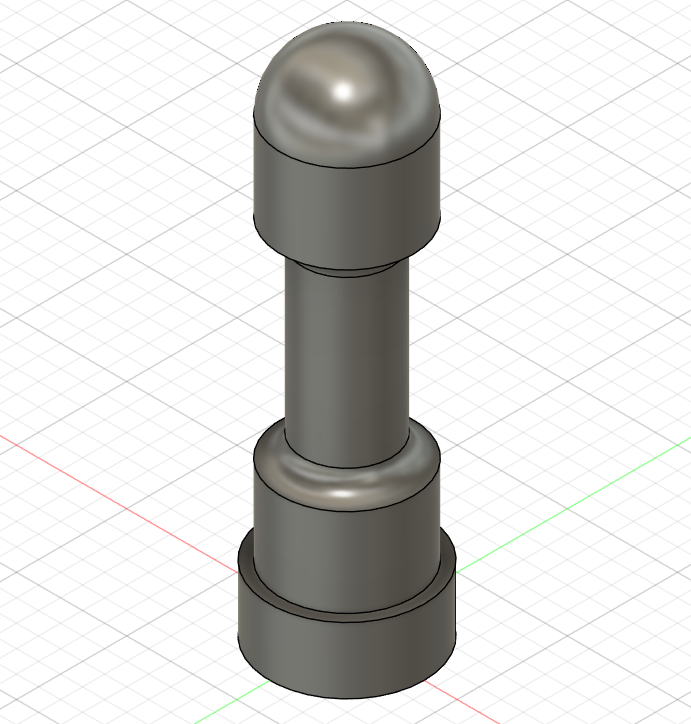
Create the same revolved parts from the drawings.
Reflection Questions
1.
When is Revolve better than Extrude?
2.
What is the difference between the profile and the axis?
3.
Why do we draw only half of the section view?
4.
When a drawing gives Ø6 mm, why do we use 3 mm in the sketch?
5.
What happens if the profile is not closed?
6.
When should you use New Body, Join or Cut in the Revolve command?
7.
How does changing the revolve angle affect the final shape?