
Overview
In this lesson, you will learn how to use the Loft feature to create a 3D solid by connecting two or more different sketch profiles. Unlike Extrude, which pushes one profile in a straight direction, Loft allows us to smoothly transform one shape into another.
Objectives
By the end of this lesson, you will be able to
1.
Understand the difference between Extrude with Taper Angle and Loft.
2.
Create multiple sketch profiles on different planes.
3.
Use Construction Planes to control the distance between profiles.
4.
Apply the Loft command to connect profiles into one 3D body.
5.
Select profiles in the correct order to avoid twisted or incorrect shapes.
6.
Use Loft to build more advanced shapes such as a circular-to-square transition or a tapered tool-like object.
What is Loft?
Loft is a 3D modeling feature that creates a body by blending between two or more closed profiles.
For example:
•
Square to circle.
•
Circle to rectangle.
•
Large profile to small profile.
•
Multiple profiles arranged along a direction.
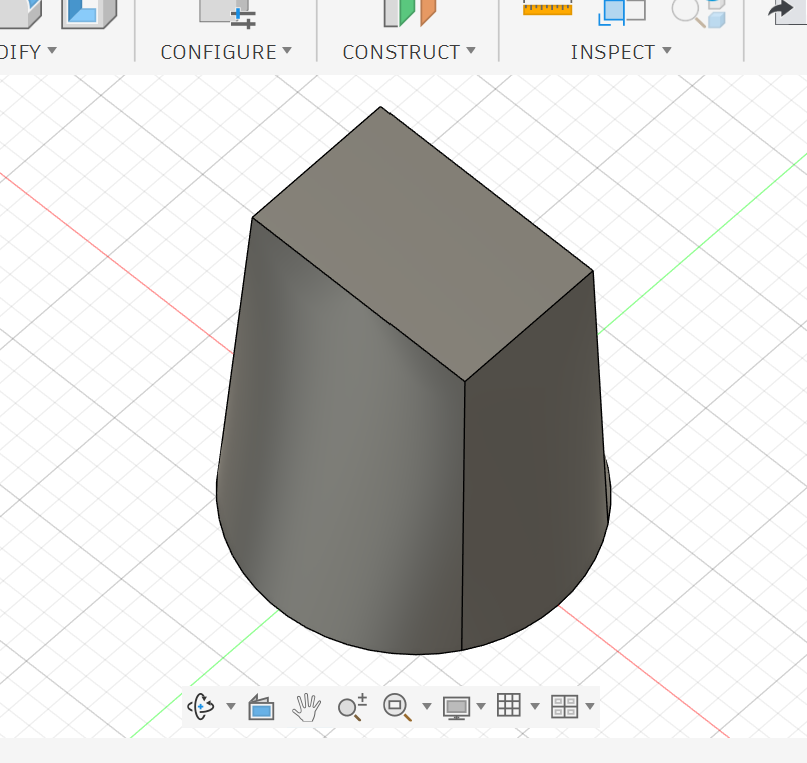
Loft is useful when the object does not have one constant shape from start to end.
Loft vs Extrude with Taper
Extrude with Taper works when we want to extrude one profile and make it wider or narrower in a straight way.
However, Extrude with Taper is limited because the start and end shapes are still based on the same profile.
Loft is more powerful because the start and end profiles can be completely different shapes.
Loft Example
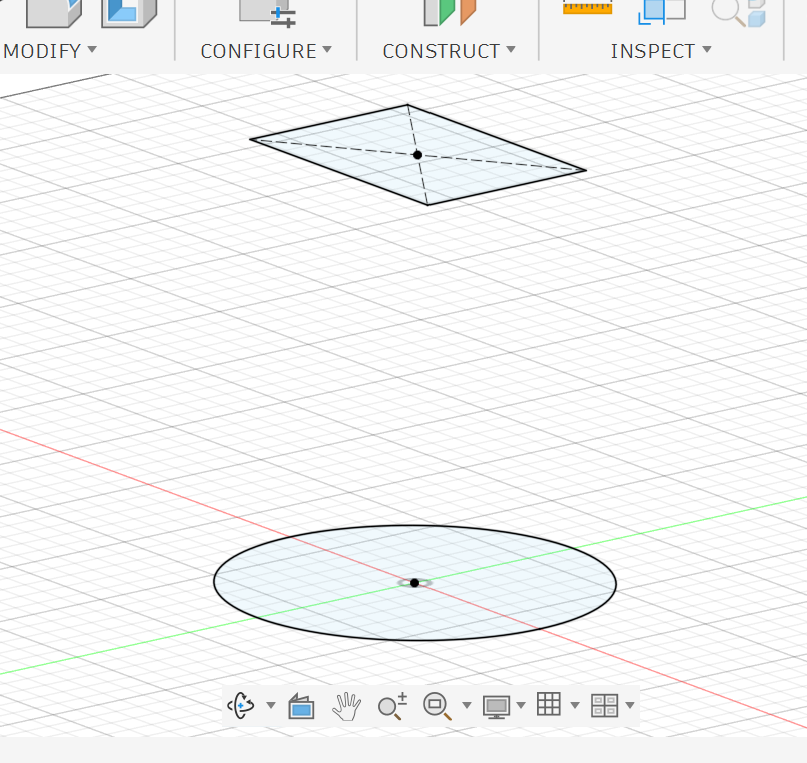
Circle to Square.
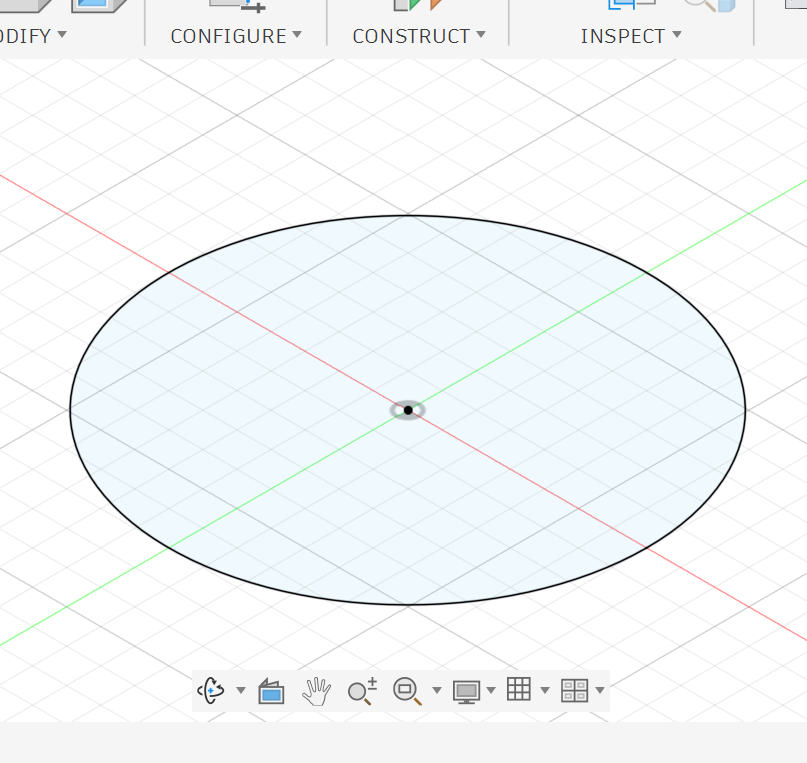
1. Create the first profile.
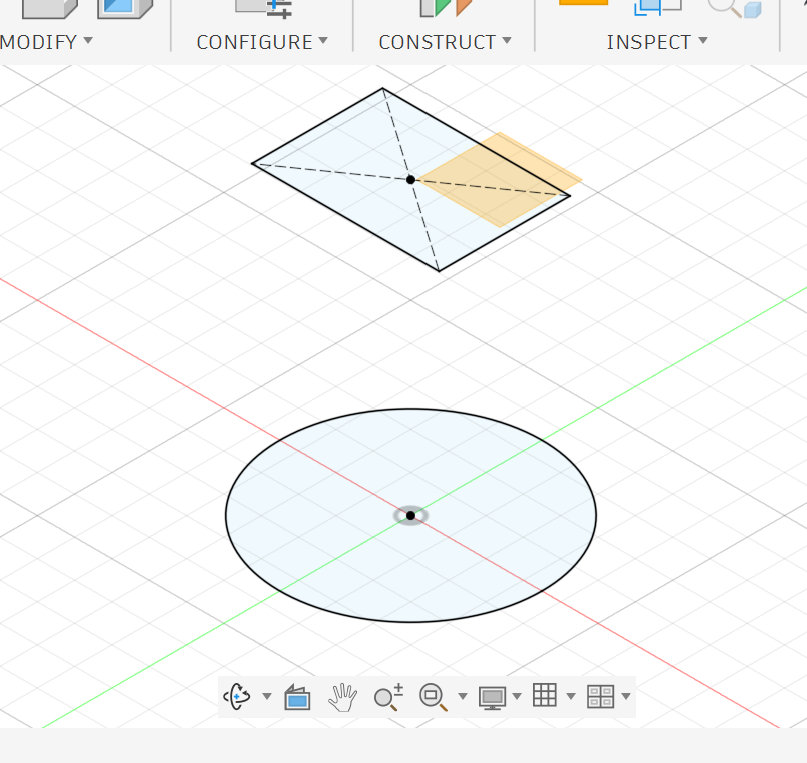
3. Create the second profile.
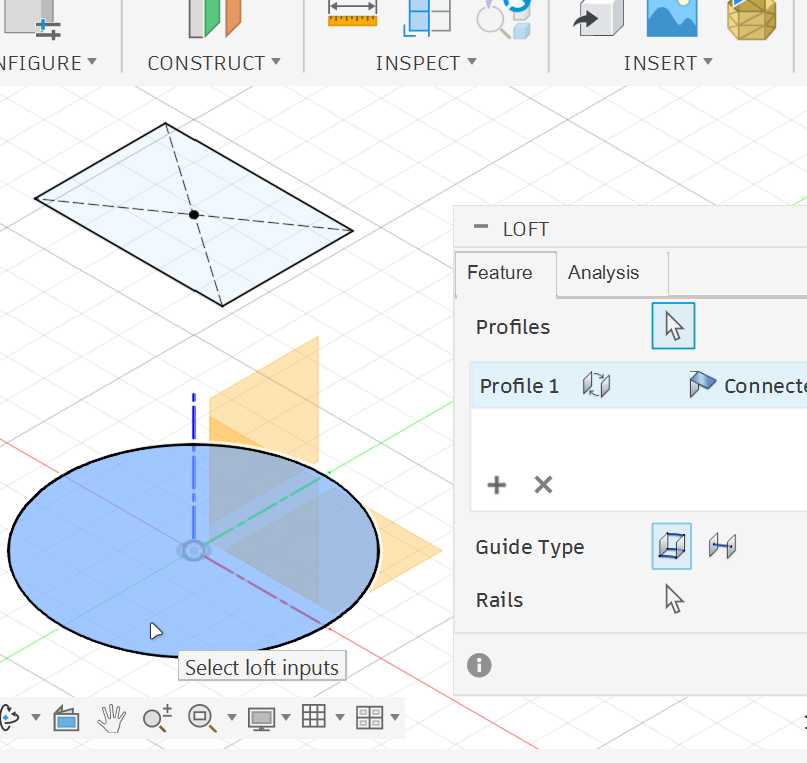
5. Select the first profile.
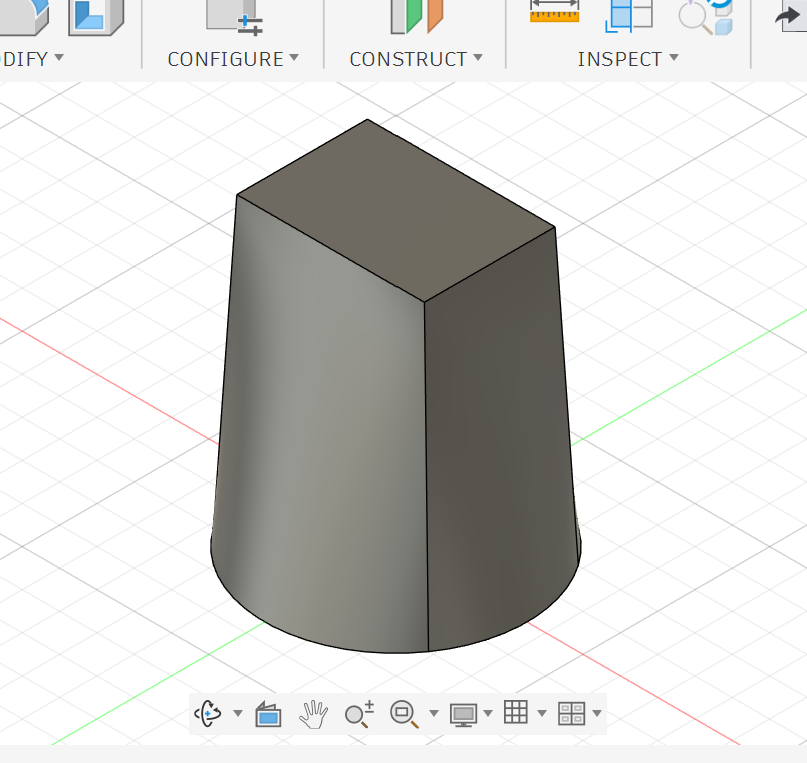
7. Check the result.
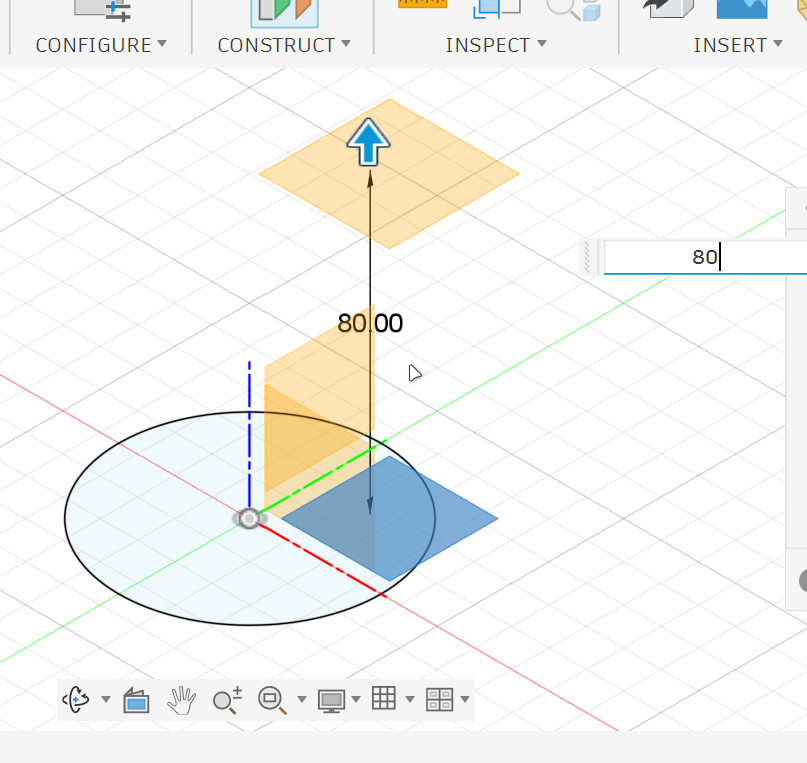
2. Create an offset plane.
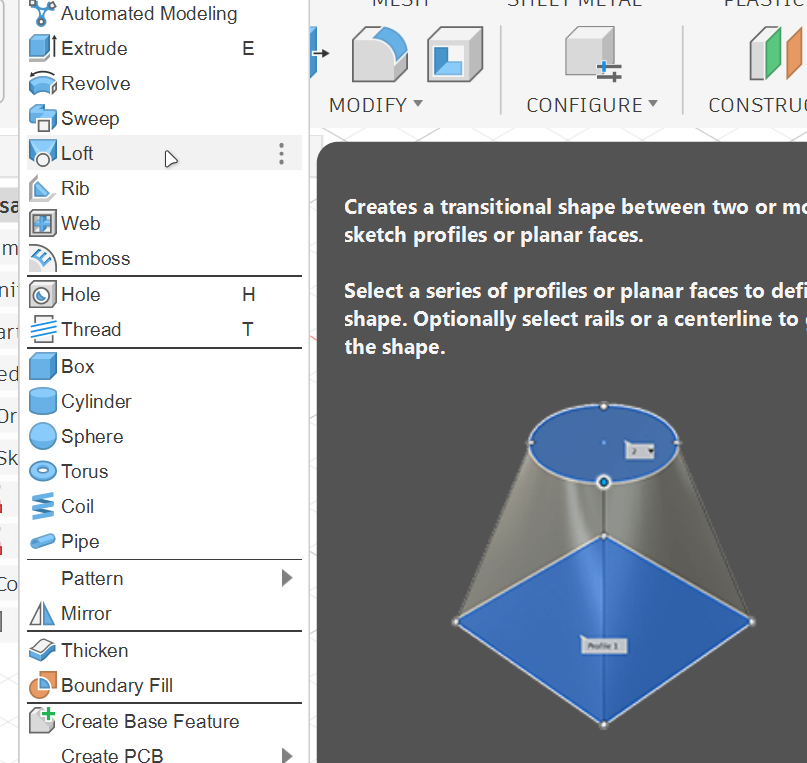
4. Use the Loft command.
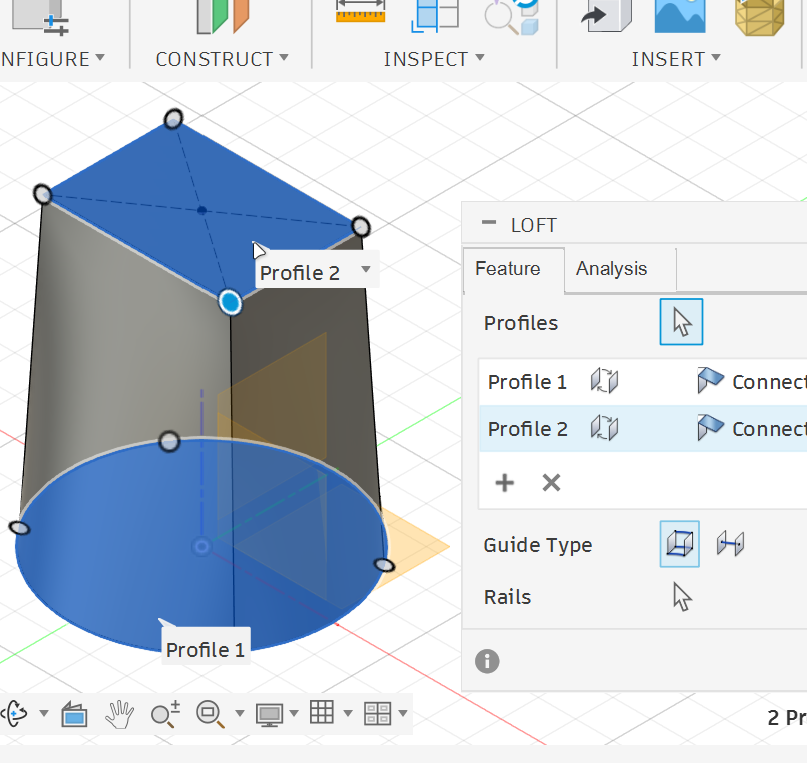
6. Select the second profile.
The result should be a solid body that changes smoothly from a square base into a circular top.
This shows the main idea of Loft: connecting different profiles together.
Optional Step: Shell the Lofted Body
After creating the lofted body, we can use the Shell feature to hollow it.
Select the top face.
Go to:
Modify → Shell
Enter the wall thickness.
Click OK.
This creates a hollow shape with a consistent wall thickness.
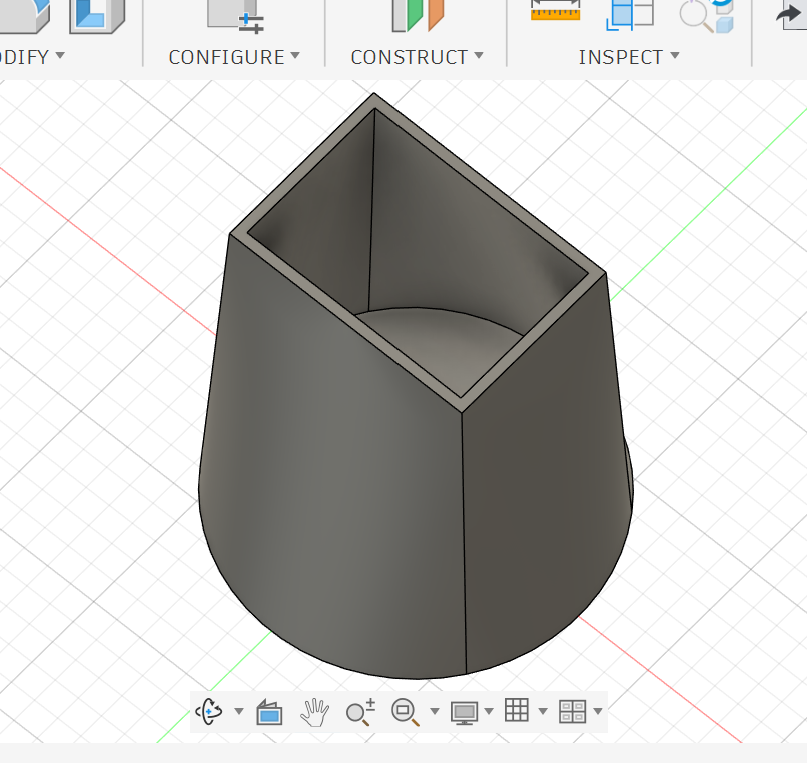
Loft Using Multiple Profiles
When using Loft with more than two profiles, the selection order is very important.
•
In this example, three profiles are placed on different construction planes and connected together to form one smooth 3D body.
•
Select the profiles in order, from bottom to top, to control how the shape blends from one section to the next.
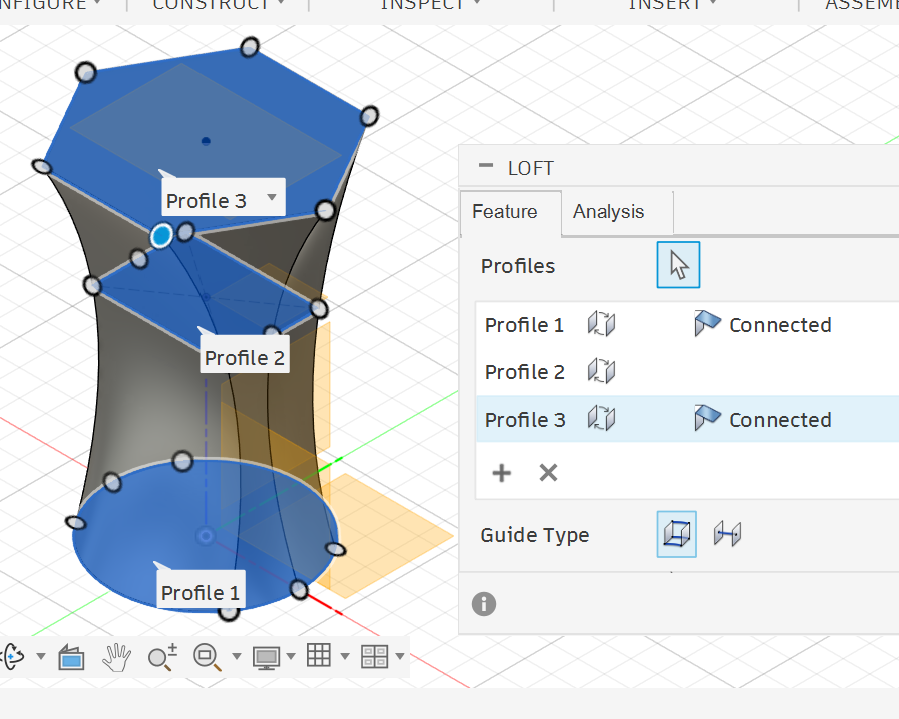
Selecting multiple sketch profiles for the Loft command.
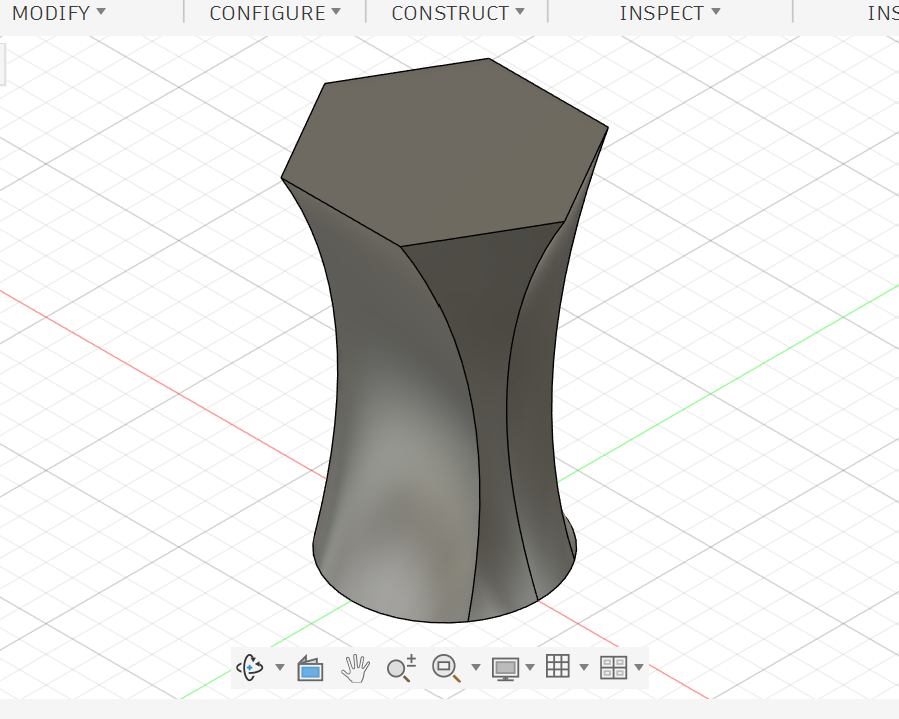
Final lofted body created by smoothly blending the selected profiles.
Important Notes
•
Loft needs at least two profiles.
•
Profiles should be closed shapes.
•
Profiles can be on different planes.
•
The selection order affects the final result.
•
Use construction planes to control profile positions.
•
Use New Body if you want to create a separate body.
•
Use Join if you want the loft to merge with an existing body.
Common Mistakes
•
Selecting profiles in the wrong order.
•
Using open sketches.
•
Forgetting construction planes.
Practice Task
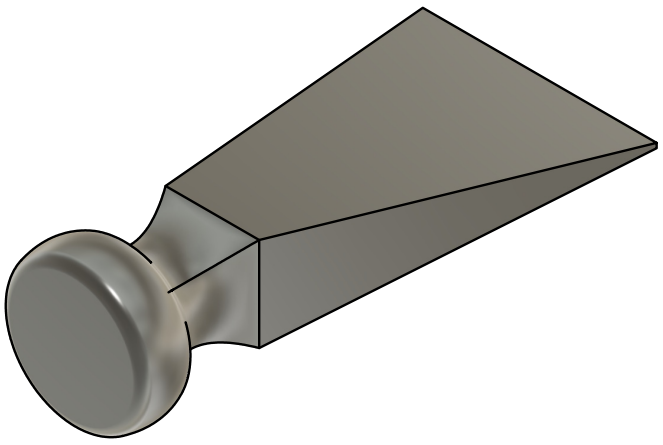
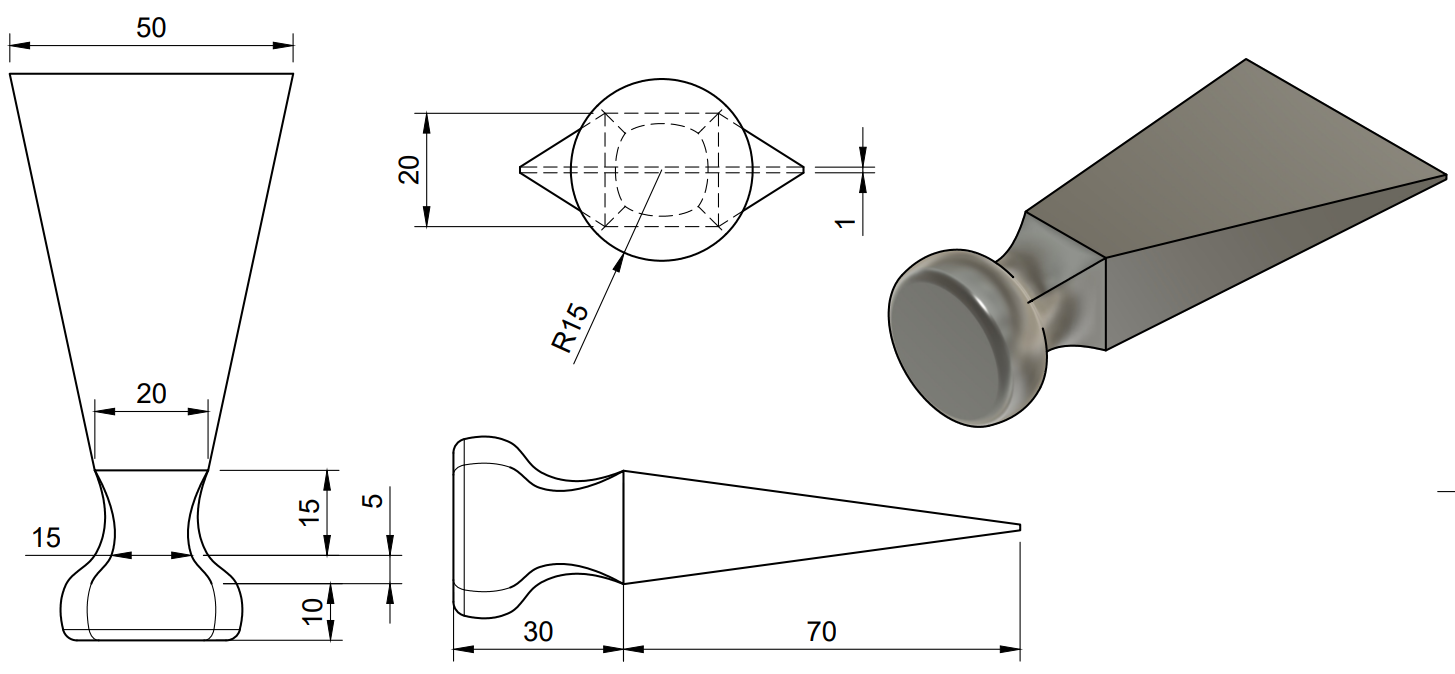
With the help of Loft, create the following design.
Start by drawing the main profiles on different construction planes, then use the Loft feature to connect them smoothly. Pay attention to the dimensions, profile order and shape transitions.
Reflection Questions
1.
Why is Loft better than Extrude for this type of shape?
2.
What happens if you select the profiles in the wrong order?
3.
Why do we need construction planes when using Loft?
4.
How can you fix a lofted shape that looks twisted?
5.
When should you use New Body instead of Join?